Project move update

I thought I’d provide a quick update on my project move down to North Carolina.

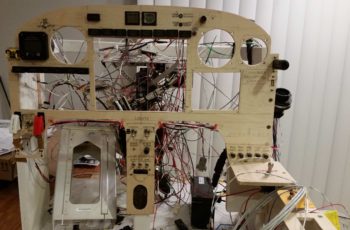
I’m not sure if I reported it, but I had previously removed and taken my GNS480 GPS down to NC on my last trip down.  This time around, after updating some new software on the HXr and Mini-X EFISs, including NAV databases and approach charts, I removed them and packed them up in their original shipping boxes.

In addition, I also removed the Trio Pro Pilot autopilot, TruTrak ADI, Vertical Compass Card and Radenna SkyRadar-DX ADS-B receiver from the panel as well and packed them up for their trip south.

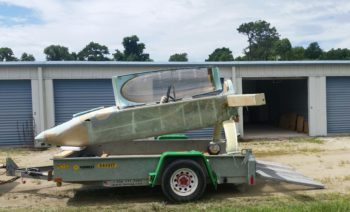
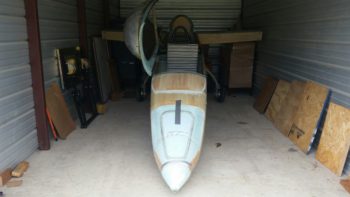
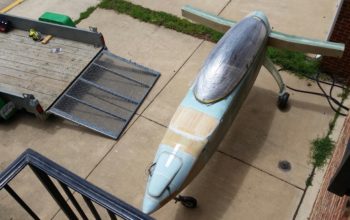
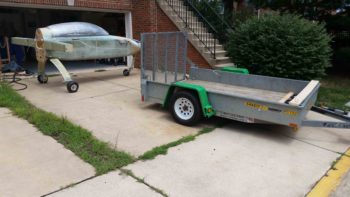
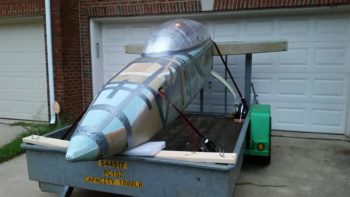
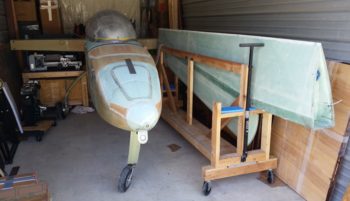
Along with a bunch of the panel components, I also packed up a good majority of parts, consumables and hardware for the build and hauled them down to NC.  As for major components (read: big), in this load I also loaded up the left wing and the wing dolly, which are shown below with the fuselage in front of my NC storage unit.

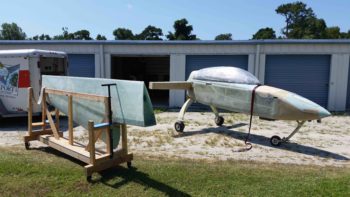
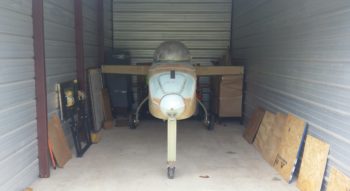
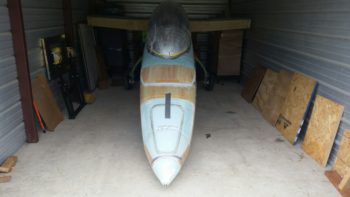
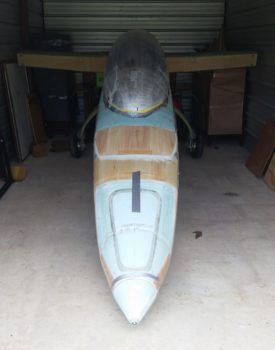
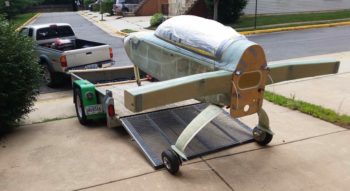
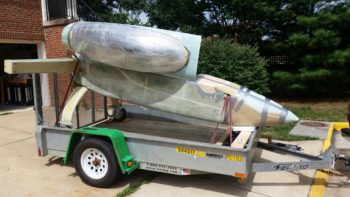
And here are a couple different angle shots of the left wing and fuselage stowed inside my NC storage unit.

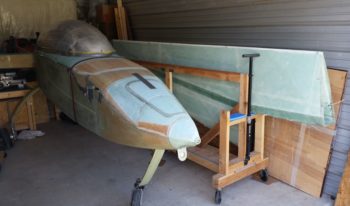
You may note that in the pic below you can clearly see my mini-lathe attached to the workbench that was formerly the fuselage dolly.  As an aside, below the lathe is the EVO Harley-Davidson motor for my custom chopper motorcycle project that I actually started before the Long-EZ (and which I’ll finish after I finish the Long-EZ!).

Again, just a quick update on the move….


Chapter 23 – Camshaft bath time!

Today I carved out about an hour from house updating tasks to bake a couple of batches of desiccant to reinvigorate the moisture absorbing power of this magical stuff.

Part of that process was pulling the cylinder dehydrator plugs to replenish them as well with the high-octane desiccant.  I then replaced the freshly pulled dehydrator plugs with spark plugs and then flipped the engine inverted to bath the camshaft and upper areas of the crankcase with oil.

After I inverted the engine I then replaced the bottom spark plugs with the freshly replenished & renewed dehydrator plugs.  As I pulled the plugs on a couple of the cylinders I used a flashlight to take a peak inside the cylinders to check out the condition in there.  The walls and a bit of a piston in both cylinders that I checked were wet with oil and shining bright as a new penny ( . . . or maybe a dime, since it’s silver colored?!).

Happy with what I saw I tried my best to grab a pic of the cylinder wall, which you get a general idea of in the shot below.

I’m really happy with this engine stand and appreciate being able to get the camshaft soaking in a bath of preservation oil.

When I inverted the engine this time around, I made sure to run the output line from the engine dehumidifier into the cold air induction plenum opening, which I then ensured was as taped closed as possible (sorry for the not-so-clear pic!).

I also installed some Lycoming exhaust manifold port covers that I picked up from ACS. They cost a bit but I’ve been so busy –with no time to roll my own– that I went ahead and pulled the trigger on them. Also, as you can see, again I loaded up the dehydrator plugs with fresh desiccant.

[NOTE: At the very bottom edge of the pic below you can see a drop of oil near the clear tubing.  I found that the fuel injection nozzle port was dripping oil so I tried my best to tighten the fittings.  I got a little bit of the main fitting and good bit of the smaller fitting, and slowed the drip down considerably…. but I will need to sinch up the fittings a tad more to ensure the leaking is stopped.]

In addition, I threw away the tired desiccant packs that I had stuffed inside the exhaust manifold ports a while back and should be getting a batch of good-sized fresh desiccant packs within the next day or so to replace the ones I threw out.

I have been meaning to invert the engine for weeks now but of course had to deal with swapping plugs, refreshing the dehydrator plugs, baking desiccant, etc.  I’m really glad that I was finally able to get this done and all still looks spiffy-keen with the engine!


Chapter 19 – Baggage pod hardware

I started out today by trimming all the overhanging glass with the Fein saw.

I then drilled pilot holes and clecoed the tail cones to the front pod sections.  After that, I then drilled out the wider diameter holes for CAMLOC/Skybolt 1/4-turn fasteners.

Here’s a shot of both the trimmed glass on the pylon TEs of both pods, and the top 2 CAMLOCs mounted in place.

A wide view of the assembled and glassed (lower assembly) baggage pods.

A shot showing the “business area” of the glassed pylon TEs and the attached tail cones via CAMLOCs.

An example of CAMLOC attach holes on the tail cones.

And the Skybolt lightweight stainless steel receptacles.  I have to say, these are quickly becoming my favorite 1/4-turn fastener receptacle.  Light yet strong!

One slight issue that I had is that since I added extra plies of glass to the lower flange on one of the baggage pods, I will have to order a longer CAMLOC stud to use in lieu of the -7 stud I currently have on-hand for both bottom CL attach points.  No big issue of course and I’ll simply add it to my next ACS order.

The first shot below focuses on the exterior side of the Skybolt receptacle (right side, in the hole) and the next shot focuses more on the interior receptacles.  As a point of note, to set the interior side of the rivets on the upper receptacles I had to use a small piece of 2024 aluminum as an impromptu bucking bar.

I do still have the cradles to build for these things, but for now I’m happy that the main portion of the baggage pods are assembled with reinforcement glass in place.


Chapter 19 – Pod TE Round 2

Today I pulled the peel ply from pod #1’s pylon TE layup, but I really didn’t get a chance to clean it up or trim the glass. As you can see in the pic below, I didn’t get around either to trimming the glass on the lower perimeter layup on the tail cone mounting flange on pod #2.

I did however get the pylon TE layup glassed on pod #2.  After laying up the 3 plies on each side I then peel plied the layup.  I will say that what makes this layup a little tricky is the flox wedge that lies between the 2 sides of glass coming together as the transition for the rather thick pylon TE.  Of course the goal is to get an even amount of flox all the way along the edge to get a nice uniform glass-to-glass shear bond.

With the bit of epoxy I had left over from the pylon TE layup on pod #2, I glassed in 5 plies of BID on the top flange of pod #1 to fill in the CL depression and even out the tail cone mounting flange profile.

That’s it for today’s build escapades.  I will say that for the pods themselves the heavy lifting is over for the more entailed layups.  Tomorrow my goal will be to get the tail cones mounted to the pods with 1/4-turn fasteners (CAMLOCs).


Chapter 19 – More pod stuff

I started out again by pulling the peel ply and cleaning up the major seam layup on baggage #2 earlier in the day.

Then later on I did the small glass layup on the aft bottom interface ring for the aft cone to attach to on baggage pod #2.  Optimally this would be an extension of the major seam layup, but with the joggle right there I didn’t want to mess around with a good chance of distorting either portions of the layup, so I just separated these layups into 2 distinct parts.

Although my way is not as optimal in strength as carrying the glass all the way through, I have no doubts it will be plenty strong for my baggage pod ops.  In fact, since the matching layup on pod #1 wasn’t quite thick enough, I laid up 5 small plies of BID here on pod #2.

I then laid up 3 plies of BID –as per Gary Hunter’s instructions– on each side of the pylon’s trailing edge of baggage pod #1.  Right at the trailing edge, filling in a small gap between the 2 layups, is a bead of flox.  I then peel plied the layup and left it to cure.

Tomorrow I plan to do the pylon trailing edge layup on pod #2.  In addition, after all the major baggage pod glassing is completed I’ll then attach the aft cones to the main pod structures with CAMLOCs/Skybolt 1/4-turn fasteners.


Chapter 19/23 – Baggage pod break

I took a short break this morning to pull the peel ply and clean up the edges of the major CL seam layup on baggage pod #1.

Later this evening I laid up a 4 ply pad of BID on the aft bottom end of baggage pod #1 that will serve to reinforce the lip for attaching the baggage pod aft cone.

I then laid up 3 plies of BID around the main CL seam on baggage pod #2 just as I did on the first baggage pod last night.  I then peel plied the layup.

While I was looking at some pics tonight I found a shot of the cowlings from around 2012 that had a document included that I haven’t seen in quite a while.  While looking for the document I finally completely unwrapped the Berkut-style armpit intakes for the lower cowling.  As you can see, I decided to grab a couple of shots of these to include in this blog post…

Again, with my house updating shenanigans I only have a couple of hours a day that I’m allowing myself to work on the plane build.  However, I figure every hour counts and gets me much closer to the finish line!


Chapter 19 – 2 hour Break

Since the baggage pods attach to the wings, I think I’ll annotate their build in Chapter 19.

Since I’m back in full on house update mode, I am only allowing myself about 2 hours a day to work on any airplane build related stuff.  Starting in on my first 2 hour mini-build session I decided to get some of the prep work knocked out on the baggage pods.

The first task was to sand the depression all away around the seam down the front of the pylon and the body of each baggage pod.  Below you can see the baggage pod on the left has been sanded while the one on the right has not.

And here’s the bottom side seam sanded as well.  The depression that Gary Hunter created about the seam is deep enough to handle 3 plies of BID.

Here we have both baggage pods’ forward sections sanded about the seams.

I then laid up 3 plies of 2″ wide BID tapes around the seams & inside the depression on one of the baggage pods.

Tomorrow I’ll lay up the 3-ply BID reinforcement layup on the other baggage pod. There’s also a layup that needs to completed on the TE of the pylon, which I will get to over the next couple of days.


Chapter 13/18 – Canopy Wrap-up

To wrap up the nose build (so far), canopy build, and fuselage move down to North Carolina, I threw together a video to cover these topics.

I’m hoping this video will help shed some light on some of my build tasks that may not have been as apparent in my description using just pictures and words in my previous blog posts.

So, with that, I’ll simply say “Enjoy!”


Fuselage in NC!

This morning I finally got around to getting over to the storage unit to put the bird in its new cage for awhile: a 10’x20′ storage unit.

One last trailer shot before I unloaded the fuselage.  I have to say I’m loving the canopy. The fit and geometry is still spot on and it’s simply a treat to open & close the canopy…. and moreover to have a canopy mounted to open & close!!

Since the front rollup doorframe of the storage unit is a few inches narrower than the CS spar width I had to do some angling machinations to get the fuselage into the unit, but it still went in without too much effort.

Having not seen my nose or canopy with the bird in the grazing position, I wanted to get a wide angle grazing shot.

And a closer grazing shot….

And finally a grazing shot with the canopy open.

I have to say it’s a relief to have the fuselage safely down in NC without any incident. Sadly, from here on out over the next month or so my build postings will be fewer and farther apart until I’m relocated down here in NC.


Fuselage on Trailer!

Today was about loading up the fuselage on the trailer to haul it down to NC.

I started out by using the Fein saw to cut a notch on each side of the aft nose cover about midpoint where the openings for the canard will be located.  I then spent a few minutes digging out the foam to create a channel from one side to the other.  This channel will be used for transiting tie-downs through the nose.

I then spent a bit of time reconnecting the wiring (with the requisite bit of troubleshooting) for the nose gear system.

I then got to work rolling the fuselage out of the shop and positioning it into place for loading it onto the trailer.

I then wheeled the fuselage into position just on the edge of the trailer ramp, with all 3 wheels positioned so that the fuselage was on the trailer CL.

I then rolled the fuselage up into the trailer and secured it into place.

A few hours and one rainstorm later, I had the fuselage and canopy ready to roll!

With duct tape in all the right positions, I was ready to head off on my trek down to NC.

I’ll be down in NC over the weekend delivering the fuselage to its new home.  When I return my primary focus will be on the house to get it prepped to sell!