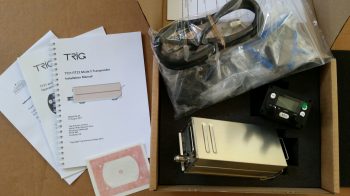
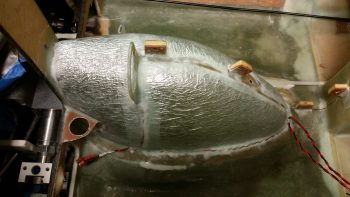
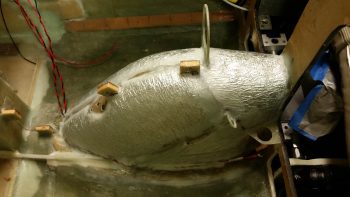
I started out today prepping for glassing up the last third of nose wheel cover on the aft side when my package arrived from Aircraft Spruce. This was one of those special deliveries since it included the last of the major panel components that I’ll need to actually operate the aircraft through my 40-hour fly-off: the Trig TT22 Mode-S Transponder. Now, I will be picking up a remote-mounted HXr-controlled backup radio as my COM2 and also a ACK E-04 ELT well before first flight, but clearly my to-buy list for avionics/instruments is down to just a couple items.
Opening the transponder box I could tell immediately that it was a high quality item with nice ring-bound manuals and a high-end accessory kit. It amazes that besides TSO’d equipment, as homebuilders we often get high-end, high cost components that are packaged and equipped as if we had bought them second-hand off of Ebay!
I grabbed the Trig TT22’s awaiting 2-digit electronics code label and affixed it to the top of the box, then placed the unit in it’s allotted location at the right side of the Triparagon’s top shelf, immediately adjacent to the HXr’s GADAHRS unit. As a point of note, since I purchased this unit from ACS vs GRT it came with the panel mounted control head which I will NOT be using. Moreover, I’ll need to incorporate a serial adapter from GRT that allows the HXr to control the transponder remotely and thus negates the need (and actually it can’t work with both) for the panel mounted control head.
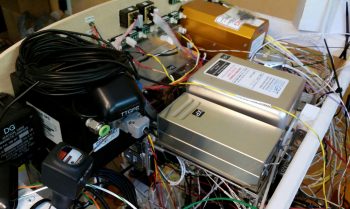
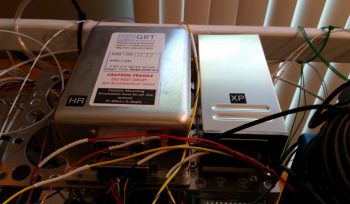
Here’s a shot of the two cohorts in crime atop the Triparagon’s cross shelf. Note that neither one is actually mounted to the cross shelf yet.
After checking out the transponder and inventorying the rest of my ACS order, I then got back to the task at hand: finishing up insulating the nose wheel cover (NB).
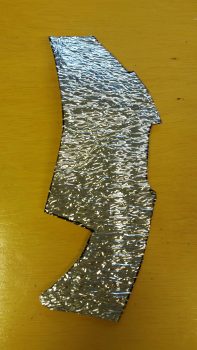
I started by dialing in the shape and cutting out the top aft “saddle piece” — that just happens to be a bit “New Jersey” shaped in my book– that will make up the first of the last 2 pieces of insulation that needs to go onto NB to finish up the actual insulation part.
I then RTV’d the top “saddle” piece of insulation into place on the aft side of NB.
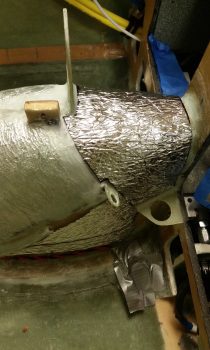
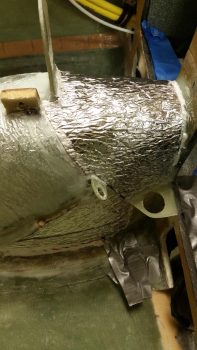
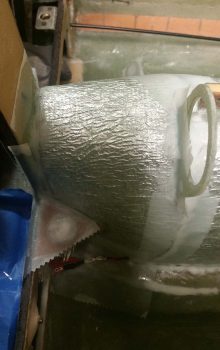
On the left side of the top “saddle” insulation piece it mates up with the front 2/3rds insulation and ends just above the cigarette lighter mounting bracket. I then added 2 more pieces of insulation below that to fill in the triangular area on the left lower aft side of NB.
Since clearance is tight in the areas of both chargers, I left the very lower aft corners of NB bare.
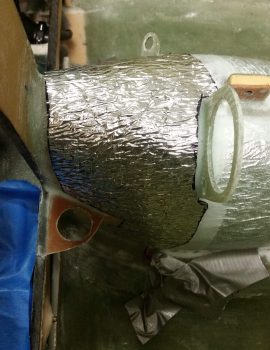
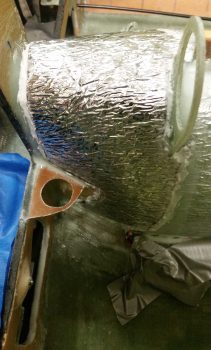
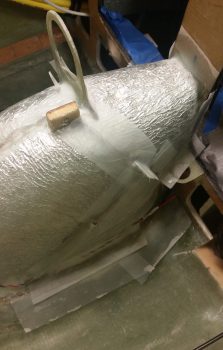
On the right the top “saddle” piece of insulation covers the last aft 1/3 of NB down to the fuselage floor. It of course also mates up with the front 2/3rds NB insulation.
I then micro’d the edges of the new NB insulation pieces on right side . . .
and the left side.
I then glassed up the last of the uncovered insulation on NB using 2 separate pieces of BID to create a 1-ply covering that overlaps right around the mounting tab for the parking brake on the left side (close to where the intersection of the “saddle” piece of insulation meets the bottom aft piece).
I then peel plied all the intersections, overlaps and edges of the layup.
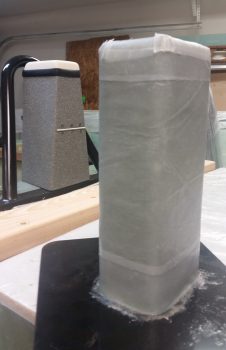
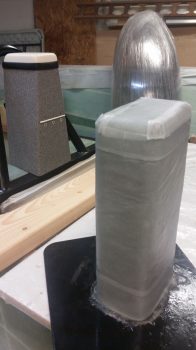
While the final NB insulation glass cured, I then spent a couple hours glassing the “Oil Tower” that I created by using a Phillips 66 aviation oil bottle wrapped in cardboard and taped up to create what will be a tall narrow oil box with a clamshell-type lid held securely in place with a hinge on the forward side and a Dsuz latch on the aft side. Again, this puts the weight of a full quart bottle of spare oil (~1.7 lbs) as far forward as possible, and provides me a consistent out-of-the-way place to store my oil (read: no headrest or CS spar oil storage!).
Believe it or not, I actually used slow hardener on this layup since I knew it would be curing overnight and I had no need to use any of my precious fast hardener on this guy.
Although you can’t see it, the bottom of the Oil Tower is actually a piece of 3/8″ thick PVC foam, glassed on the top (interior) side that I reclaimed from the piece that I cut out of the left vertical armrest notch for the lower seatbelt bracket access.
I micro’d the edges of the foam base piece –which matches the outline of the sidewalls– and then extended the sidewall glass to overlap onto the foam base piece. Once I open it up I’ll glass a ply or 2 internally to overlap from the sidewall onto the foam base (interior floor) for added strength.
Lastly, I left the bottom of the foam base bare so that I could more easily cut out and embed mounting hard points into the base before covering the very bottom with glass.
I then peel plied and left the “Oil Tower” to cure.
After taking a short break, when I returned to the shop my final NB insulation layup was pretty much completely cured. I pulled all the peel ply and then did a rough clean up of the layup by clearing/cutting out all the holes I had covered up with the layup. In fact, 2 mounting tabs: the right side USB charger mount and the parking brake handle mount both got an extra ply of glass added to them for strength (and ease of laying up the insulation covering BID).
Here’s the final shot of my NOW insulated Nose Wheel Cover (NB)… which I of course quickly marked that off my to-do task list!
I will repeat and alas, reiterate, that completing these prerequisite tasks personally does not get me jazzed like seeing the big “real” pieces of the airframe go together, but in my attempt to stay disciplined by front loading these tasks and doing them while I still have true access to these areas that would be so much more difficult to reach in the future, I truly believe I’m optimizing my build sequence as best possible…. although it may not seem fun or sexy right now! (for any of us!)
Tomorrow I’ll continue with my “3 DAY BLITZ” to get more of this hard to reach install and configuration stuff out of the way before starting in on the actual nose and canopy build.

