
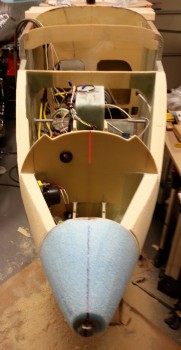
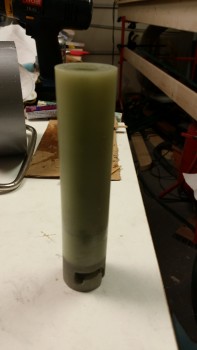
I started off today by shooting my laser down the CL to ensure that the large bolt that I’m using as a clamp to hold my nose tip cone on is aligned in the center, since the hole I drilled in the big block of blue foam that is now my nose cone, was about a 1/4″ wider in diameter than the bolt. I had to move the bolt over to the bird’s right (pic left) about 0.15″ to get it centered. With that done, I could then sand the blue foam nose cone down to the big outer washer I used along with the gigantic bolt.
I then gave myself exactly 1.5 hours to sand the nose to shape, for round 2. Here’s what I came up with on the left side.
And here’s the right side.
And here’s what was removed in sanding & shaping: Round 2.
I then ran the requisite “tape measure-over-nose” to get an idea of how my nose was looking profile wise. I think since I capped my nose cone at a hair over 6″ long, then my nose drops off more quickly than a gradual curve would show if I had added another 2″ to it like my buddy Marco. But if I did that, I would hear his incessant claim that I was copying his design, so I had to sacrifice style for pride . . . haha! (I’m kidding!)
You can see what I’m talking about by the approximate inch gap between the tape and the very tip of the nose.
I think the sharp drop-off curve at the very top of the nose tip is a little reminiscent of the original plans-style EZ nose. Either way, besides adding more to the front of the nose, there’s nothing I can do about it, so it will get worked into the schema.
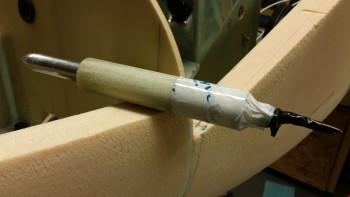
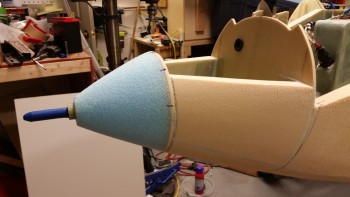
I then mocked up the pitot tube for install. In its initial resting state in the nose cone channel (where my clamping bolt transited) it sat pointed about 0.1″ off to the left & about 0.1″ high. I lightly sanded the inside of the nose cone channel a few trial & error times before finally dialing in the correct windage & elevation.
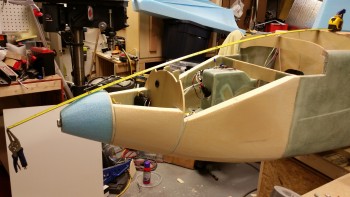
Below you can see my laser sighting of the pitot tube to match it with the aircraft’s CL.
When my incredibly talented buddy Marco machined this magnificent pitot tube, the G10 protective heat sleeve ended up in 2 parts. To flox this thing in the nose, I didn’t want any flox leaking in-between the two pieces and locking my pitot tube into an eternal position, so I prepped the two G10 tubes to be joined via 5-min epoxy.
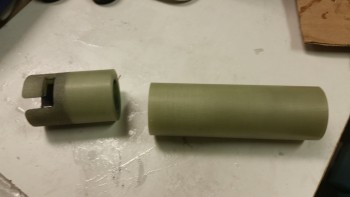
Here’s my now one solid G10 tube for the pitot tube.
Well, the G10 pieces were a very scant fraction of a millimeter off, but when I ran the pitot tube down to test alignment, it literally snapped the single G10 tube back into 2 separate pieces.
Oh well, on to plan B. I still couldn’t allow for epoxy or flox to get into that G10 seam, so I taped just forward of it and planned on the first round of flox to secure the first 4-5″ of the G10, then I would deal with the rest after I popped the nose cone off, whittled out the foam and laid up a ply or two of glass.
As final prep before I floxed this sucker in place, I taped up the pitot tube with blue painter’s tape. I wouldn’t want to have a beautiful pitot tube set perfectly in place with globs of epoxy from my ham-fisted install all over it!
I whipped up a bunch of wet flox first and slathered that in the hole, then I followed that up with a flox paste and installed the pitot tube assembly.
I then laser sighted it again to ensure it was still tracking straight on the CL.
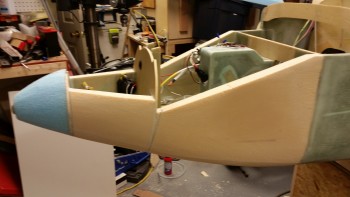
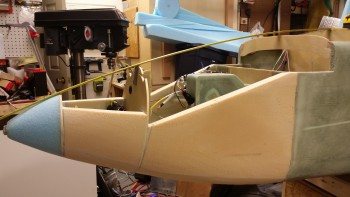
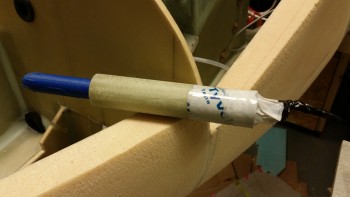
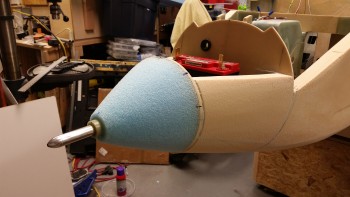
Here’s a profile view of the installed pitot tube. If the pitot tube looks as if it’s pointing down, it’s an optical illusion. I swear I saw this pic and thought my pitot tube would cure in a pound of solid flox in the wrong position! So I double, triple and quadruple checked windage & elevation, and the elevation on this pitot tube perfectly matches the longerons. And due to this pic below, I seriously checked it about every 10-15 during the curing of the flox!
Also, as I was figuring out the spacing requirements for installing the pitot tube, I determined that for clearance of the pitot tube fitting that sits just inside the battery compartment, on the aft side of the F-7.75 bulkhead, that I couldn’t mount the aft end of the G10 sleeve any farther than 1.05″ from the front face of the F-7.75 bulkhead. When I mocked up the pitot tube install, I found that a 0.5″ protrusion of the G10 sleeve on the front tip of the nose cone equated to a 1″ gap between the aft end of the G10 tube and the front face of the F-7.75 bulkhead. Requirement met!
Here’s a shot of the installed pitot tube a couple of hours later after the fast hardener used in the epoxy/flox was getting to a solid green stage.
I again reshot the laser to sight the pitot tube’s alignment with the CL. Bravo Zulu!
I spent at least 20 minutes, if not 30, using the L-shaped side of a scribe to dig flox out from around the aft end of the pitot tube fitting and wires that I had previously taped up. The first inch inside this hole, between the front face of the F-7.75 bulkhead and the G10 sleeve is where the fitting and wires attach to the aft side of the pitot tube. I definitely didn’t need any flox in this area, but there sure was a heck of a lot of it, 90% of which I couldn’t actually see!
Almost 3 hours later, when the flox was barely gummy and close to a full cure, I removed the pitot tube by rotating it CCW looking from the front of the nose and then pushing it all the way through the G10 & into the battery compartment. I then cleaned up the pitot tube and set it aside until later.

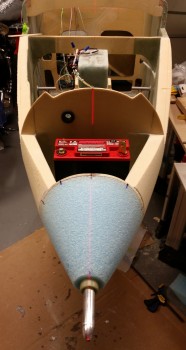
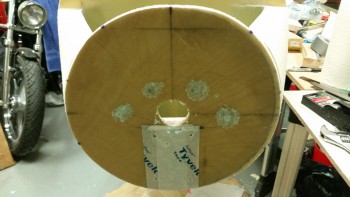
Then, as per my original plans, I applied firm pressure with both hands and wiggled the nose cone slightly until it popped right off the F-7.75 bulkhead. The 4 blobs of 5-min glue had done their job perfectly!
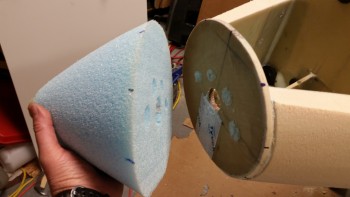
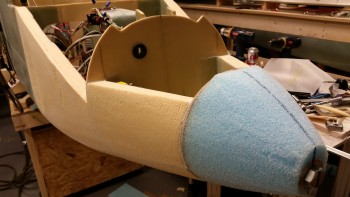
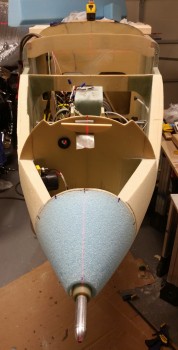
Here’s a shot of F-7.75 bulkhead after I removed the nose cone.
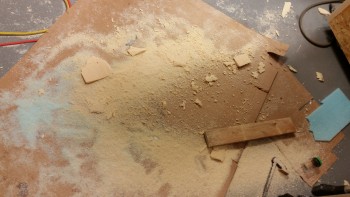
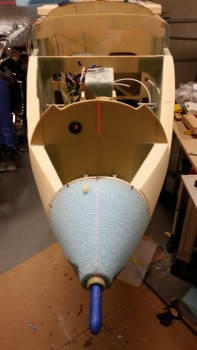
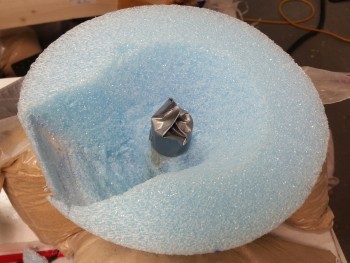
I then set to work to remove the foam in the center area around the pitot tube aft end, including of course the G10. And then also clear out a channel for the nose mounted landing light.
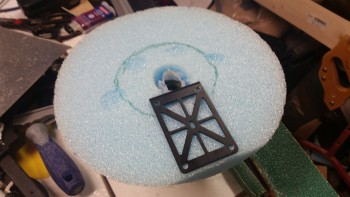
Here’s the beginning of the “Big Dig”!
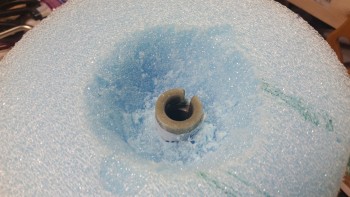
And later on, after I completed the digging out of the pitot tube G10 sleeve (including that tape I had added to protect the seam between the 2 G10 pieces) I cleared out the foam for the landing light.
In addition, I ran a straight edge across the foam & checked the distance from the foam face (front of F-7.75) and the aft edge of the embedded G10 sleeve. I got 0.97″ using the digital calipers. Since I didn’t want more than an inch, all is great with this spacing.
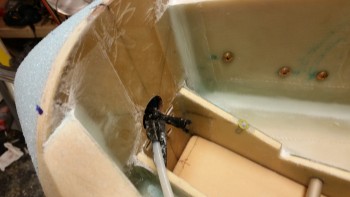
Since I have a decent sized dished out area for the landing light, I wanted to add some more strength internally to the nose cone, besides just relying on the external skin for all the strength. In addition, I wanted there to be some actual glass securing the pitot tube in place, so I felt an internal layup here would be most appropriate (said in Conehead voice).
I then glassed in the side walls and upper wall of the landing light area, and the inverted cone area around the pitot tube G10. Around the base of the G10 and on the upper wall of the landing light (down the front side of the G10 tube as in the pic below) I used a fair amount of flox. I also used 2 plies of BID on the upper wall/G10 side, whereas I only used 1 ply of BID for the other areas.

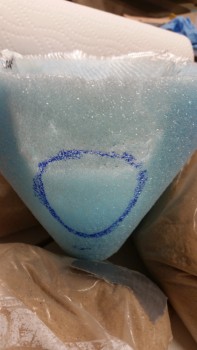
Before I glassed the internal foam on the nose cone (above), I hooked the landing light up to the battery and fired it up. I then set the nose cone in place, and with the translucent foam –especially how thin it is in the landing light channel area– I could see exactly the size & shape of where the lens cover would need to be mounted. I marked that up with a blue Sharpie and then pressed on to glassing the interior of the nose cone.
Tomorrow is New Years Eve. I’ll be working on the project until probably mid-evening, then taking off for the festivities. I had really wanted to get the external side of the nose glassed before New Years, but with the challenges of the landing & taxi light installs (yes, there will be a separate taxi light! . . . more to follow) I think it will be more like the 2nd or 3rd of January before I get to that point. I would rather have everything correct & optimized than to meet an arbitrary timeline.
Tomorrow I plan on finalizing the landing light install. I’ll then also be installing and glassing the center H100 foam piece into the battery compartment between the BC1s. If that all goes well, then I’ll also reattach the nose cone.