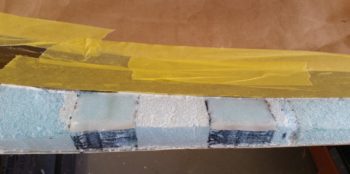
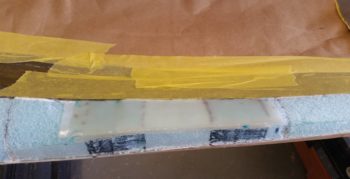
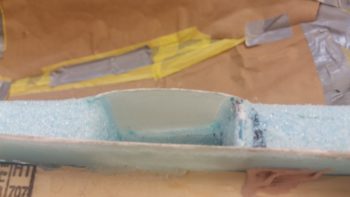
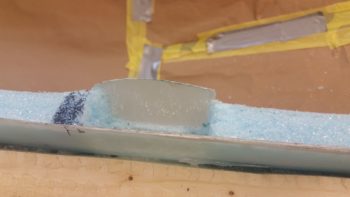
I should note starting off that it took me a bit of research and thought yesterday to figure out that I needed what was essentially an interior “wall” to retain the wet flox & BID that goes into all the component hard points on the canopy frame. Thus the reason for a layup of 2-3 plies of BID –above and beyond the normal layup schedule– at each hardpoint location.
I started off today with another long round of more refined clean up of the canopy frame. I Dremelled off a lot of dead micro, and also Dremelled a small trench around the front edge of the canopy about a foot in each direction from CL. Like the top side per plans, I’ll also lay up the first ply with the glass going into this trench and fill it with flox.
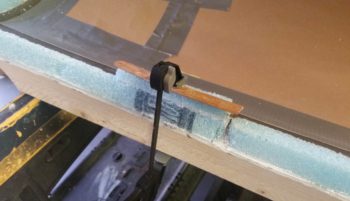
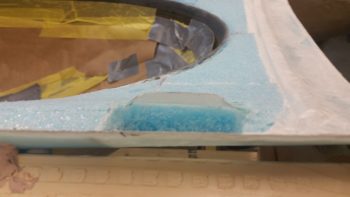
I then got to prepping the right front hinge location for a retainer layup, as I mention above. The plans denote a 1.5″ thick (over normal width longerons… more on that below) canopy frame where it contacts the longerons, but since my canopy rail matches the thickness of the longeron (~0.8″) on the front half, I needed to ensure I maintain (or make) my hard points at the 1.5″ width. As it goes, at the front end of my canopy frame it’s not difficult to obtain or keep the 1.5″ width for the hard points.
But I digress, back on the front hinge hard points, I used micro on the areas that would not get dug out and then placed raw epoxy and then a patch of peel ply over each actual hard point spot.
I then laid up my prepregged 2 plies of BID over the hard points, and then peel plied that since the final interior canopy frame layup will cover this glass.
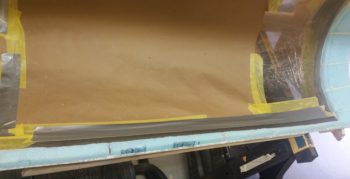
I then taped off the back right half of the canopy along the “glass-to” line that matches the exterior glass line of the canopy. I then sanded the bare canopy edge to give it texture to grip the interior glass when it’s laid up.
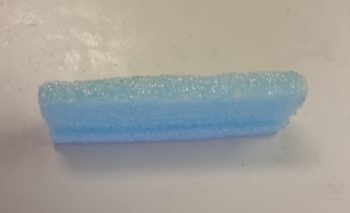
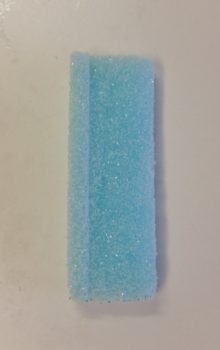
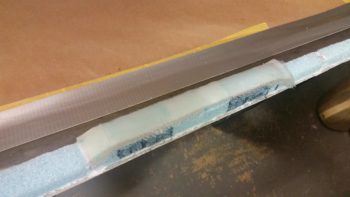
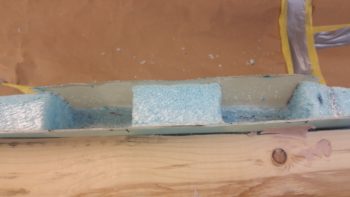
Since I don’t have 1.5″ of foam frame here, I manufactured it by shaping a piece of foam that will get micro’d to the existing foam rail. I made it “L” shaped so that it also rests on the bottom half of the exposed canopy edge, with plenty of room for glass above it.
I then micro’d the additional foam piece in place that then gave me 1.5″ wide on the canopy rail right at the right side canopy aft hinge hard points. The foam piece extends 1″ beyond the hardpoint segment forward & aft to allow for a transition back to the existing narrower canopy frame.
I then made up another piece, only for one hardpoint, on the other side for the #3 of 4 canopy latch.
[NOTE: I’m going with 4 canopy latches. Here’s why: My canopy goes much further aft than plans, plus I have a longer aft canopy frame. In addition to that little factoid, I don’t have a good option for keeping/incorporating the middle latch in the same place due to my roll bar frame. If I move the middle latch forward 2″ than I can just barely clear the frame, but since I have the entire kit from Jack Wilhemson, pre-made, then I only have enough of the long rod (tube) that then forces me to move the aft latch forward about the same as the middle latch. So, I have much more canopy + frame aft, but then I’d be moving my aft latch forward a minimum of 2″. I don’t much care to do that. I’d rather move the aft latch back an inch, move my middle latch forward 2″ and then fill that gap in with another latch. With a MUCH bigger canopy than stock I think I wouldn’t mind having one more securing latch anyway!]
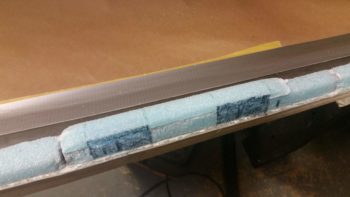
Here’s the foam piece micro’d in place for the #3 of 4 canopy latch, that will be located just aft of the roll bar frame.
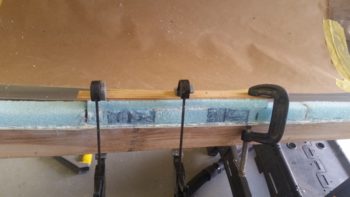
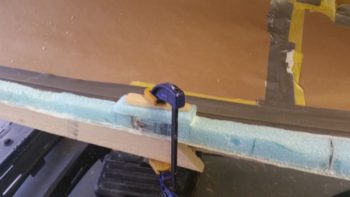
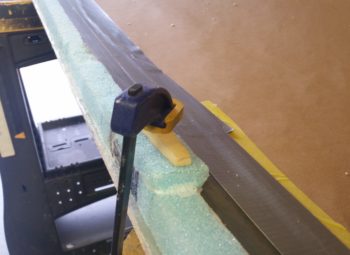
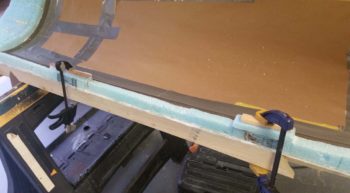
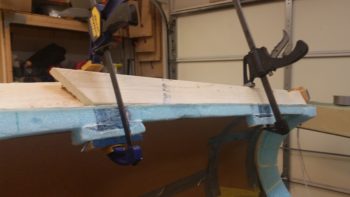
I then cut another piece of foam (quickly, since I had leftover micro) and clamped it in place on the left side aft canopy frame. This foam piece will of course make up the left aft canopy latch hardpoint.
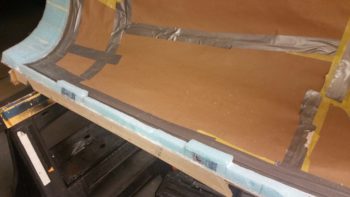
So, here are the foam pieces (incorrect width! more on that below…) for the aft 2 canopy latches, secured in place with clamps while the micro cures.
And a bit a later after the micro cured…. look nice eh? But again, wrong width!
My mindset the whole day had been geared towards the aft hinge hardpoint, which, no matter what size the longeron is needs to be 1.5″ minimum width to have a good foundation for mounting the hinges to.
With that in mind, I got busy shaping/curving the top side of the added foam so it made a nice transition into the canopy edge.
I prepped it in the same fashion as the front hinge hard points and as I was finishing up the 3 ply BID layup I was thinking about my next task: glassing the 2 hardpoint retaining layups on the other side…. I then had a DOH! moment.
As I mentioned, no matter what size the longerons are, the 1.5″ wide hardpoint works fine for the hinge hard points, but that is not the case with the canopy latch hard points, which MUST overhang the longeron inboard since the latch assemblies attach inboard of the longeron. Remember, from the pilot’s seat aft my longerons are a hair over 1″ wide, so a 1.5″ wide hardpoint works for a 0.7″ wide longeron, but not a 1″ wide longeron. Ugh! The good news is that I caught my error before I glassed in the retaining layups at these hard points.
Again, having some left over micro, I quickly made up 2 more additions to bring the canopy frame inboard a minimum of 0.35″ to allow enough hardpoint for the latch assembly to attach to. The foam pieces are a bit thicker than required, but of course I’ll just sand them down to the proper thickness before glassing the retaining layups.
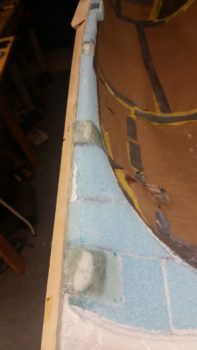
I then got busy digging out the foam and removing the inboard peel ply off the 3 left side forward hardpoints . . .
And the two forward right side hinge hard points.
BTW, although these layups were fairly fresh and I used NO micro on the foam surface where I applied the peel ply, it was still amazingly difficult to remove…. each hardpoint took a good 10 minutes in just removing the peel ply!
About this time in the evening is when everything turned magical, and by magical, I mean it went south ….. a bit. Kinda weird and still assessing!
I started off by rereading the plans and then proceeded to glass in the 3 hard points along the front left side canopy frame. I knew from accounts from other builders that 15 plies in these hard points, especially the deeper ones I had, was simply a fantasy and that it required a whole lot more than that. I gathered up all my BID scraps, whipped up some flox using my “slow” hardener (75/25 slow/fast) to a point where it was right at the cusp of being wet flox (i.e. towards the thicker side of wet flox), and got to work.
Ok, first off, my bad for not taking into account the heat in my shop. It was HOT outside and well over 80° F in my shop. Secondly, I had never encountered an issue with a large scale exotherm type event with anything other than using fast hardener. IIRC, in Germany I had an exotherm with a huge cup of epoxy when I left it sitting there for a good while when I was doing something really big like the wings or fuselage, and one event when I used fast hardener for the filling in the one of the elevator hinges . . . which resulted in it spitting the flox right out of the hole.
But just as I was a few plies from finishing up these holes, I started to see some bubbling around the edges of each hole. I felt the sides of the retaining glass and it was hot, so I grabbed my thermometer. I got one reading at 201° F for a blip, but couldn’t replicate it. Most of the readings on all the surfaces on or around the hardpoint layups were in the range 160-195° F.
I had a couple of small leaks around the retaining glass layups going on which had annoyed me since I had to keep wiping up epoxy running down the inside of the canopy (one of the few times I’ve used paper vs plastic, and I got a fair bit of epoxy running down the paper!)…. however, I think these leak areas worked to allow the heat to vent and the layups to stay in place with no expulsion action going on. I continued to monitor the temps as there was no discoloration of glass on the top side of the canopy frame and no melting foam anywhere.
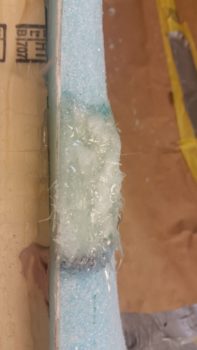
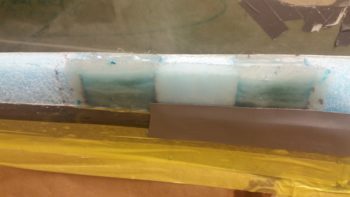
Out of curiosity I tried to add a bit of flox to the top side of each layup just to use it up and get the final 0.2″ of fill on each hole. However, when the flox hit the bubbling brew on each hole it just burned out immediately and turned white (as you can see in the pics below).
The layups stayed warm for quite a while, but again, except for one non-repeatable blip just over 200°, I never saw any dangerous temps. I’ll cut a core out of one of the hard points to see if it is solid [it should be, it was filled with glass] and check to see if the epoxy/flox just cured overly fast or if it burned out.
Having learned my lesson, I then grabbed a can of straight SLOW hardener and got to work on the right front hinge hard points. Note the duct tape on the front hardpoint… this tape plays a key role in the next part of my story.
You see, as I was filling up the 2 front hinge hard points, I thought to myself the front hard point must be bigger than the back one, because the back one is filling up noticeably quicker with the same amount of flox and glass going in. That’s when I realized the front hardpoint was leaking and thus harder to maintain the same level as the aft hardpoint.
Seeing that I wasn’t going to win this game, and almost out of flox in my cup, I simply cut a piece of peel ply for each hole and set the peel ply in place. I would simple finish these holes with flox paste tomorrow and call it a day. I did a final wipe down of all the epoxy that had run down into the canopy onto my thick brown paper, and knew I’d be back one more time for some cleaning before heading to bed. And with that, I went upstairs and took a shower.
When I returned to clean up the epoxy mess caused by the leaking front hardpoint, what did I find?! These hardpoint layups –with straight SLOW hardener– both had some minor bubbling going on around the edges! I grabbed the IR thermometer again and checked temps (again!) and sure enough, same range as the left side: 160-195° F. Highest temp I saw on this side was 198° . . . amazing. Again, no discolored or burned glass or foam anywhere, just a really hot curing layup. (sorry, no pic of this tonight but I’ll grab one for tomorrow’s post).
So, I cleaned up the epoxy, went upstairs to spend some time uploading the pics for this post and returned about 45 minutes later. The temps were still fairly high, although significantly cooler (130-150° F), and the epoxy leak had stopped, so I did a final cleanup of the epoxy and pulled out the wet tape and paper from inside the canopy to ensure I had no curing flox or epoxy on the inside canopy surface…. thankfully it was really clean and nothing had really gotten onto the canopy.
Since the weather temps are high here and my canopy hard points are significantly deep, for the last 4 hard points I will fill them halfway and then peel ply the layup, and then finish it after it cures. All I can say is wow. I guess my technique of trying to follow the plans is more hazardous than stuffing the holes with BID and pouring wet flox in & around it!
All part of the struggle I guess of building these airplanes!

