
The external canopy layup has passed the 48 hour mark for curing, but before I pop the canopy off the fuselage to shape and glass the inside I need to contend with one of two issues involving the turtleback (aka turtledeck, D-Deck, etc.).
The issue that I’m not contending with today is the profile angle between the turtleback and canopy. I’ll deal with that once the upper cowling is mounted and I know the exact angle I’m dealing with.
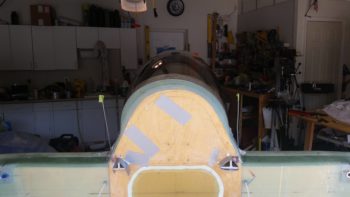
In regards to the other issue, as you may be able to see below –which coincidently I clearly DID NOT/COULD NOT see before I glassed the canopy frame– is that the turtledeck is a bit curvier on the left side, a bit flatter on the right side and a bit deflated on the upper right side. This all comes down to one thing really: Sins of the past.
With my fuselage being slightly askew, although virtually imperceptible to the naked (or unaware) eye, it seemingly took its toll on the aft canopy to turtleback interface . . . although I tried (in vain) to mitigate it as best possible before glassing.
A sideline issue that may actually help mitigate the issue above is that the vertical seams between the turtleback and canopy are at different Fuselage Stations, with the right side corner being about 3/8″ aft of the left side. This should actually help my mitigation actions (note that I’m not saying “fix” actions because I think the configuration is such that I should be able to mitigate the turtleback imbalance to a good degree, but not eliminate it altogether) since it will give me more space forward for another layup that I will add to this structure.

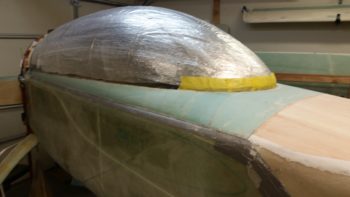
Yes, it may be hard to tell, but underneath that strap and all those boards and wedges is a 1/4″ thick piece of PVC foam that I will sand and shape down to fill in the low spots on the right side turtleback.

Here’s a closer shot . . . Again, there will be no way to completely eliminate the offset of the turtleback without redoing the entire canopy install (that is NOT going to happen!), but I am cautiously optimistic that this will help balance it out to a good degree.

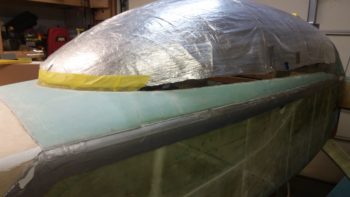
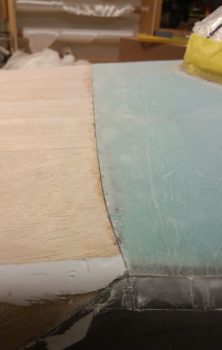
With the aft extra foam piece in place, I then spent about 45 min marking and trimming the overhanging glass from the sides of the canopy, starting on the right side first.
I then did the same on the left. The edge will most certainly require more work before final canopy install, but so far it’s looking pretty good.
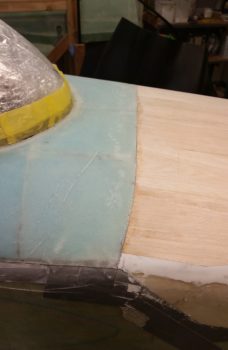
I then spent some time cleaning up the intersection between the canopy front skirt edge and the aft edge of the nose cover. Again, this is the rough start to this process, but so far the lines are looking pretty good and the elevation glass-wise will be very close between the two structures once I get a ply of BID on the aft nose cover (which I now plan to do after I remove the canopy from the fuselage). I also took about 15 minutes to sand down the flocro transition around the Balsa wood on the aft nose cover.
Tomorrow I’ll sand and shape the foam I added to the right side turtleback to (hopefully) create a better turtleback transition that balances with the left side. I then plan on laying up 2 plies of BID on the new turtleback foam. Once that cures I plan on cutting the turtleback-canopy split line and then removing the canopy from the fuselage (after I build a wood frame around the canopy to support the it inverted and off the fuselage). I also plan on laying up the final ply of BID on the aft nose cover.