
I started out today wanting to get the FT-60 Red Cube fuel flow sensor mounting bracket finished so that I could Alodine it with the armrest mounting brackets that I planned to prep as well. Well, I went as far as I could before having to get on the road to head up towards the Dulles area to help out a friend.
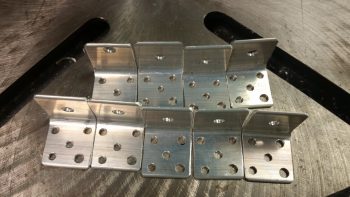
I did get the FT-60 bracket configured with the mounting bolts drilled and the corner nutplates’ rivet holes drilled out as well.

I countersunk the rivet holes in prep for using flush rivets.
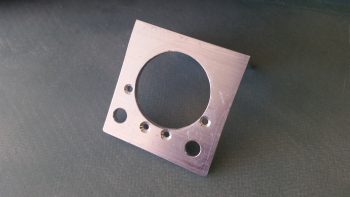
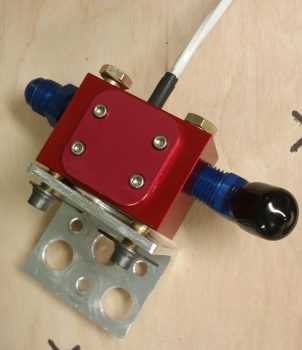
Thankfully, after the click bond disbonding issue, I was able to get the bolt holes aligned correctly, since the Red Cub sits on its bracket at a slight angle left-right to align properly with the fuel feed tube. I added the nutplates in the pic so you can get a sense of how it all goes together.
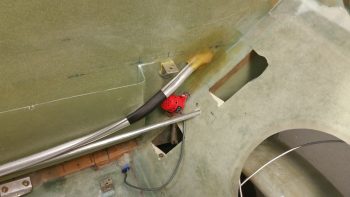
Also, after pondering it for the last day or two I decided that with all the fuel lines, fittings & components in the back seat area –and the entire cockpit actually– that the fuel vapor sensor that I bought while I was in Qatar was going back into the lineup. I just think that it’s the prudent thing to do to have the earliest possible warning of any fuel leak, at the vapor level before it gets any bigger/worse. I decided on an out-of-the-way spot for the sensor element and will mount it there (it’s just mocked up here) with 2 click bonds using?! . . . yep, MGS!
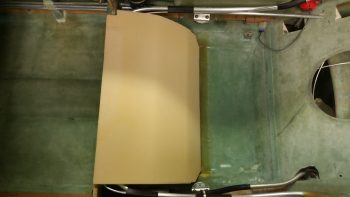
I know I stated in my video that the sump top was the next item to be worked, and I have been (slowly) working on curving the top cover of the fuel sump by heating it up. I have never undertaken the curving of foam by heating it up, as the plans references a few times for curved foam parts. The feedback that I’ve seen on this method has not been good, and most people generally cut relief grooves and curve the foam that way. I wanted to try it simply out of curiosity. It does work, but there is some inherent problematic issues in heating it up to curve it.
First, I started off trying to simply use the fuel sump as the form and set the lid foam on top of it. I then weighed it down and heated it up in place there. I thought there might be some issue with some spring back after I removed the foam once it cooled, and I was right. With that knowledge in hand, as well as some nice scrapes on my fuselage floor from heavy weights leaping off the tricky curved sump surface, I decided to shape the foam off of the actual sump.
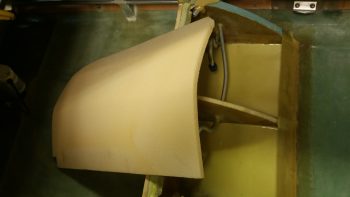
Next, to get an even curve, I used a 1×4 board base as I weighed it down with weights with the top set upside down against a 4×4. Well, the end result was angled curves with “corners” somewhat like you’d get with a hex shape.
No big deal, but it is something I’ll have to contend with. I’ll keep working the top sump cover as I finish up these smaller sideline tasks for the time being.
Finally, I spent a good couple of hours working on my last batch (hopefully!) of mounting tabs for the GIB left armrest, as well as backfilling some inventory that I stole from the front & aft right side armrests. Over the next day or so I do intend on getting the GIB left armrest mounted, as well as getting 2-3 more tabs mounted on the right side as well. I did run out of time finishing these up to get them Alodined before installing them, so I will work to get this batch knocked out tomorrow.
After a not so productive weekend as far as the airplane build is concerned, I’m hoping for a very productive week!