
Today I finished getting the Dynon intercom installed into the intercom bracket that I just glassed to the sidewall.

I hate to admit it, but with the curve of the sidewall that I failed to take well enough into account, I had to move the forward two K1000-6 nutplates inboard just a hair to get the intercom to mount correctly. The front nutplates were off a bit, especially in conjunction with the aft 2 nutplates.
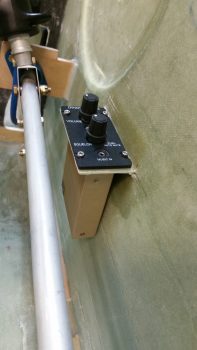
The lower body of the intercom just barely kisses the sidewall on the forward side, which is close to perfect as far as what I was looking for on the angle of the intercom. I’ll stick a piece of double-side sticky tape foam at that corner and it will keep everything nice and tight, with a little separation between the intercom corner and sidewall. In addition, in the pic below you can see that the stick is all the way left that it can go before the bottom of the control stick bracket hits the sidewall. Sitting in the airplane this action would most likely be near impossible to accomplish at this severe angle of bank since the pilot’s leg would be in the way (at least mine would be!). Regardless, my point is that even with the control stick maxed out to the left, there is still clearance between the lower control tube and the lower intercom box.

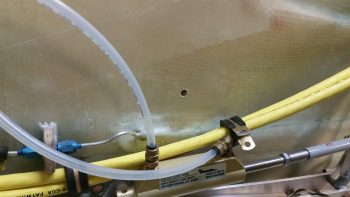
Moving on. Later this evening I figured out my big power cable reroute which is essentially a Bell Curve looking deal that goes up & over my right rudder pedal travel path. After having to move the rudder pedals forward, and having skooched them in a bit close to the sidewalls, I could no longer run the big power cables along side the right rudder pedal as I had planned for originally. The fit was very tight before, but after moving the pedals forward it just simply wasn’t going to work.
Rerouting the big power cables worked out for the best anyway though, considering if I had gone with my original plan I might not have known how tight the rudder pedal and big cable clearance situation was until I tried to adjust the rudder pedals forward for a taller pilot (or if I hit another growth spurt… ha!)
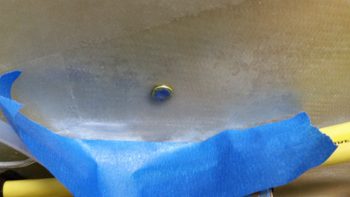
Thus, the process of rerouting the big power cables is the same as eating an elephant: I’m doing it one bite at a time! Tonight I drilled the first new hole in the nose sidewall and prepped it for inserting a Rivnut.
I then prepped the Rivnut by taping up both ends, and then floxed it into the hole.
I’ll let this Rivnut cure in place, then mount the cable with an Adel clamp in the Rivnut before figuring out exactly where the next Adel clamp needs to go. I’ll then flox in the next Adel clamp hardpoint, let it cure, and repeat the process until I get the big power cables over & around the right rudder pedal and to the instrument panel . . . at a minimum.