
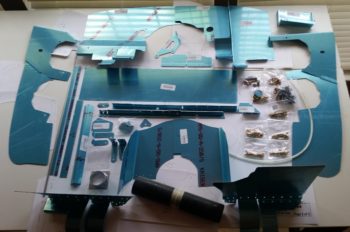
As I was getting started in the shop I heard the UPS guy drop off my VAN’s O-320 engine baffle kit. It was another hour before I could collect it up and inventory all the parts. I know I will have to make both the standard mods to the baffling kit (i.e. trim for EZ cowling), but I’ll specifically have a significant mod in the forward right hand corner where RVs have their oil cooler located.
Still, I’m extremely happy I got this kit since it gets me about 80% there on getting the baffles finished and installed. (I’d like to recognize and thank Buly again for his tip to go this direction!)
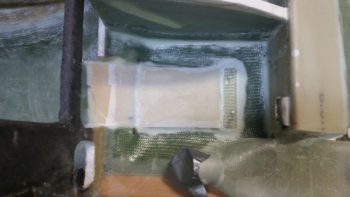
As for the build, I dug out the foam a hair over 0.25″ deep in the area at the bottom left fuselage bulkhead that I had previously “flattened” to allow for the ELT mounting bracket to be installed.
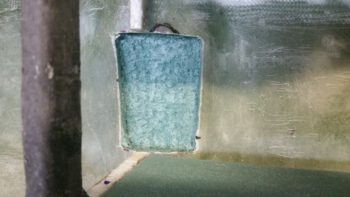
I then traced out the shape, grabbed a piece of H250 foam (to add more strength back into this somewhat critical area) and then trimmed the foam to fit. The foam piece I grabbed wasn’t big enough so I back filled the corner with a crescent shaped piece. For all the OCD’ers out there grabbing their inhalers, out of curiosity I just checked the price of H250 on ACS: $175 for a 2’x2′ piece! The first piece I bought was just under $100 back in 2011, and the second piece less than $120 back in 2013. So, it’s NOT cheap and I’m not wasting any to make something that’s getting buried in glass look perfect!
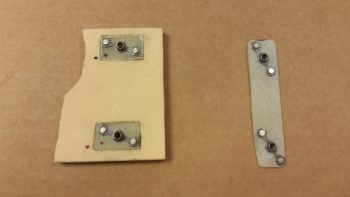
Note that you can see the 2 dots I marked up that show the front bolt positions for the ELT mounting bracket.

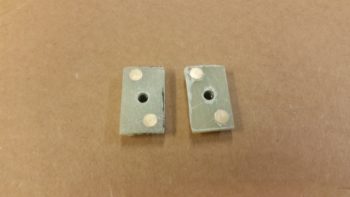
I then used some spare G10 Garolite pieces I had lying around to make up these 2 forward nutplates for the ELT mounting bracket. These nutplates will get buried under the uber expensive foam above.
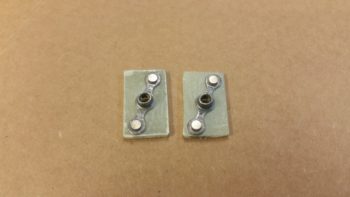
I then marked and cut depressions into the bottom of the H250 foam to allow the nutplates to sit flush. I then 5 min. glued the nutplates into the H250 foam. As the 5 min. glue was curing, I then made up a another, narrow 2-nutplate mounting plate out of G10 Garolite.
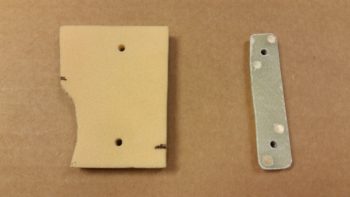
I then test fitted all my pieces/parts in prep for glassing in the H250 foam into the foam divot I started out making this AM.

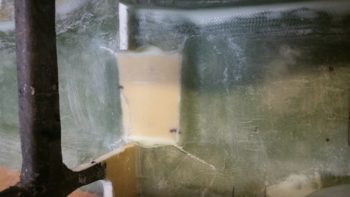
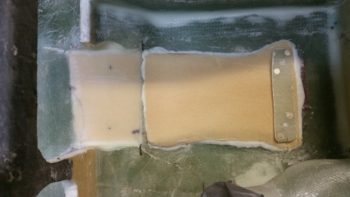
After prepping the nutplates by stuffing them with plastic wrap to protect them from nasties, I then flocro’d the H250 foam –with nutplates attached– into place. I then glassed 1 ply of UNI with the threads running in a nose-to-tail fashion, and then covered that with 1 ply of BID. I then of course peel plied the layup.
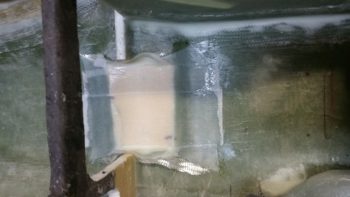
A few hours later I pulled the peel ply, cleaned up and did some judicious sanding on the freshly cured layup.
I then shaped a piece of urethane foam for the aft 2/3rds of the ELT mounting bracket base. At the very tail end of this aft foam piece will sit the longer, narrow 2-nutplate mounting plate. I taped up the bottom of the nutplates in this plate, set it in place in the urethane foam and then checked the front bolt marks through the front bolt holes on the ELT mounting bracket.
When the configuration looked good, I then micro’d the urethane foam base in place to the fuselage floor with the ELT mounting bracket set in place on top (to ensure the bolt holes were aligned). I then slid a 2×4 piece down the center of the ELT mounting bracket, ensuring that none of the bolt holes were covered up (ensuring alignment). I then placed weights on top of the 2×4.
Here’s another shot.
After a couple of hours, I removed the weights and cleaned up a bit of excess micro that had oozed out. I then sanded the top of the urethane foam base to match the top angle and elevation of the forward embedded foam base.
After getting a good prep in, I then glassed the aft ELT mounting bracket urethane foam base into place with 1 ply of BID.
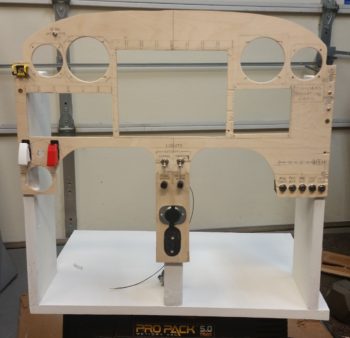
During the evening I was able to add a bit to the mockup instrument panel. If you notice, I redrilled the 2″ hole for the heating vent so that now it is located just above the left armrest intersect point. I then drilled the holes for 3 switches right above the newly relocated heating vent. I also drilled and mounted my 2 dimmers (center of center post).
Tomorrow I’ll continue on my quest to get the pilot seat area knocked out. Now that the lion’s share of effort is out of the way on the ELT mounting bracket base, I can get back to the pilot thigh support seat and get the corner CAMLOCs installed.