
I started out today spending well over an hour doing some research, answering questions, and providing info to Bob Nuckolls, et al. in response to a question I asked on the Aeroelectric Connection forum. The question I asked was on how to create or modify a 4-into-1 video splitter to channel the micro cameras I’ll have on ship for viewing the back seat left & right fuel site gages, top side looking aft (at engine/prop), and bottom side looking aft (at engine/prop). This device will then feed a GRT-integrated USB video module that will allow me view the video feeds in a small sub-window on my EFIS either auto- cycling through (that was one of my questions how) or by manual select.
I then got to work on round 2 of the pilot seat thigh support rib tops. I took the profile of the bottom of the thigh support cover’s underside contour and then cut a cardboard template out so I had a good 1″ wide rib top edge profile to then cut the 1-ply prepregged BID tapes for each side of each rib.
Below you can see I’ve got the 1-ply layups + peel ply on the left rib (bottom) and on the side of the right rib, with the plastic still yet to be pulled. I know I’ll have to add around 3/16″ -1/4″ more dry micro on top of the existing micro, so I laid up these edge plies of BID so they stuck up above the existing micro a bit.
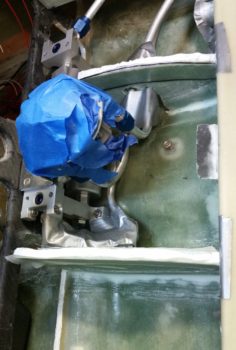
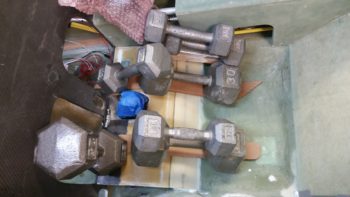
Once the layups cured for about an hour, I then trimmed them a bit, cleaned them up and then added another round of micro. I then of course had to add massive amounts of weight to the thigh support cover plate . . . Why? Because I could …. (grin)
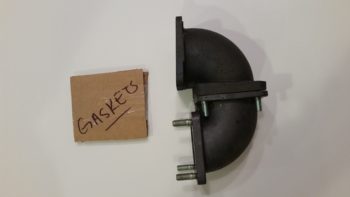
During my shop shenanigans I heard a delivery truck stop by. A little while later I did in fact find a couple packages on my doorstep. The first one was from Airflow Performance and had the 90° and 85° air intake elbows that I ordered, with the associated gaskets.
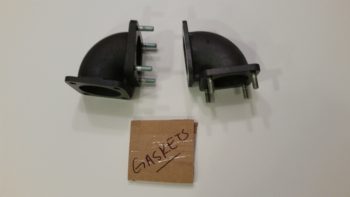
These elbows make up the physical mount and air intake for the air coming out the of Silver Hawk fuel injection servo into the Superior cold air plenum. In the pic below, the nose of the aircraft would be to the left, prop to the right. Since all the cold air induction plenums are built for forward facing engines, to incorporate one I had to get my air turned around.
To be clear, this isn’t something I did willy-nilly, although I know a number of Cozy builder/ drivers have done it with reportedly good success. I conferred with Kevin Murray at Sky Dynamics, my IOX-340S engine builder, Tom Schweitz, and just within the last week I had a good discussion regarding getting this air turned around with Pete at Precision Airmotive, the maker of the Silver Hawk fuel injection system.
I’ve also been discussing this quite a bit with Chris Seats, a fellow Long-EZ builder. While Chris is not using the Silver Hawk FI (he’s using the EFII system) he is using the Superior cold air induction plenum, so he has to turn the air around as well. Chris is constructing his own air intake duct out of Carbon Fiber, but was curious about the weight of these combined elbows… which is 1.7 lbs. total.
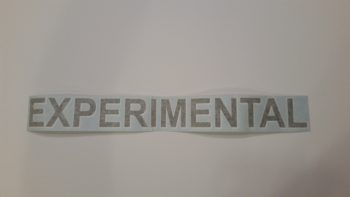
The other package contained the 2″ high “EXPERIMENTAL” vinyl label that will eventually go on the inside bottom frame of the canopy rail. It’s kind of hard to tell, but the lettering is simple black letters with a white shadow. If you’re wondering why I bought this now, remember I had 2 weeks to do nothing but research and figure some of the smaller issues out… so while I had the opportunity I played around with my vinyl decal styles and pulled the trigger on a couple orders.
While my second round of micro on the thigh support ribs cured, I then spent a good amount of time determining the exact location of my GRT HXr EFIS on my panel mock-up blank. I then cut the PFD mounting hole in the panel and test fit the HXr.
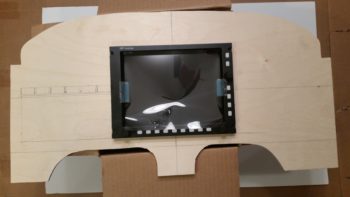
After a gazillion tweaks on the dimensions, trying to ensure every component gets a spot at the (panel) table, I then cut out the mounting hole for the Garmin GNS480 GPS unit that you see “installed” here.
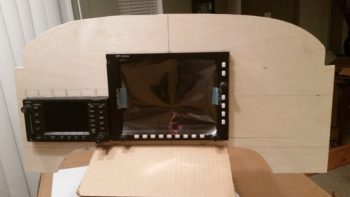
Here’s a shot of the GRT HXr EFIS and GNS480 mounting tube behind the panel.
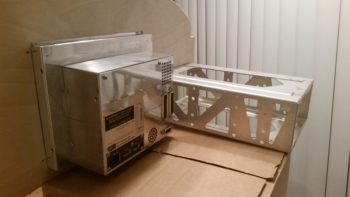
And another shot of the GNS480 mounting tube. I’ll have to play around with getting the tube mounted in this panel mock-up blank, since it is a different configuration than how it will actually get mounted in the real panel.
I then spent another couple of hours dialing in the remaining panel avionics, instruments and components. Since it was too late to do another inevitable round of micro, I left the weights in place on the thigh support cover and hit the rack. Tomorrow I’ll continue with my primary push to get the pilot’s seat and fuel valve cover completed so I can move on to the left armrest (which, in turn, when finished will allow me to do a final mount of the GIB heating & air ducts).