
After I got home yesterday from my running around the mid-Atlantic region for the past 2 weeks, I of course had a number of chores to take care of. I then decided to update some of the build pages on this site, and got prepared for today. I also caught up with some other builders, read the latest CSA, and did a quick bit of research.
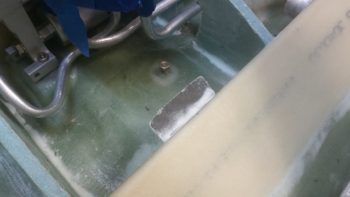
Tonight I wanted to get a quick layup in as a foundation for tomorrow’s build endeavors. I had originally planned to glass in 3 tabs along the top edge of the front side of the thigh support wedge duct. However, I decided to wait on the onboard tabs and focus on the middle one.
Why am I putting tabs along the front edge of the wedge duct? Well, if you think about the original plans pilot thigh support, first of all it’s actually glassed into place. Next, the most common configuration is to either have the thigh support floor/plate/top hinged on the aft side so that it swings up & aft, or at a minimum at least removable and not glassed in . . . so what do these all have in common? The aft edge of the thigh support floor/plate/top is supported along its entire length.
Mine is not.
So I just want to give a little extra support to the top plate so that it doesn’t balk at me or my pax stepping on it during ingress/egress ops!
Thus, I prepregged two sets of 2 plies of BID and decided to throw another “trash” piece of carbon fiber in the middle for added rigidity, making 5 plies total. I then wet out the glass, combined my sets into one set with the plies as follows: 2 BID/1 CF/2 BID. I set it in place, making sure it was high enough on the wedge duct, and then added a little flocro in the corner where it bent back (actually forward) away from the wedge duct.
I then placed the pilot thigh support floor/plate/top in place (with tape on the bottom where it interfaced with the glassed tab). I then weighed down the thigh support floor.
Since I used fast hardener, after a few hours it was cured. I pulled the weights and then the thigh support floor off the layup and it looked great. I had peel plied both the face and the front of the support tab, so I pulled the peel ply.
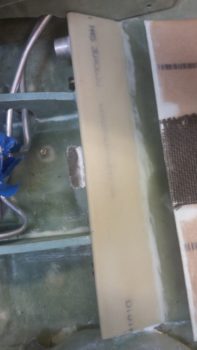
Here’s the center thigh support center support tab in it’s raw form. I should note that when I laid up the tab in place, the 5-ply glass pad measured 2″ x 2″.
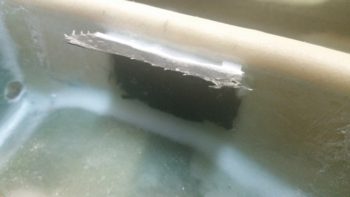
I then did a quick trim on the support tab while the glass was still in its “green” state.
Tomorrow I’ll continue to finalize the installation of the pilot thigh support to then allow me to get on with installing the left pilot armrest & components.