
This will be my last build post prior to Rough River! And since I’ll be on the road visiting folks in North Carolina and Virginia, I won’t be home for another 2 weeks…. so quite the break in build action.
Today I pulled off the boards that I had clamped in place to help straighten out a rather wavy looking foam piece that I shaped into a curve for the pilot seat floor piece, which also happens to make up the majority of the pilot thigh support.
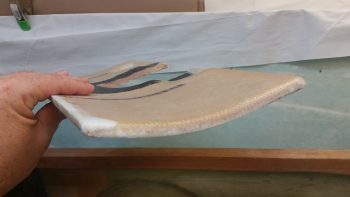
I then cleaned up the initial Kevlar layup and test fitted the floor seat piece without the boards in place. It looks good, but still needs just a bit more persuasion to be close to spot on.
I also rounded the aft edge into a radius that I assessed as a “pleasing shape” since I plan on doing all glass to glass edges on this seat floor piece.
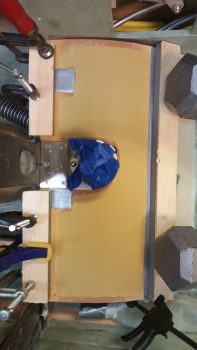
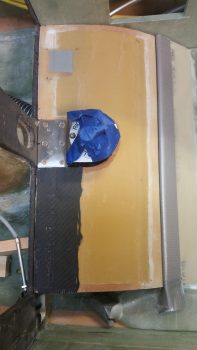
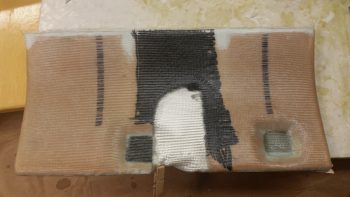
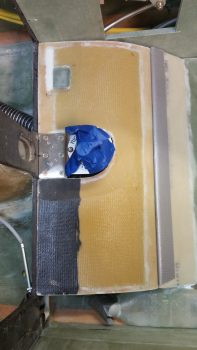
I then did the round #2 top seat floor layups on both the front and aft side of the piece, overlapping onto the initial Kevlar layup. The duct tape squares you see in these pics that you might be curious about are 2 pieces of 1.1″ x 1.1″ duct tape plies covered by another 2 plies of just slightly wider duct tape. These duct tape pads are to provide clearance on the underside of the seat floor piece for the 2 ends of the EFII fuel pump frame that juts aft. The foam over these 2 tape pads, and of course the tape itself, will be removed before I layup the underside of the seat floor.
So, at the outset of the round 2 layups, I set a square of peel ply over each of the duct tape pads and then laid up a 2″ x 2″ ply of reinforcement BID over each of the pads. I then laid up the separate front side single plies of glass (1 BID & 1 CF) to reach aft enough to cover the tape pads.
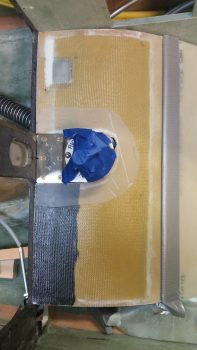
Once I got the layups completed and peel plied, I then set the seat floor back in place and clamped it again to try and knock out some of the waviness incurred by heating it up in the curve-shaping process.
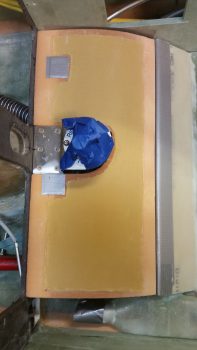
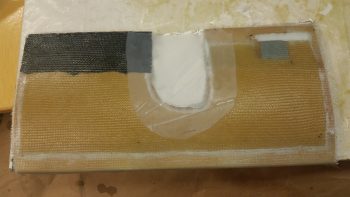
You may note that I used some carbon fiber over on the left side. This is due to the fact that I had some scraps of carbon fiber hanging around, and I also wanted to really lock in that corner and tame an indention over on that side.
A few hours later, when the glass was about 90% cured, I removed the clamps and checked out the layups . . . all good! Moreover, the slight indention on the left side was in fact tamed and is no longer an issue.
I then pulled the peel ply and cleaned up the layups. Here’s a test fit of the pilot seat floor after round 2 of the top side layups.
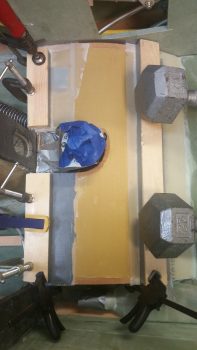
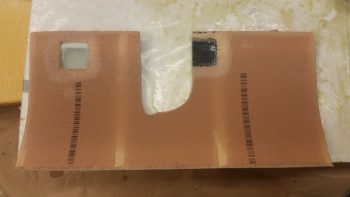
Then it was on to round 3. I micro slurried what little bare foam was left, and made some transitions (as I had on round 2) with thicker micro between the edges of the Kevlar and the foam. I also filled in the divot created in the upper right hand corner where the clamp piece of wood made a distinct edge. I actually liked the depression, but glassing it could have been a bit difficult, so I simply filled it in with dry micro.
I then glassed the second and final ply of BID on the seat floor top. For some reason I felt like going rogue again and did NOT peel ply the entire layup, just the inside edge that will have a mini wall glassed in around the fuel selector valve.
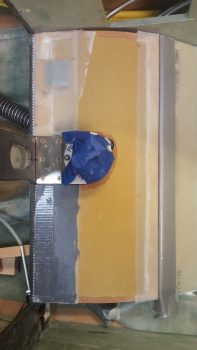
A few hours later, after the final BID layup on the top of the seat floor cured, I then razor trimmed and cleaned up the edges, and set it back in place for a test fit. So far I’m really happy with how this is turning out. To be clear, it’s not perfect, but definitely good enough for this combat builder!
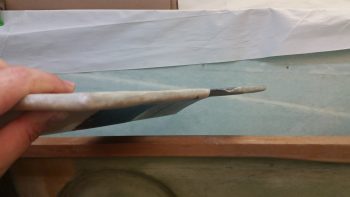
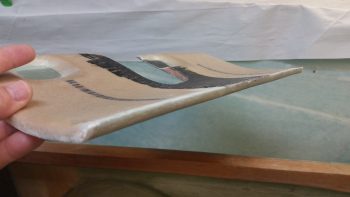
With the top done I got on with the task of shaping the front edges and sides of the underside of the foam seat floor. Just like the top aft edge, these 3 sides will have a radius that will allow the glass to curve around the edge in one continuous piece to make up the edges of the plate. Thus, every side of this seat floor plate will have micro’d corners for strength. This obviously mandated that I had to spend a bit of time making the angled trenches along literally every exterior edge (minus the center U-shaped notch) of the seat floor plate.
I then spent a bit of time as well pulling the tape & peel ply out of the divots I created for the fuel pump frame jut-outs that I needed clearance for. Once all the remnants of the last bit of “clinging-for-dear-life” peel ply was extracted (with much difficulty at times I might add!) I then used my ever trusty and ever awesome Perm-A-Grit tools to shape the foam edges of the 2 divots.
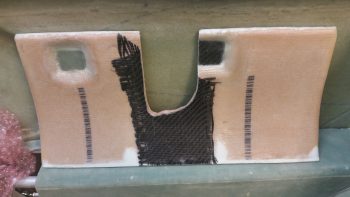
I should note that although the top was glassed with 2 plies, relatively there is so little mass in the U-shaped notched area that wraps around the fuel selector valve & bracket, that it was surprisingly “flimsy” for lack of a better word. I decided to reinforce the center narrow area with a patch of BID on the bottom side, but alas I didn’t have any scrap pieces big enough . . . but then again, I did have one last piece of scrap CF hanging around. I figured CF would provide even greater stiffness here so I threw it on there . . . at the beginning of the 1-ply BID layup on the underside of the seat floor. I know it may look a little unorthodox (read: nasty) but in my defense it’s the MGS epoxy’s fault, since if I had used EZ-Poxy you would have never known what it looked like! hahaha!
Also, before I laid up the final large piece of BID on the underside seat floor, I also again laid up a scrap patch of approximately 2″ x 2″ BID over each divot & overlapping onto the foam to add reinforcement to these glass-to-glass only areas (5 plies of glass total when all is done).
It took a bit of time just to micro slurry the foam face, and then stuff thicker micro all along the mini trenches I had created along all 4 sides. After the micro went on, to be honest, glassing up the large ply of BID was the EZ part. However, getting the glass around the corners and sticking to the edges was a bit trickier, but in the end I got it all in place.
A number of hours later, after it all cured, I then razor trimmed the glass, sanded and cleaned up all the edges.
I have to say that I’m ecstatic with how the pilot seat floor plate layups came out! I didn’t want bare foam on the edges that I would simply have to fill in with micro anyways, since if you’ve seen older plastic airplanes with bare foam edges on parts… well, they look really old, dry and unattractive (I guess that’s what folks say about us ‘ol dog pilots too, eh?!).
Anyway, here’s 3 pics showing the front, aft and side edges of the pilot seat floor plate:
I then of course mocked up the finished seat floor. Ah, it fits great!
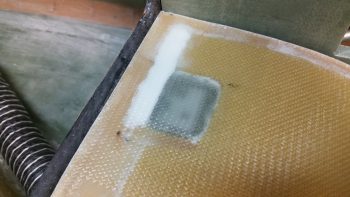
Here’s a closeup shot of the right underside divot where you can actually see the fuel pump frame jut-out (bottom pic) through the glass. As you can tell, there’s plenty of clearance between the fuel pump frame and the seat floor plate.
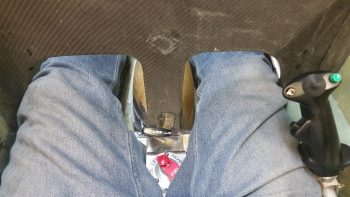
Well, nothing left to do on this thing at this point other than try ‘er out! So I set the seat floor in place, threw a towel and some padding on the pilot seat, grabbed my throttle handle quadrant and climbed in.
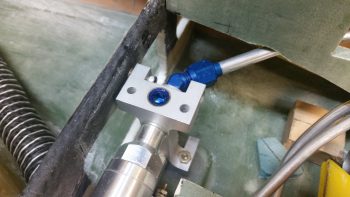
This first shot is exactly what I was aiming for! The fuel selector valve is aft enough and high enough that I can actually easily see it and manipulate it during flight! Hoo-ah! Also, I should point out that my fuel selector valve bracket is only about 1/2″ max total farther aft than the stock plans fuel valve plate. The difference: my valve is located at the very aft end of the plate, obviously about an inch higher, and not located center of mass on the valve plate as the plans valve is.
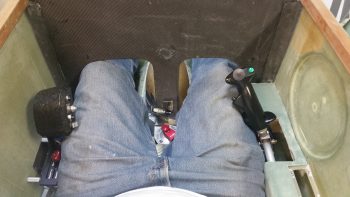
I then mocked up the throttle location to test it out. I messed about with the throttle for a bit and determined that for me I had in fact picked the optimum location for this throttle quadrant setup.
Here’s a shot of the throttle handle/quadrant, fuel selector valve and control stick. Again, I’m extremely satisfied with the location, ergonomics and functionality of all these controls!
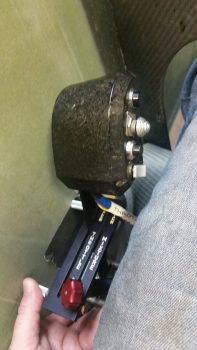
And here’s my parting shot of this post. The throttle handle and quadrant in its planned left armrest location.
Again, this will be the last build post for the next couple weeks. When I get back –renewed, refreshed and re-motivated– I will continue my quest to finish up the internal fuselage component configuration and install before starting on the nose & canopy!