
I actually started this project a couple of days ago and finished it today. Instead of stringing you along like I normally do, I just decided to show you what I was up to all in one whack!
I noted yesterday that my TIG welder was the “Elephant” in the middle of the shop, when in fact a truer statement would be that the fuselage dolly, having served its purpose well, is now the true elephant in the shop. Not only do I need to trim it down for space, but I need to repurpose it as a portable tool work bench for my upcoming focus on making some bric-a-brac for the plane.
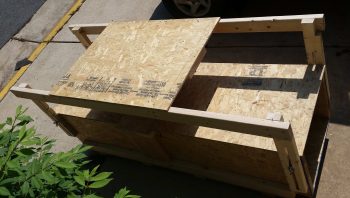
I started by clearing off the top of the fuselage dolly and then giving it a good cleaning.
I then removed all the hardware and wood brackets off the top.
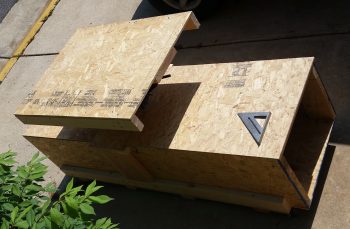
Here’s the last official pic of the fuselage dolly before it got a massive makeover (key some dramatic music from some crazy reality TV show!).

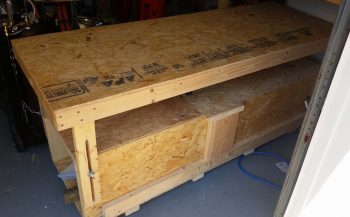
I determined yesterday that I need the top to be 38″ long, while the width will remain a hair over 30″. After determining the top area that would remain, I started on each end, cut and then removed the top shelf pieces and the underlying support frames.
I then removed the 4 corner slide posts that would get reattached, and then trimmed the remaining overhanging wood support rails from the table top.
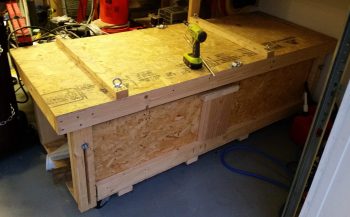
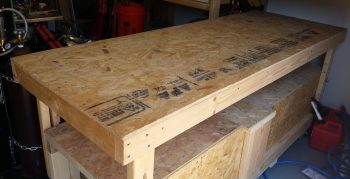
About 2 hours later I ended up with a much shorter version of the fuselage dolly that again, will now be used as a portable work bench that power tools will get mounted to.
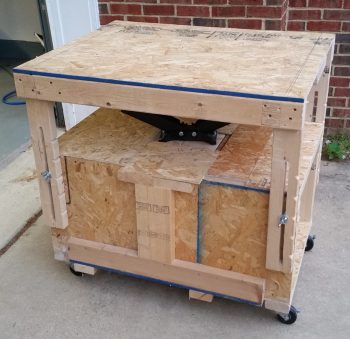
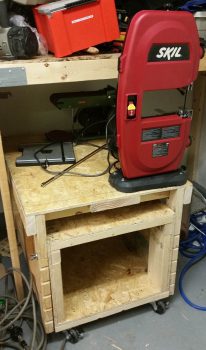
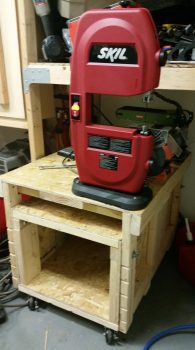
I mounted 2 recent acquisitions –the red 9″ Skil band saw and the Harbor Freight bench top combo sanding belt and disc machine– along with my ever faithful bench top grinder that has never really had a home. Yes, I know that these tools don’t get high marks for being the best in their respective classes, and I’m sure they got beat up a lot in tool high school, but by all accounts they work well enough to do what I’ll need them to and moreover, they were cheap (like me!).
You may have noted there is a spot on the opposite side of the table, which is for a mystery tool that for now we’ll call: Tool X. It is vitally important that the information as to the type and purpose of this tool not be made public at this time…. especially to Marco! haha!
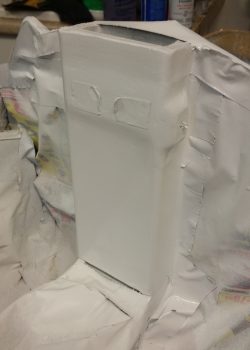
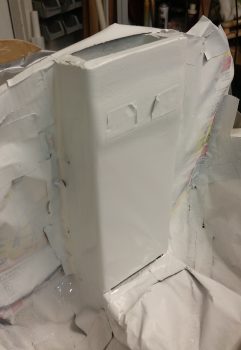
My initial plan for the day was to wet sand and then clear coat the front NG30 mini-bulkhead so that I could have then wet sanded and buffed that out either later this evening or tomorrow, but alas I broke through the topcoat when I was wet sanding and had to repaint those areas with another couple coats of white paint.
Finally, much later in the evening I was able to successfully wet sand the white top coat and then clear coat it with a tack coat and then 2 full coats of clear. Yes, I understand that these pics probably look exactly the same as the gloss white top coats…. but trust me, THAT’S clear coat on there!
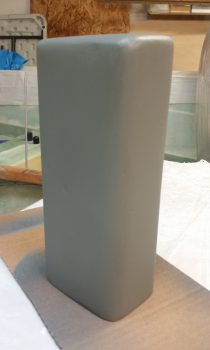
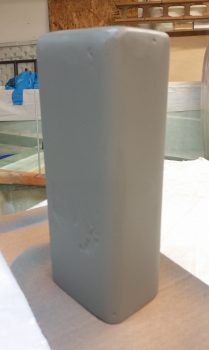
I was remiss in getting a pic of the Oil “tower” box with its surface sanded down, before primer… after nearly an hour’s worth of sanding on the stubborn surface.
I toyed with the idea of using a bit of metal glaze body filler first but then decided I would not only use the primer as a bit of a guide coat per se, but also let it sit for a week to really cure while I’m down on my next trip to North Carolina. For certain it will need some help in the hole-filling department, especially that crater on the north face, but I determined that it would probably be easier to do after the primer was on, cured and wet sanded.
My build tasks will be minimal tomorrow since I have to get into packing mode (which I was supposed to do today!) to prep my next load out of household goods to haul down to NC.