
As you can see, and as I predicted, I didn’t get anything done on the plane yesterday since my fellow Long-EZ builder & great friend Marco (prolific writer of the awesome blog “What have I gotten myself into!”) stopped by late yesterday afternoon. I showed him around the shop and gave him the tour & update on my project, which he hasn’t seen in person since he helped me layup glass on the F22 bulkhead back in 2011!
We talked all things Long-EZ, flying & otherwise until the wee hours of the morning before finally hitting the rack, then continued our discussion this morning. After a late lunch he took off back home & I got back into the shop. It’s great to be able to visit with good friends for more than just a couple of hours, and since Marco & I started our respective Long-EZ build journeys at the same time, after having met at the EAA composites workshop, we know each other’s projects just about as well as our own. And as I mentioned to Marco over lunch, having a building buddy –even more & above just being linked into the canard community– has really made my build much easier and faster in almost every aspect.
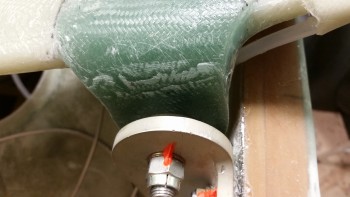
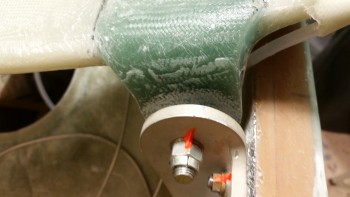
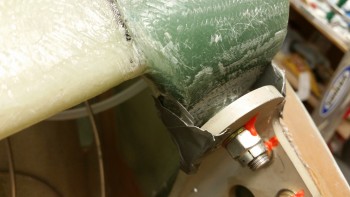
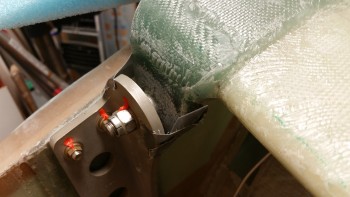
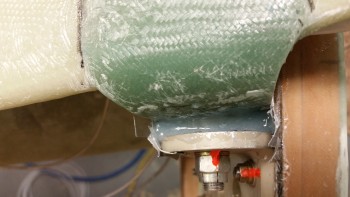
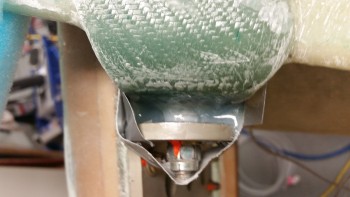
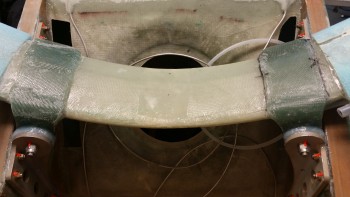
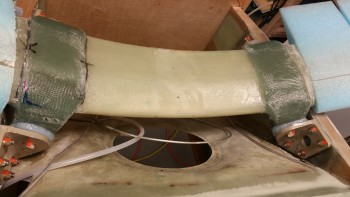
So late this afternoon I started on the gear by knocking out the first half of Long-EZ Plans Change (LPC) #128 that’s listed in CP-48. It basically says that a few pilots had knocked their gear loose off the LGMAT tube and had to recenter the gear with a crowbar. Then they ensured it stayed centered by placing flox in-between the gear tab and the 2024 aluminum gear mounting tab thus creating a thick flox washer between the two to keep the gear tabs in place both on the front & aft side of the gear.
Instead of trying to do this after the fact, if it ever came to it, and since I have no delusions of being the best pilot in the world or the fact that I won’t have a few hard landings, I thought it best to get this flox into these channels now while I still have good access. For the record, I spent a good 10 minutes going over my build schedule and thought hard to see if I could come up with any scenarios where I would need to remove the gear for the rest of the build, and couldn’t come up with one. So, in goes the flox!
I started by using my Perma-Grit tools to sand the glass gear tab opposite the landing gear mount extrusion so that the flox had something textured to bite into.
To better keep the flox in place, I then cut up 4 plastic strips 1/2″ wide off an old package & wrapped them around the bottom of the gear tab (technically top since it’s all upside down) and butted up against the inside edge of each aluminum extrusion. I then taped the plastic strips in place to essentially create a “U” shaped channel.
I then whipped up some epoxy with fast hardener and made some wet flox and poured it into each U-shaped trough I created around each of the 4 gear tabs. Obviously, this will only cover about half of the area, but by starting out with wet flox I know I’ll get good coverage in the hard to reach areas. The “top” half will get a little bit thicker flox since the lower base half will be in place with the cured wet flox.
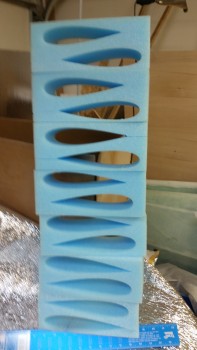
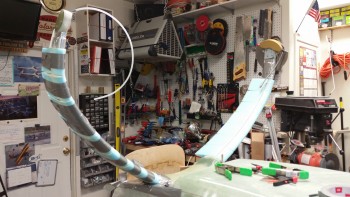
As the LPC #128 flox cured, I went to work on widening the 7/16″ diameter channel in the gear fairing foam pieces to 1/2″ in diameter. I started with the 1/4″ round screwdriver looking Perma-Grit tool to widen the beginning of the channel out to about a 1/2″, then I switched to the 1/2″ round abrasive tool that you see in the pic below.
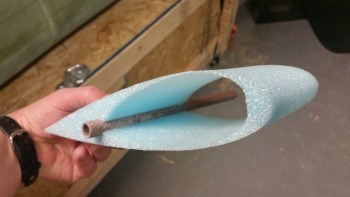
This is to allow for the emplacement of the 1/2″ diameter thinner walled plastic tubing that I picked up at Home Depot.
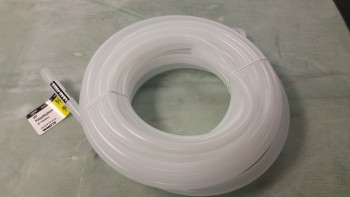
After sanding out the channel, I tested the 1/2″ diameter tubing and it fit great.

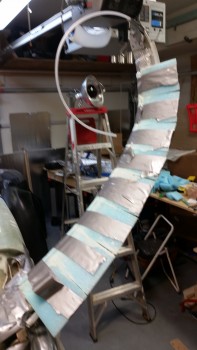
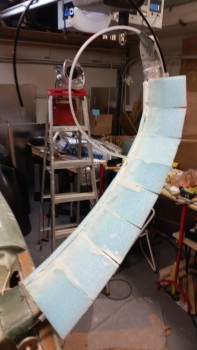
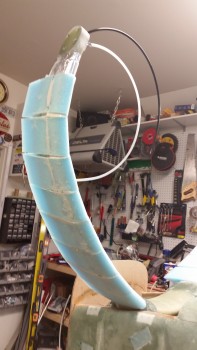
Just for fun & to see it’s “natural” shape, as I finished enlarging each gear fairing piece channel to 1/2″, I stacked them up on top of the fuselage. Since the edges are very close to matching you can see a bit of a washout in the second pic. BTW, I couldn’t get the very last fairing piece to balance without the whole tower crashing down.
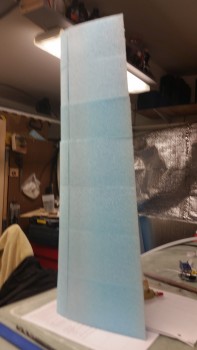
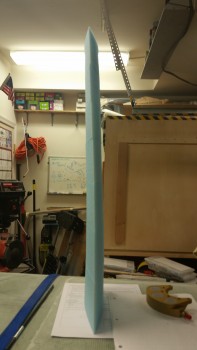
Of course then I had to take a pic of the other tower I had created as I removed each foam fairing piece from its original block.
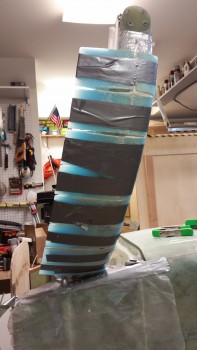
I then mocked up the first left gear fairing piece and once I figured out the starting point & marked it, I whipped up some old MGS 335 epoxy (to use it up) and made a bunch of micro with it. Below I had just painted the inboard half of the gear leg with pure epoxy before I started applying the micro.
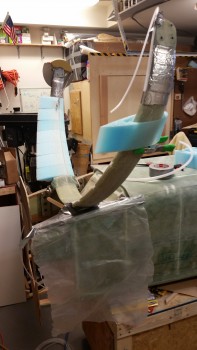
Jumping ahead, to keep the foam pieces tight on the gear leg I used duct tape to keep the two “halves” together. However, since the tape I was using wasn’t sticking well, I carefully wrapped the duct tape around the TE and secured the tape back onto itself, on all but one fairing piece. This method secured the foam to the gear leg just tight enough.
A couple other notes on the install. First off, I would like to remind everyone that there are NO instructions that come with these gear fairings! However, that being said, I will give HUGE props to Stephen James from Eureka CNC in that once I secured these fairing pieces tightly to the gear leg, they fit so spot on that the TE of the fairing pieces aligned so well that I had no need to use the clothesline pins that I spent a good 10 minutes looking for. Very impressive.
In addition, I mentioned previously that I needed to install these now since, unlike the Cozy version, these Long-EZ gear fairing foam pieces are cut in a single piece with a slit on the inner gear side. However, on piece #5 I accidentally snapped it in half while sliding it into place. It was then that I serendipitously realized that it was actually much better to mount these in 2 pieces since you can get more micro slathered on to all the surfaces. This makes sense since instead of applying micro to the gear leg, then pushing it out of the way by sliding these pieces into place, if you simply install the front half in from the front, it captures the existing surface micro in place and keeps it in-between the gear leg and the foam fairing piece. However, while there is a bit more room to get more micro in play on the aft side, by sliding the piece into place with the tube in the channel, the aft side is still a bit tricky to get all the micro in there for a really uniform application. Thus, on the right side I will be cutting all the foam fairing pieces into 2 pieces before mounting them to the gear leg.
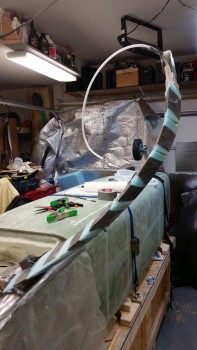
Here’s a wider angle shot of the gear legs showing the left gear fairing micro’d in place.
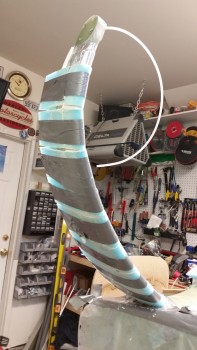
The shots below are a couple of hours later after I just carefully removed the duct tape securing the left gear leg foam fairing pieces in place. You can see that I cut the ends of the 1/2″ channel tubing and ran another narrower black tube down the middle to test clearance and accessibility. The tube works like a champ and I’m very happy with it. BTW, the fast hardener on the MGS 335 kicks off much more quickly than the fast hardener on the MGS 285, so the micro in these pics was completely cured.
I then whipped up another batch of flox using MGS 285 with fast hardener and finished my flox gear washer mod IAW LPC #128 as described in CP-48. I used slightly thicker flox this time since I didn’t have any dams to stem the flow of flox from running off the “top” half of each gear tab-extrusion gap. You can also see that I had just spent a few minutes removing all the tape, plastic & errant flox from the “bottom” half flox application.
Here’s the new aft side flox “donuts.”
And the forward side flox gap fillers.
Tomorrow I plan on installing the right gear leg foam fairing pieces. Once those are installed, I’ll start cutting all the UNI for the gear fairings. I then plan on sanding down and laying up the left side fairing UNI on the underside of the gear leg. I won’t be glassing the top sides of the gear fairings until after I flip the fuselage right side up.
We are going to have to do it again Wade. Ciao, Marco.
I hope you mean on your bird!!! Because I’m pretty much through with that redoing stuff crap! Ha!
Cheers,
Wade