
Well, hopefully really wrap-up tasks, as in “the end”!
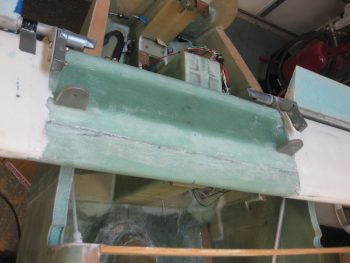
Today I knocked out the main tasks for denying unwanted cold air to enter the fuselage via the elevator control tube transition into the fuselage. As you’ve probably seen, I filled in the gap immediately behind & under the canard with the Cozy plan’s “filler piece” and then filled in the area immediately around the torque tube offset with micro/flocro–both on the fuselage and canard “filler piece” sides. Well, that’s what I finished today, so read on dear reader . . . read on!
I started off today by test fitting the canard, with the elevator torque tubes still taped up with electrical tape approximately 0.090″ thick, to the fuselage/nose. After I ensured it fit, I took it off, flipped it upside down and trimmed up some of the micro on the canard side. I also lightly coated JUST the electrical tape with WD40 as a release agent so that I wasn’t taking an unintended action of permanently gluing my canard to the fuselage!
I then whipped up micro (actually flocro) using fast hardener and put it into the areas on the fuselage where the elevator control tubes (torque tube offset) transition the fuselage sidewalls.
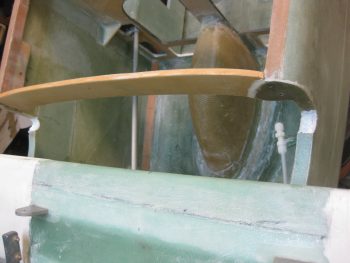
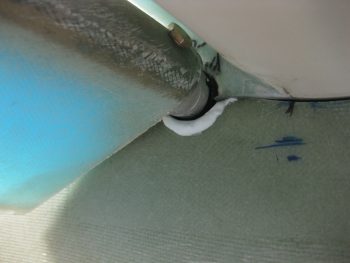
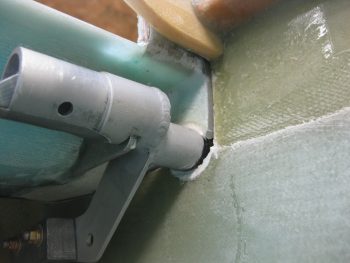
Here’s a closeup of the left side immediately prior to me setting the canard in place.
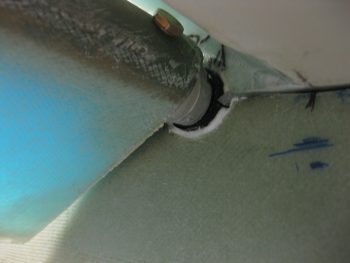
And this is the left side immediately after I set the canard in place. Note the flocro oozing out of the seam. You can see the same for the right side below.
I then cleaned up the excess flocro from both the left and right sides.
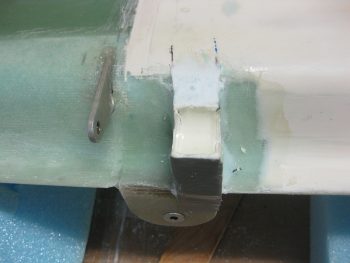
And here’s a couple shots of the inboard torque tube transition points.
With the flocro curing on the mounted canard, I decided to knock out the mounting of the nose tool box. I drilled two #10 mounting holes through the upper tool box mounting hardpoint. I had to ensure to drill the holes inboard just a bit more than I had originally planned to make sure the nutplate assemblies could be mounted properly on the aft side of the Napster bulkhead.
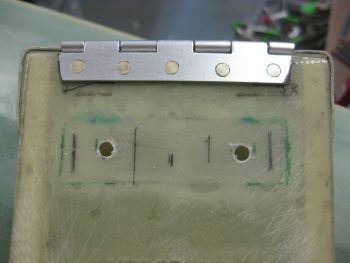
Here’s a shot of all 4 tool box mounting holes.

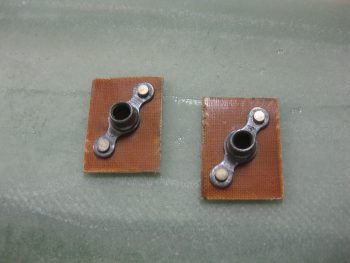
I then made up a couple of K1000-3 nutplate assemblies using 1/16″ phenolic as a base.
I then mounted the tool box on the lower mounting tabs, finalized its position, and marked the upper mounting hole positions using a scribe. Then I drilled the mounting holes through Napster using a #10 bit.
I floxed the nutplate assemblies in place using two AN3 bolts to hold them in position. Then I added a ply of BID over each nutplate assembly.
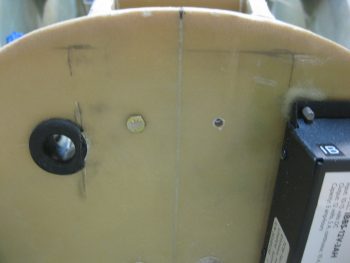
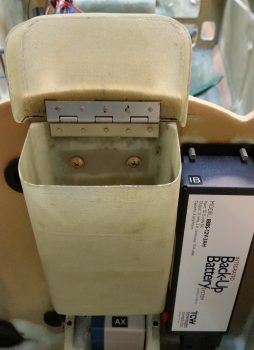
The pic below is actually the last shot I took this evening, but I’m putting it here for a better topic flow. So… here it is. My tool box is officially mounted! I included the IBBS in the pic to show how tight the quarters are in the nose, but so far it all fits.
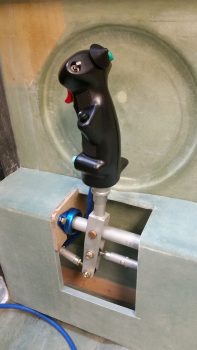
I sort of did a repeat of last night, only now with both the canard and tool box composite stuff curing, I set my sites on making an adapter for the Infinity Stick Grip. Technically, I’m making an adapter for the adapter since JD makes these adapters for 3/4″ OD tubes. The tubing on the top of the Cozy Girrrls’ control assembly is 5/8″ (plans dimension), so another adapter is required to get the Infinity stick grip mounted onto the control stick assembly.
As with many things on this build, in prep for these steps over the last few days I had to Google some of this stuff. I got the specific information on how this adapter is made from a forum post from Bernie Siu. I can’t find it just now, and I tried going to his website, but it is out there.
I first took the plans identified 5.2″ piece of 3/4″x0.58″ walled 6061T6 aluminum tubing and cut it down so only 0.6″ hung out the bottom of the Infinity Aerospace adapter (standing on end in the pic below)… making the overall length of my new adapter about 2.75″.
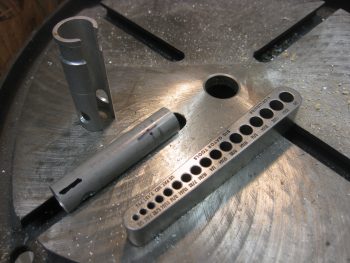
Then, as per JD’s instructions, I drilled a 29/64″ hole all the way through the new adapter to match the 29/64″ hole in the Infinity adapter. I then drilled two more 29/64″ holes perpendicular to the first set of holes & only on one side of the tube. I then essentially connected those holes to make a wide slot down the center of the tube. This slot allows the multi-wired stick grip cable to transition through these adapters. Unfortunately, my Dremel tool died so I had to cut the entire slot sides by hand!
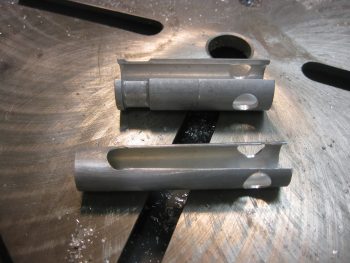
I needed 8 hands to keep the innards of the control stick from flying out everywhere when I mounted the adapters inside the stick, so unfortunately I didn’t get any pics of that insane process. As you may be able to tell below, the stock adapter slides around the adapter that I made this afternoon, which in turn slides onto the control stick assembly.
Below you can see that the control stick grip is just too high. I have to cut that same size channel into the bottom control stick assembly in order to get the cable out of the control stick without pinching it. That should let me get the correct stick height dialed in. In addition, I’l have to sit inside the front seat and test out the control stick in order to “clock it” correctly to know exactly where the front of the stick will face. This will determine precisely where I need to cut the channel in the bottom control stick assembly.
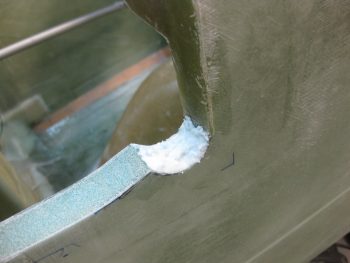
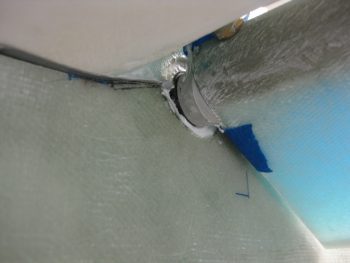
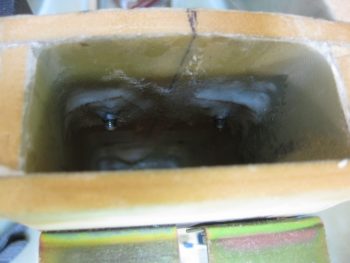
After all my control stick adapter shenanigans, my flocro was pretty much cured so I popped the canard off the fuselage and found this . . .
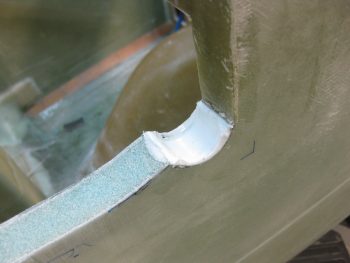
and this. Not too shabby if I say so myself. And moreover, I say: “Goodbye cold air!”
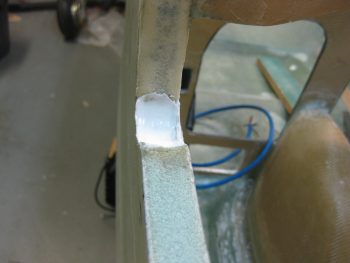
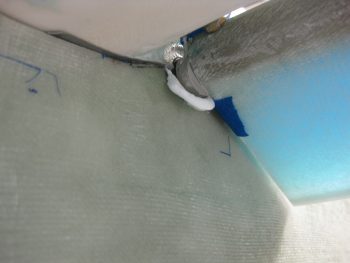
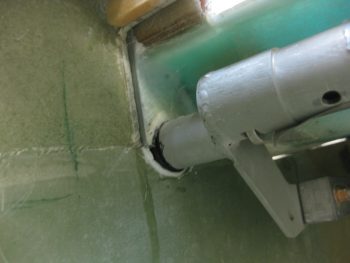
Below is the canard side after I pulled the electrical tape off the elevators. You can see the micro did a great job on this side as well. It all still needs to be cleaned up & tweaked, but I’m glad this is starting to wrap up (a slight pun).
Next I’ll mount the elevators full board with the center spool tube and all. Then I plan on configuring the control system for pitch and linking up the elevator control rod to the main control system. I’ll also try to repair my Dremel Tool so I cut that channel in the control stick and get the Infinity stick grip mounted as well..