
Today I started out by flipping the engine back upright, reinstalling the desiccant plugs and tying in the desiccant dry air lines to be pumped into the engine. I had flipped the engine upside down last week to let the camshaft soak in oil for a few days.
I then set about to finish creating a unique socket for my Mill’s power draw bar, to allow for quick change outs of the milling machine tools. As I mentioned previously, the mill’s power draw bar uses a 12mm square nut that I mistakenly thought I could use a 12mm 12-point socket on to drive with a 3/8″-drive impact wrench.
I was wrong. The 12-point 12mm socket simply did NOT fit on the 12mm square draw bar nut. Since I had the 12-point 12mm 3/8″ drive on hand, I simply spent a few bucks more to buy a 1/2″ drive socket, cut the business end of the sockets off which left me with the 3/8″ square drive side on one, and the 1/2″ square drive on the other.
I then just needed to join them together to make one tool. That’s where this pic below comes into play . . .
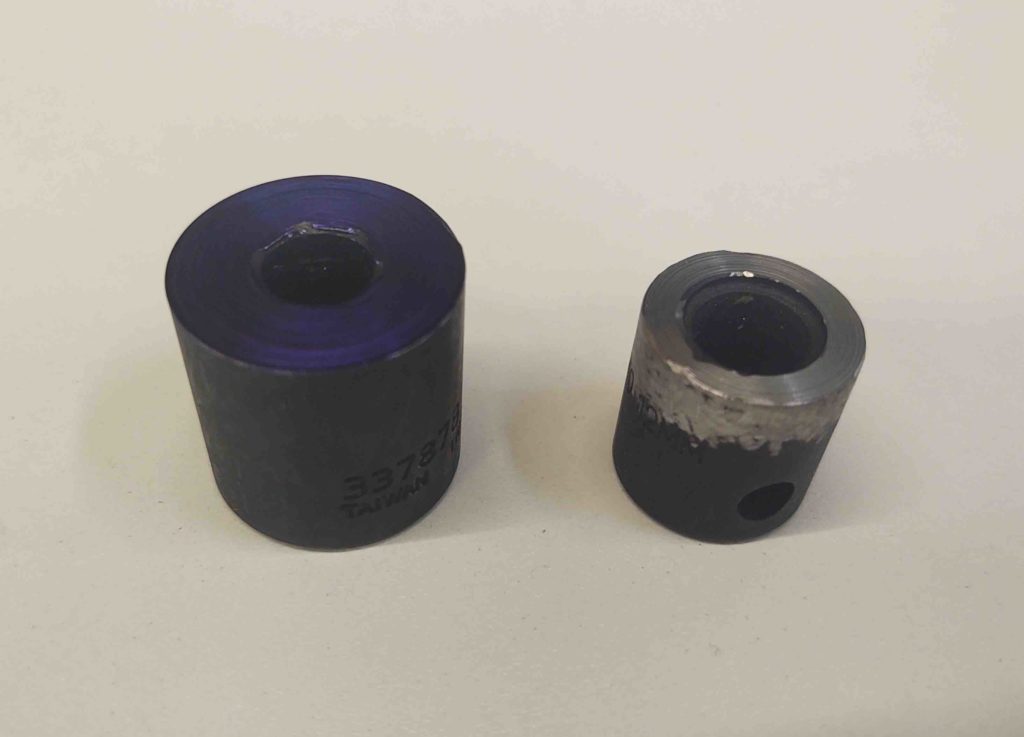
I determined the diameter of the small socket and subtracted it from the bigger socket, I then used the remaining value (halved, not as in my quick first swag below which was not correct) to scribe an alignment mark on the face of the larger socket.
After spending a good little chunk of time aligning the two sockets, I then ensured they were securely clamped together.
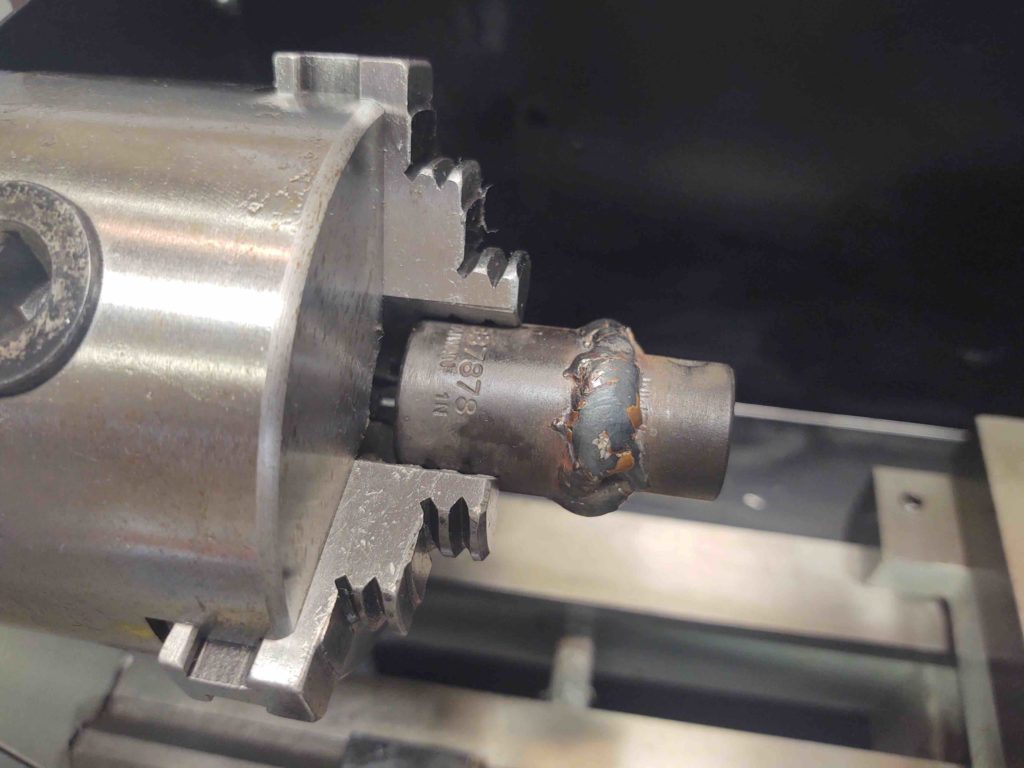
And then –with surprisingly even more Argon/CO2 mix left in my MIG welder gas tank– I welded the 2 socket pieces together.
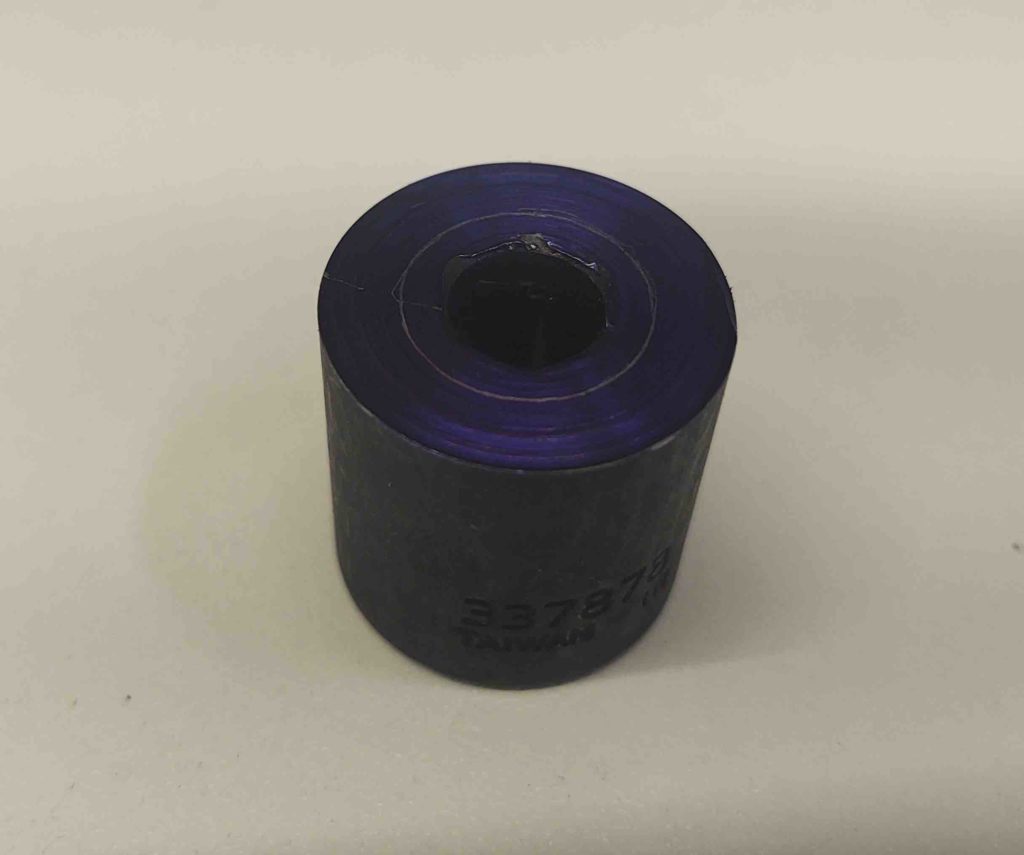
After the new welded oddball socket cooled, I chucked it up in the lathe to clean it up. Being a newb on the lathe, I was curious how much nicer I could actually make this thing look.
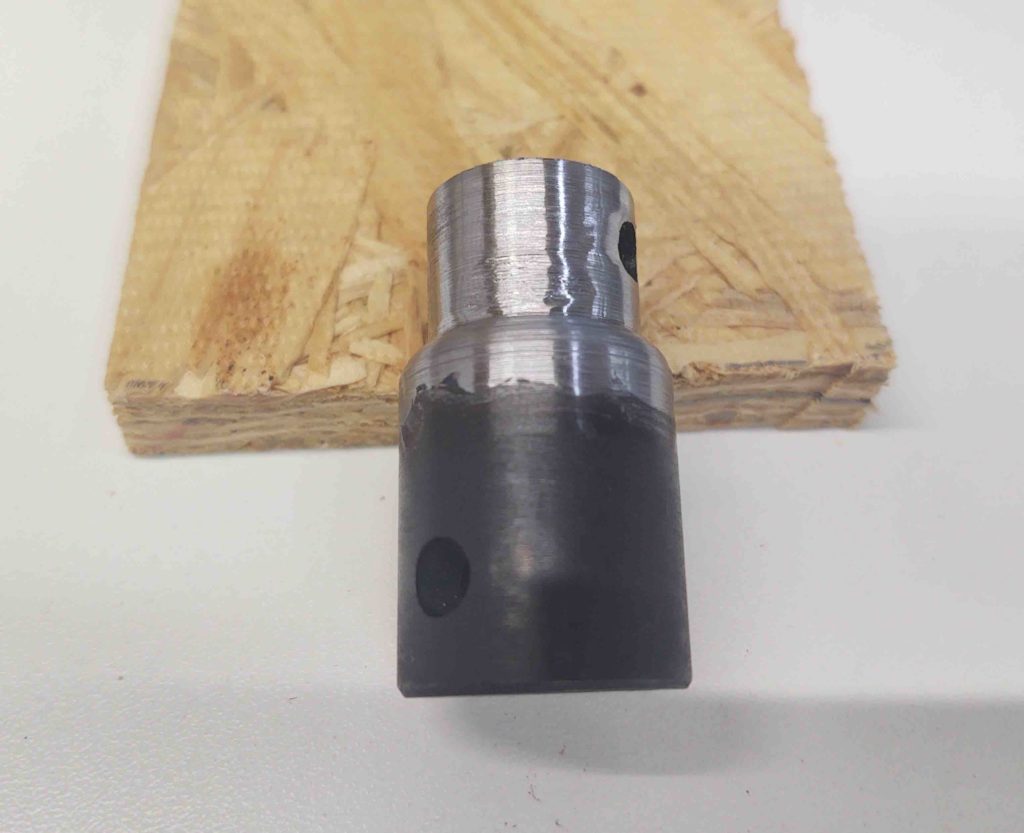
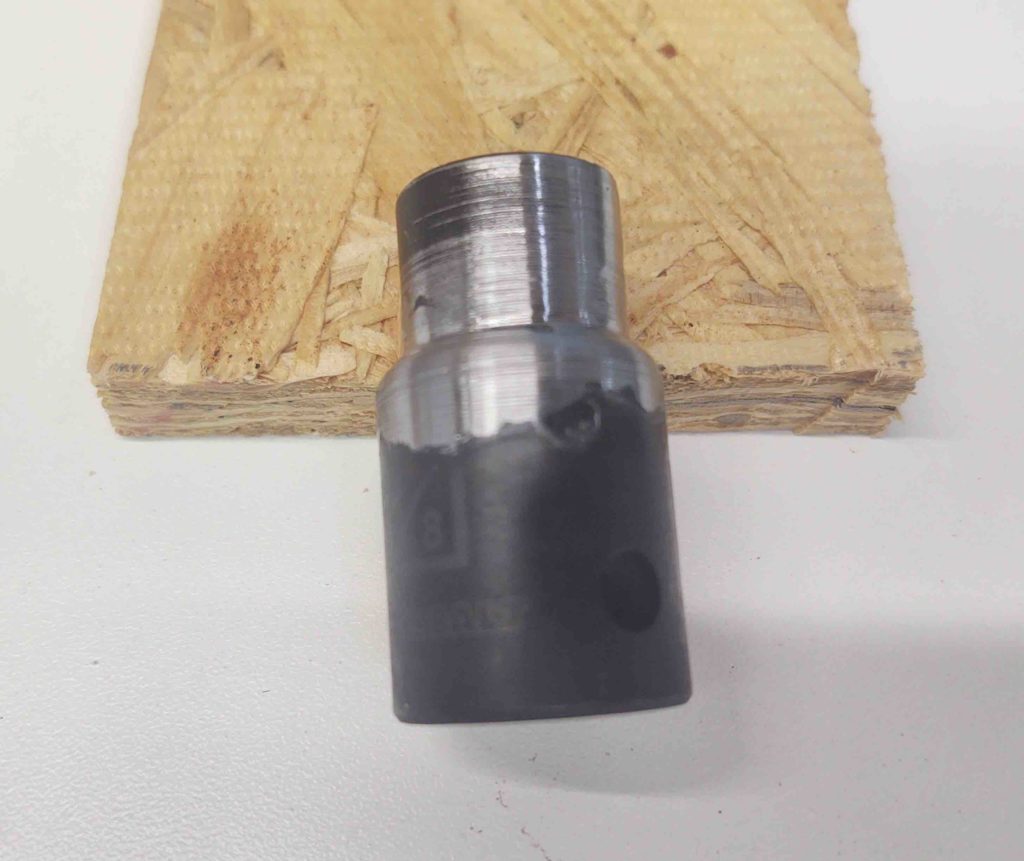
Not too shabby IMO. Not a superior part, but definitely good enough to get the job done and also not look hideous while doing it. I have to say I’m loving this lathe, and can’t believe I’ve gone so long without using it!
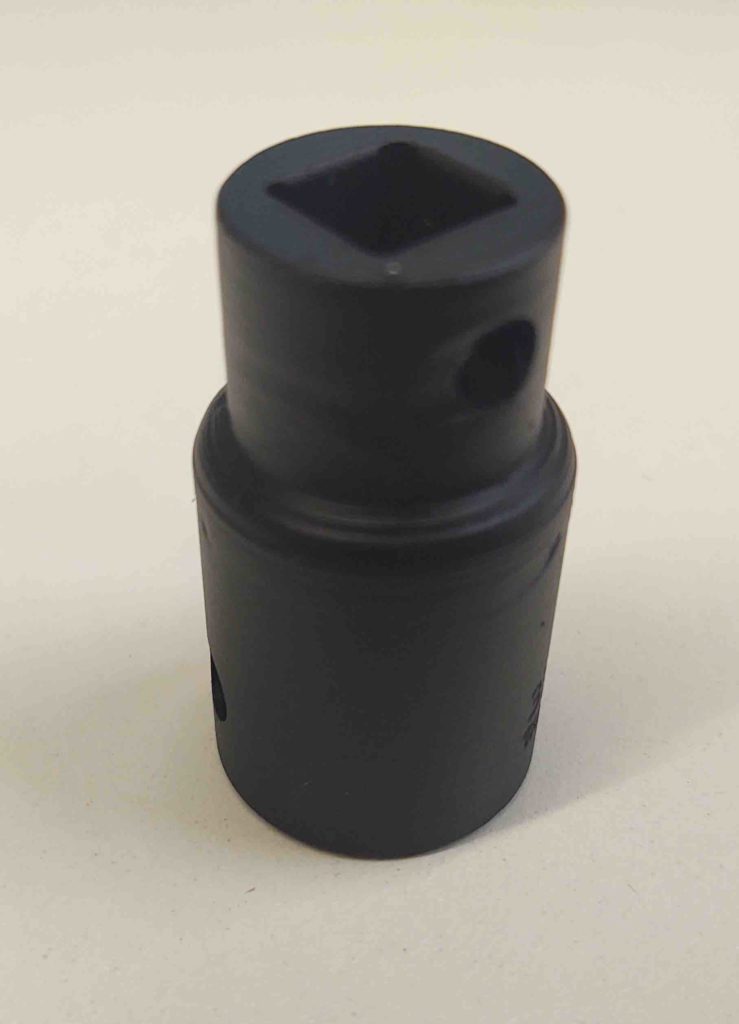
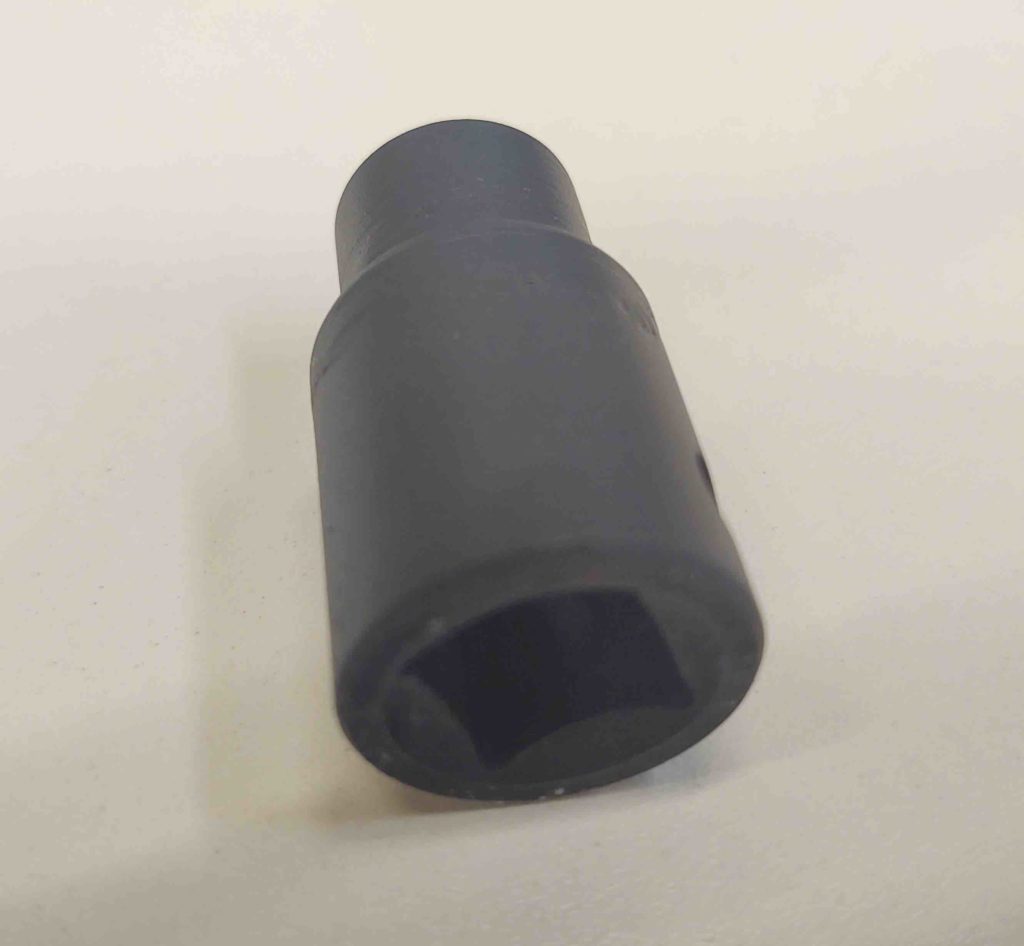
The pics show the different sides of the new mill power draw bar socket.
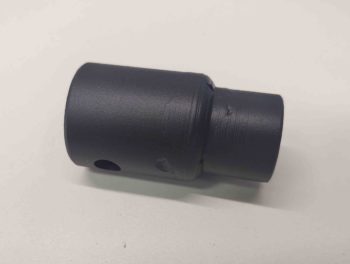
I then painted it black. Here it is a few hours later after the paint was dry.
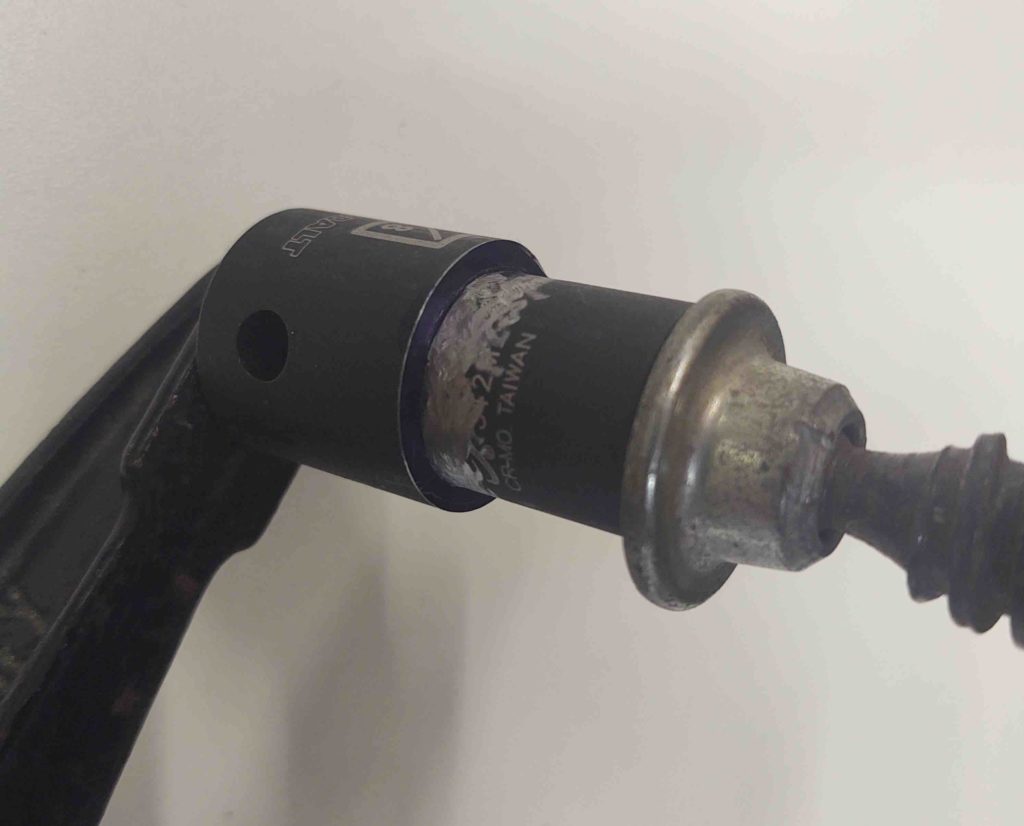
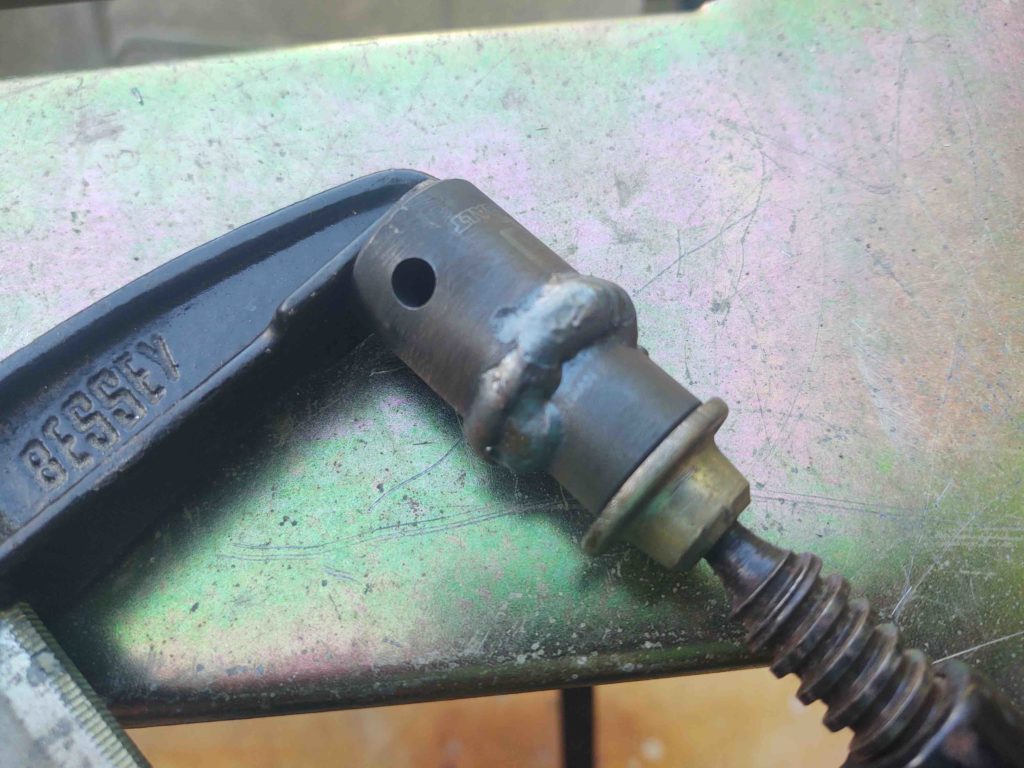
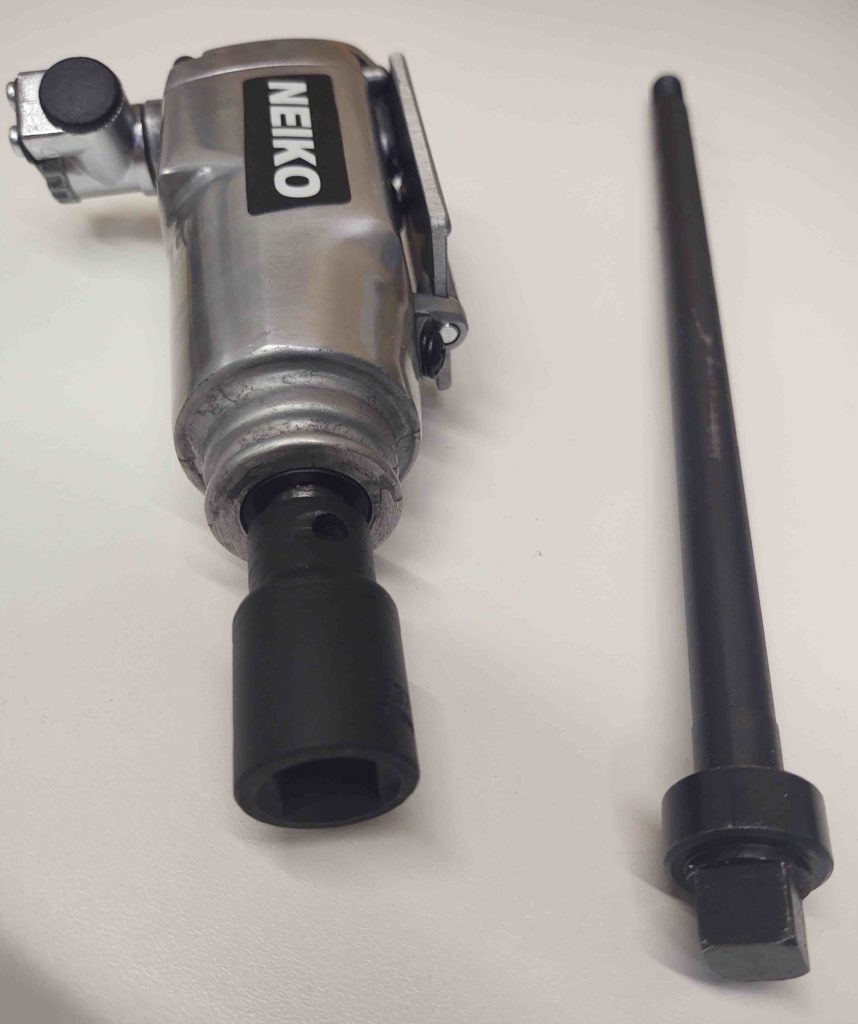
Here’s the new mill power draw bar socket attached to the 3/8″ drive impact wrench that will drive the quick tool change process for my mill. Lying next to the impact wrench is the mill’s draw bar, as you can the square 12mm nut on top.
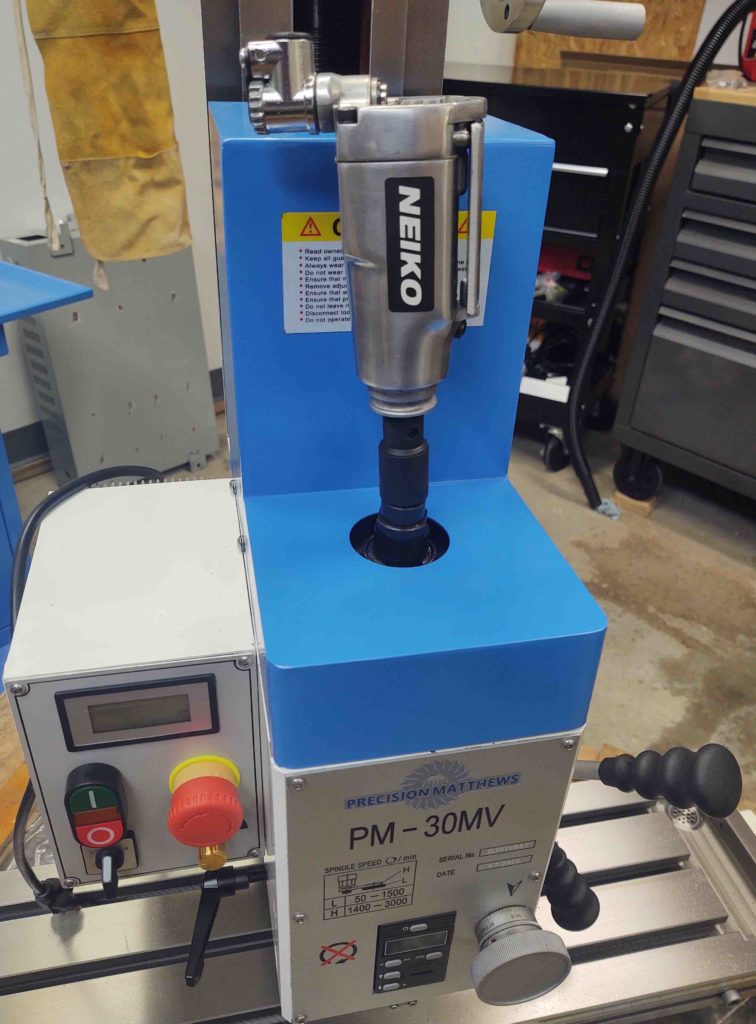
Here we have a quick mock-up of how this new socket will interface on both sides… to allow loosening and tightening the draw bar to release one tool and then tighten up the next tool during the milling process.
I’m very happy with this new lathe capability in the shop, and how this socket came out. With mini-projects like this it will help get me in the saddle quicker to tackle parts for the actual airplane.
As a point of note, as the new power draw bar socket was drying after having been painted, I worked on insulating the last big set of shop doors for a couple of hours. So just another couple of hours more and the insulation on those big doors should be complete.