
So here’s another week in review on the workshop. I’m moving forward as quickly as possible and putting a lot of long hours in each day to get this thing done. I’m happy with my progress, however, I am a bit frustrated with how long this workshop upgrade and renovation is taking. Believe me, I’m not being a perfectionist in updating this shop, I just need some minimum standards to be met in pressing forward with the plane build.
The weather has been beautiful lately in the high 50’s to mid 60’s and normally either overcast or sunny, with a bit of rain here and there. However, that appears to be changing and the real winter we should be experiencing is creeping in, with temps in the 30s at night and 40s during the day. Where I thought I might squeak by without getting all the walls finished (insulated with wall board installed) in the shop, I now realize that that’s simply not workable.
So the challenge in insulating the walls with the foam and then covering with wallboard is that although the workshop is overall structurally sound, not one darn thing in this workshop is square. That means except for the large 4×8′ panels, all around them every piece is a custom cut… and not as in say a 12″ x 38″ rectangle, but more along the lines of a parallelogram, etc. A royal pain and a total schedule-buster.
For example, on the back left wall the bottom 2 cross boards were fairly parallel (within an inch, still an issue), but then the top cross boards fan out from the right (aft) side towards the front side, so every long cut is an angle!
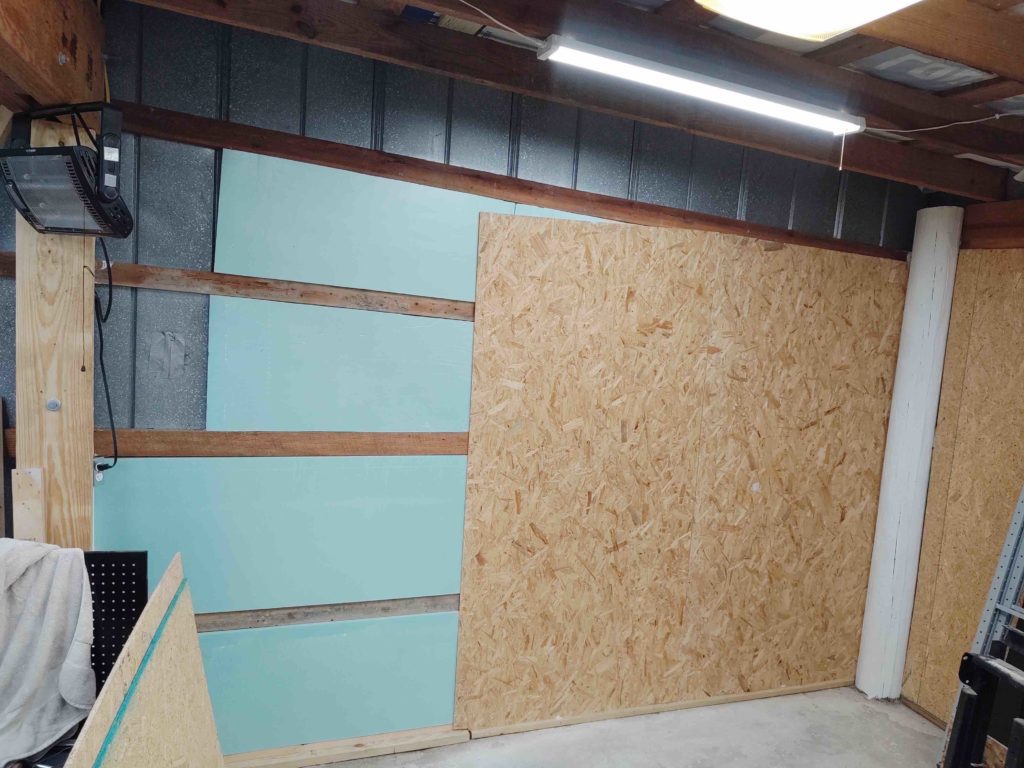
Nonetheless, I of course trudged through it and got this wall section completed.
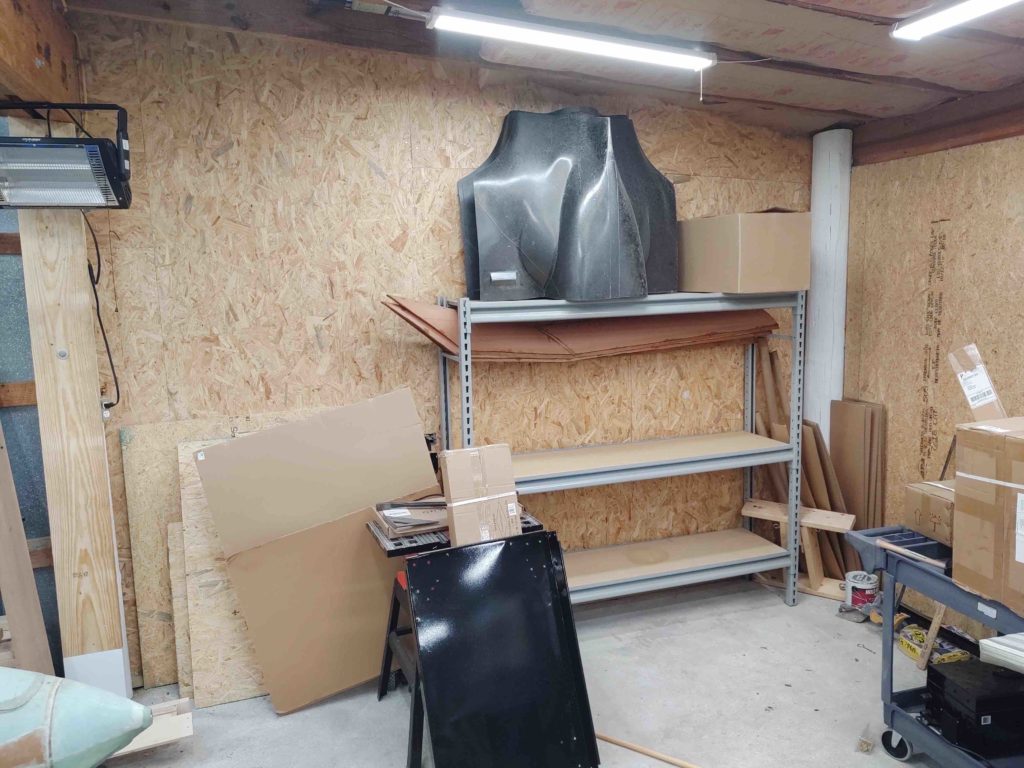
Note that part of my consolidation of STUFF that I am finally able to do after all these years is to incorporate items I own that I have had in storage for years. I personally haven’t used the industrial 3 level shelf (gray, in pic below) that the cowlings are sitting on since since July of 2011….just a few months after I started this build!
Also note that I have one of my heaters installed below the big beam on the left and plugged in to the new electrical plug I ran and installed, so a lot of little details and organization that I haven’t previously reported on is all happening in the background.
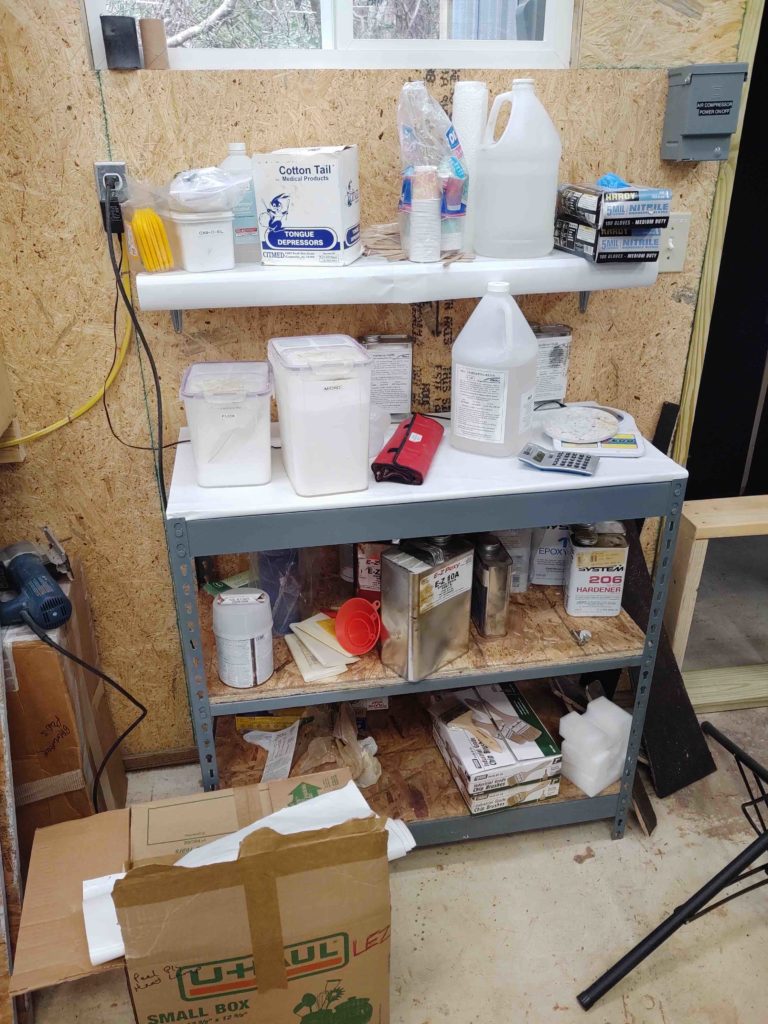
Part of getting the workshop online has been slowly migrating a lot of build-related stuff out of my rec room in the house to the workshop. Another week or so and the lion’s share of all the LEZ stuff in the house should be out in the shop. That of course immensely helps in the organization of my house in general.
Case in point, all this epoxy stuff below was taking up space in my rec room, and now is in place at the epoxy station. Also, before I installed it in the workshop, the glass storage box/cutting table was sitting in my garage, taking up a good bit of space and in the way… so I’m slowly getting organized and it feels like (finally) that it’s starting to accelerate a bit every day.
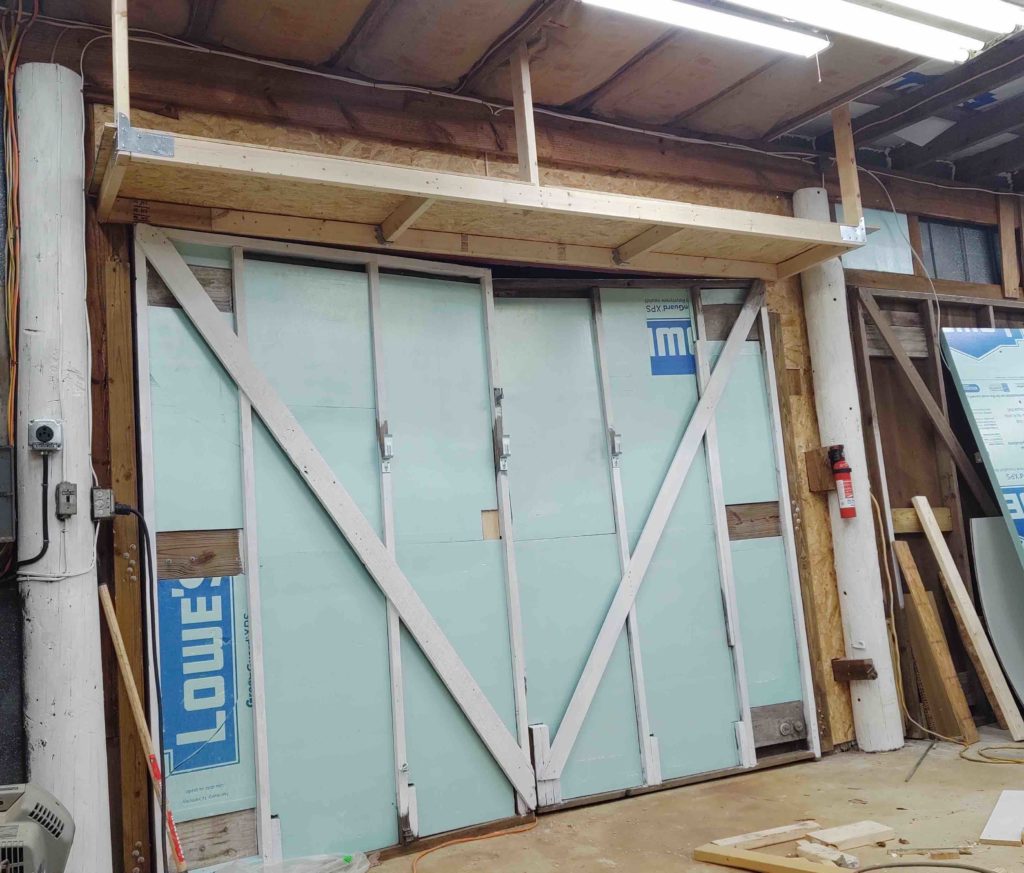
One of my recent tasks was the front center door area between the white poles. I had already insulated this area and installed wallboard, except for the doors, which I then insulated with an initial 2″ thick blue-green foam. A top, second layer of 1″ foam with the reflective foil surface will be the final surface (see below). This should keep it insulated well enough and still be lightweight.
If you look up high on each side of the door, you can see the “outriggers” coming aft and dropdown supports from the ceiling for what is a 2′ deep and 12′ wide shelf right above the door. I’ll do the same thing for the other big door, which will allow me to store all the bigger, bulkier, lighter stuff like the ton of blue foam I have on hand, baggage pods, etc.
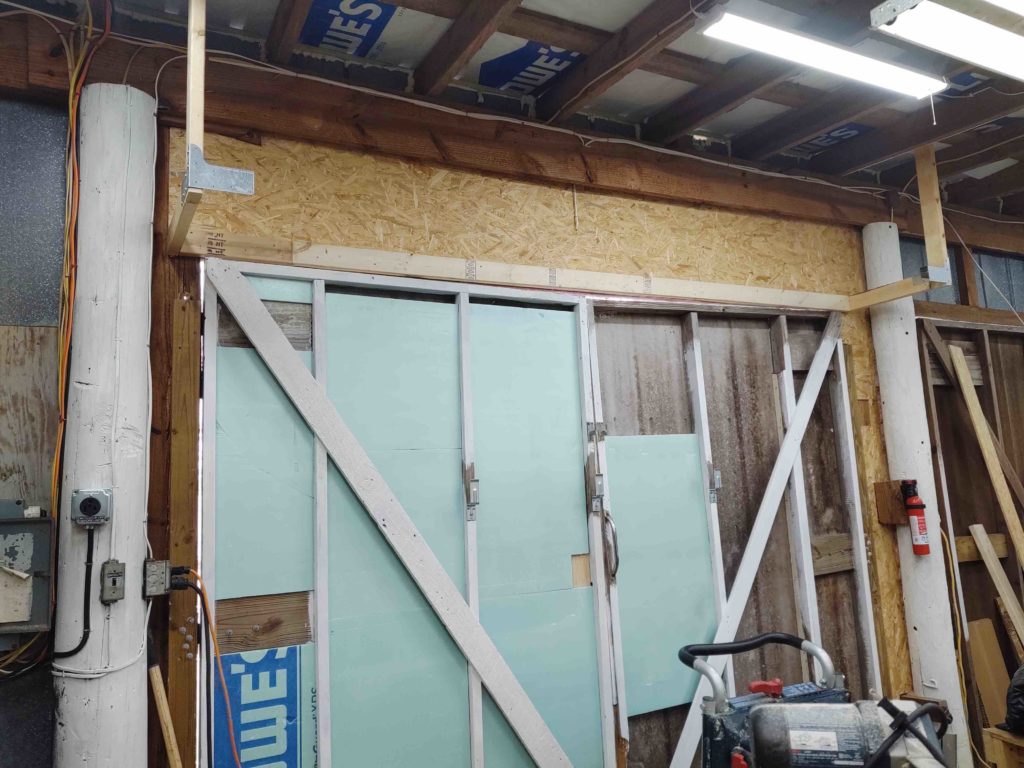
If you look closely in the center in the pic above, coming down from the big beam is some wiring that I just added that will be for one of the outdoor lights I just ordered off of eBay. I have a hard time working at night since I don’t have enough lighting in front of the workshop. Although the days are slowly getting longer, this should help in the near term in that I’ll have a light over every door, and I plan on adding another big light at the far front corner (right in this pic) to extend my night ops out front significantly, if required… since I like to cut all my wood, etc. out front so I don’t make a mess in the shop.
Also note on the right of the door I have a fire extinguisher mounted, and to the left is the big 240V/50A circuit (black cable) for all my welders that I added from the main panel.
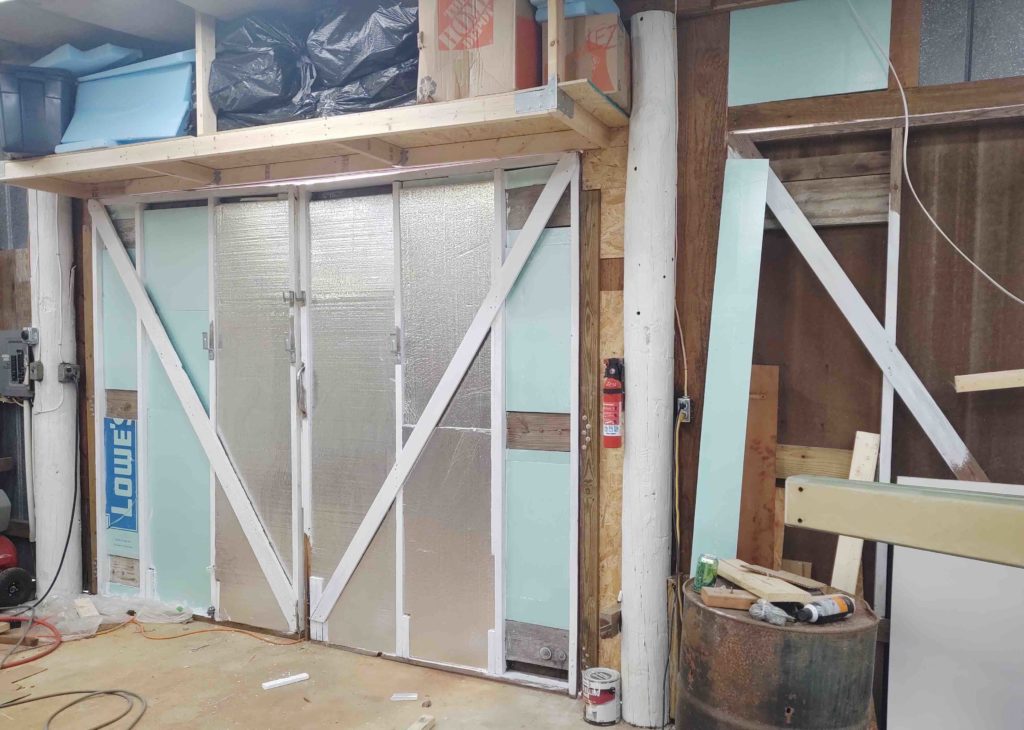
Here I have all the 2″ thick foam insulation in the center big door. Plus the over-door shelf is finished (after I finished insulating the ceiling above it).
I’m in the process of adding the final 1″ thick foam layer with the foil heat reflector. This really does help as it’s starting to get much colder here and I can feel a huge difference standing/working in front of these doors vs. the bare ones to the right.
Also, I pulled all the spare blue wing foam (minus the one big canopy crate full of it) out of my house rec room and now have it all stored on this over-door shelf.
I’m also pretty close to having the entire ceiling insulated as well…. about 80%. I’ve still got a few rows to do on the far end and some half insulation batts to put in along the front wall.
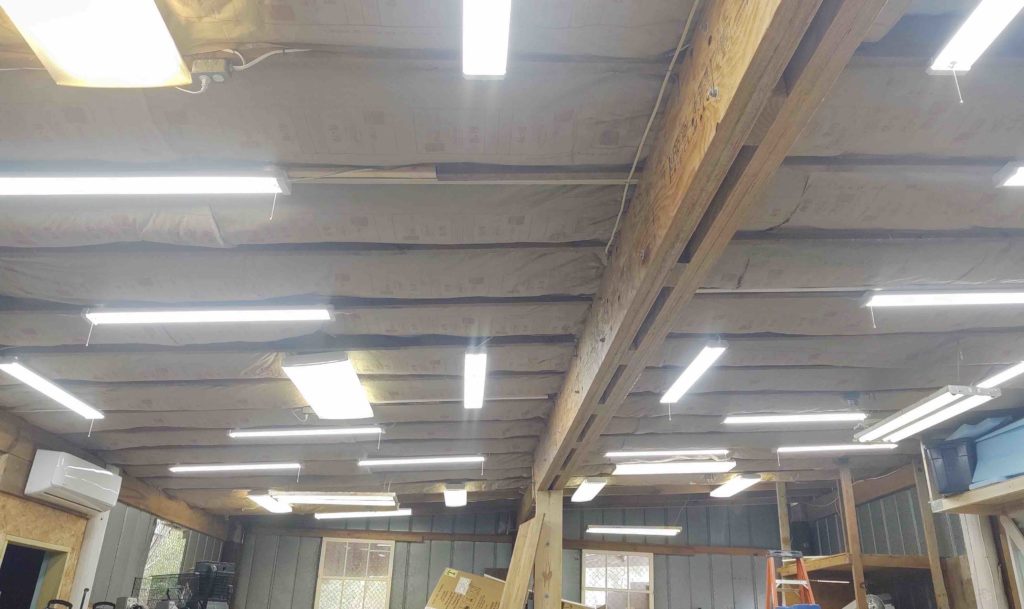
Over the next couple of days I’ll finish up the ceiling insulation as I work on the back and side corner walls, lower left in pic above.
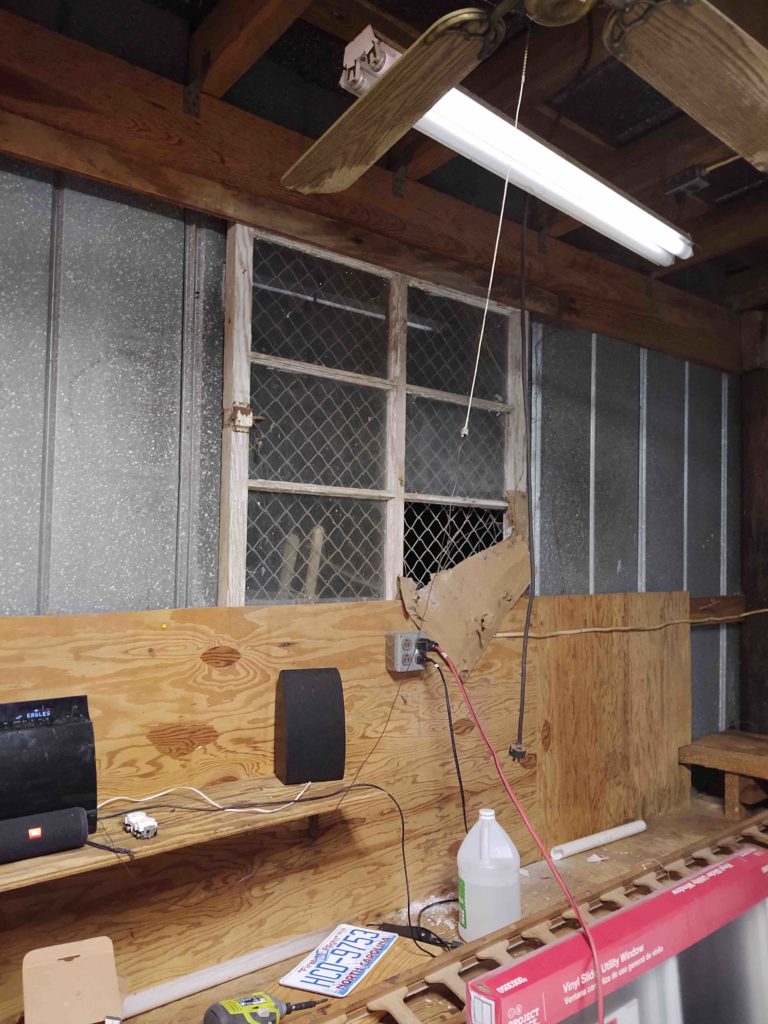
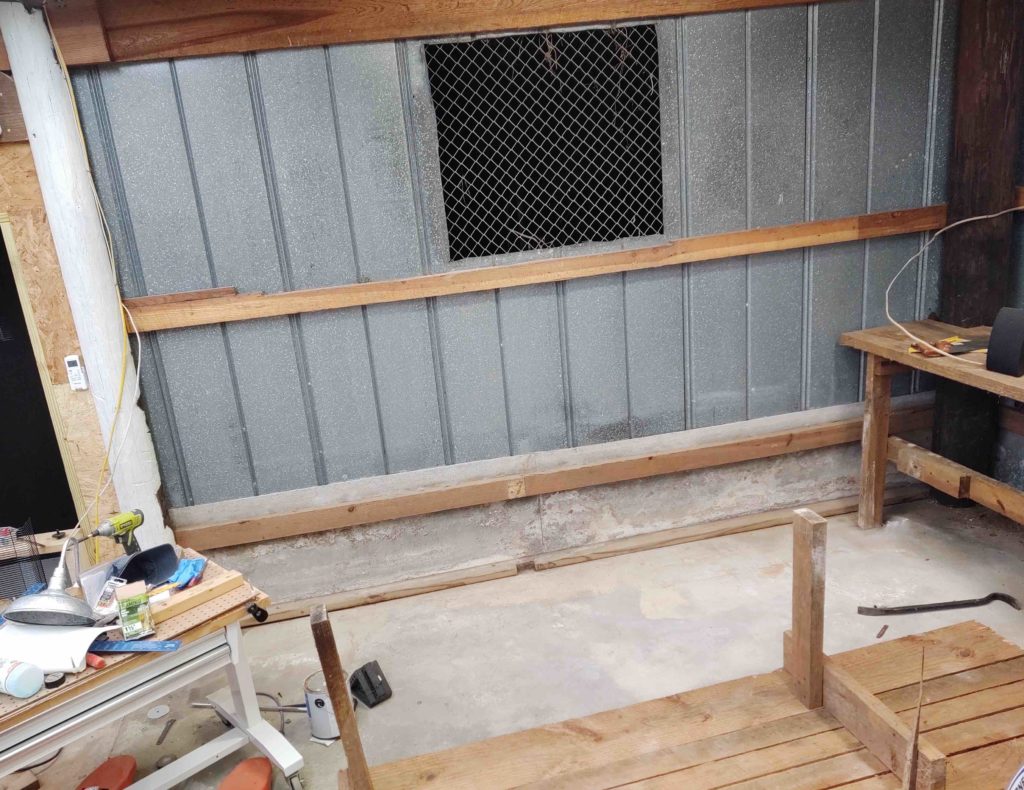
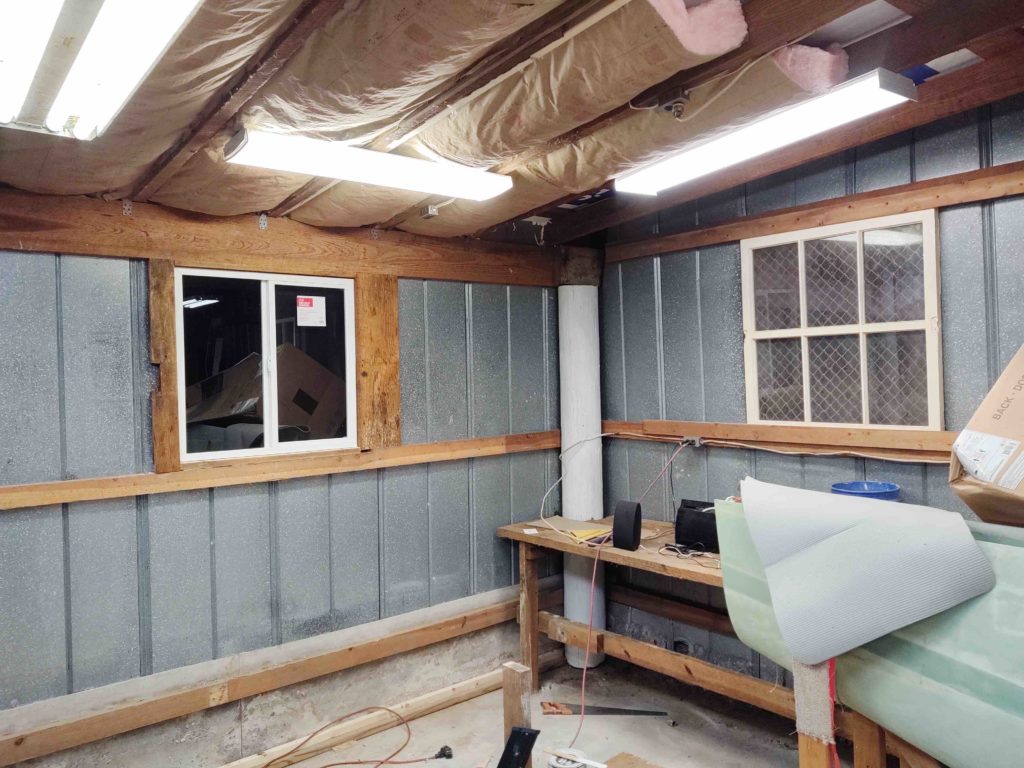
Speaking of the back right corner, here’ a couple older pics of the pre-existing back wall (low) workbench that was in place when I bought the house.
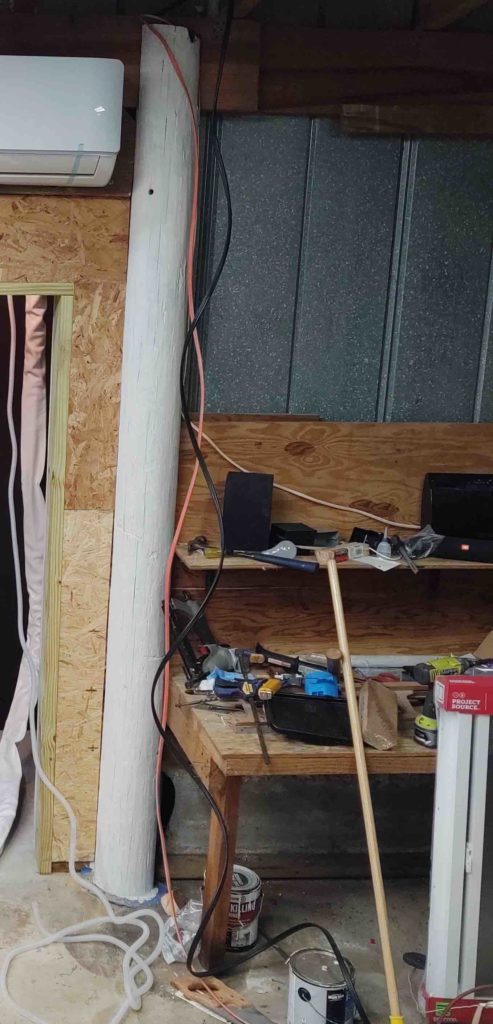
I removed the old back-wall workbench and will use just the top for a new workbench underneath the white peg board on the back left wall of the shop.
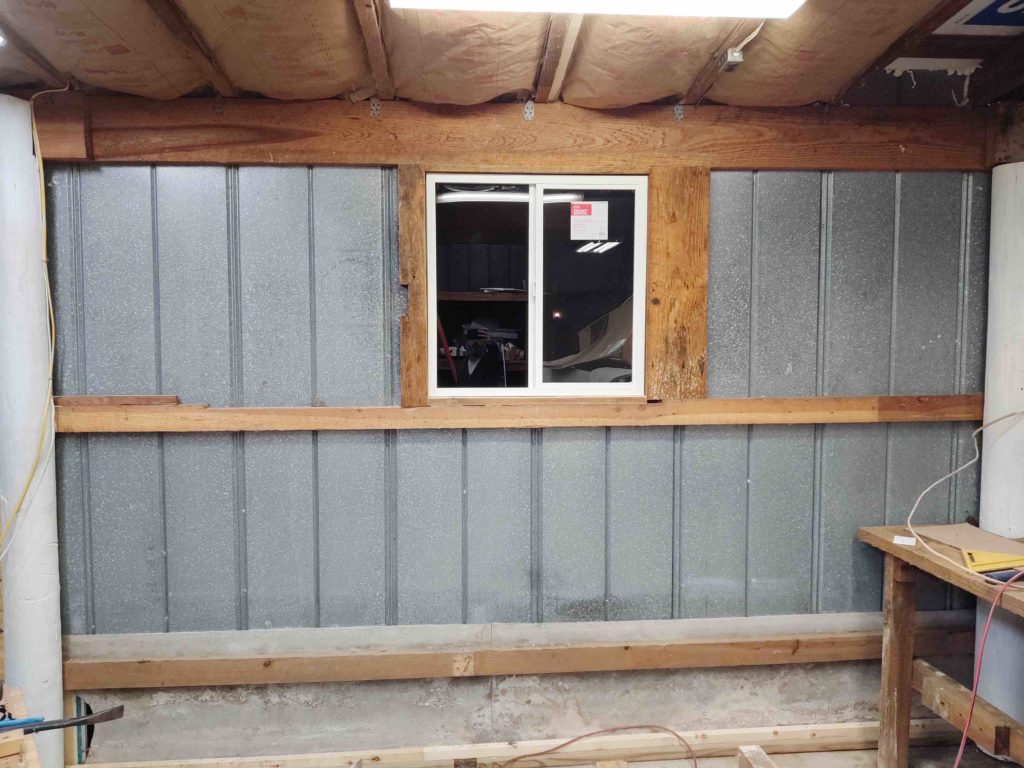
About centered in front of this window will be where I install my milling machine… hard mounted to the shop floor.
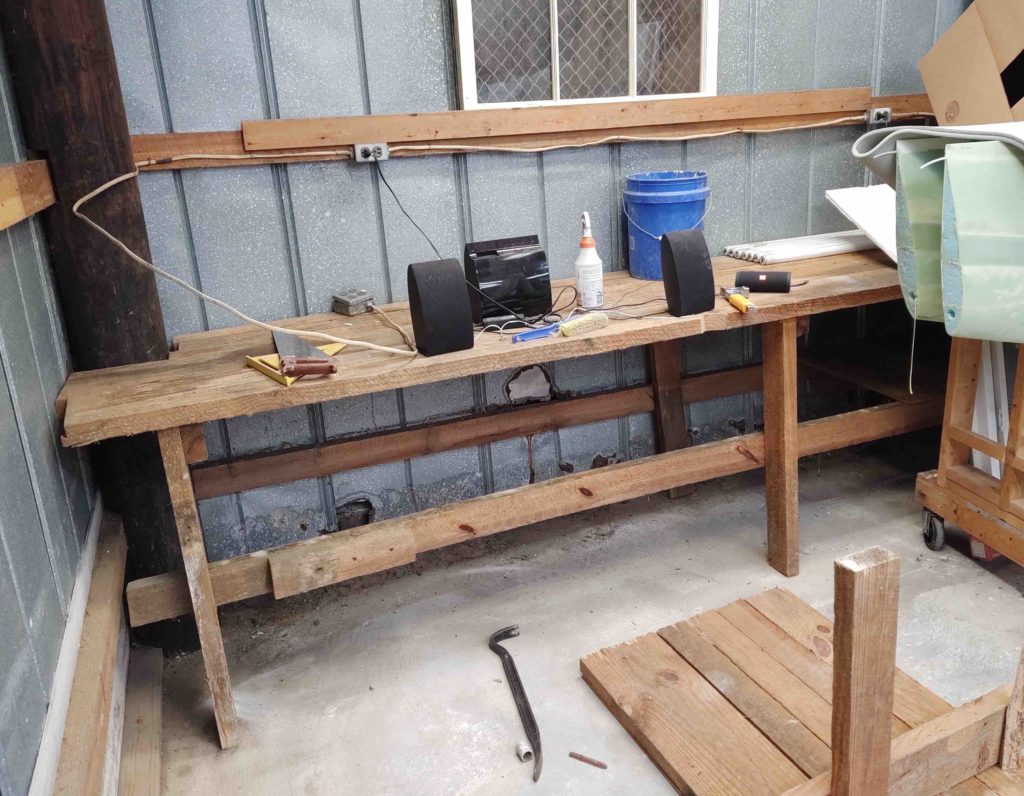
On the wall to the right of the back wall section above, will be where I place my new big gray roll-around cabinet that the lathe will be mounted on top of. The lathe cabinet will be mostly centered underneath this side window (which will probably get replaced also), so this section of workbench from about where the edge (ends) of the wings are in the pic to the corner will get removed. Having this big section of workbench removed will also make installing the 2″ foam insulation much easier.
Here I’ve repurposed some of the old rough-hewn wood from the old workbench as side framing supports for the new window. I was planning on putting cabinets on the right side of the window so I used a 2×10 for the window side frame to also serve as support to attach the cabinet. After I installed the window and was measuring things out, I decided to put cabinets on the left side as well…. so, oops! Now I’ll need to add in some more structural support wood to secure the cabinets to on the left side as well.
Within the next day or so I plan on getting the 2″ foam insulation installed on this back wall section, which will require that I first remove the 8-9′ or so of the right wall bench.
Once I get the back wall insulated and covered with wall board, I will then work to finish up the right back sidewall.
Also note that I’ve painted the back corner pole with white primer to contain the quite strong tar smell of these support poles.
I had told my buddy Dave B. that I was trying to call a hard switchover date of around 21 Jan from the workshop being the priority to the airplane build being the priority and then finishing up the shop where I could (say, in-between layups). However, I made that statement right before the weather turned chilly. I will certainly try to make my hard cutoff date, but may have to extend it a day or two… to at least install a good bit of the 2″ foam board since the weather is now turning colder.
I simply can’t do layups of course if I can’t maintain a good shop temp. Regardless, I will continue pressing forward on the shop… should be done soon. Just, not soon enough!