
I started off today by using raw West epoxy to fill the decent amount of pin holes I had in all the components I shot with epoxy primer yesterday. My method was to fill all the holes on one side of, say, the elevator, let that cure, and then flip it to do the other side.
I’ll note that I also had a number of things to finish up in prep for the trip out west that Jess and are leaving for tomorrow.
I then grabbed some pics of my canard mounting for shooting it with primer and the upcoming painting. I bolted hinges to the canard mounting tabs and then screwed the other half of the hinges to the ends of scrap 2×4 boards.
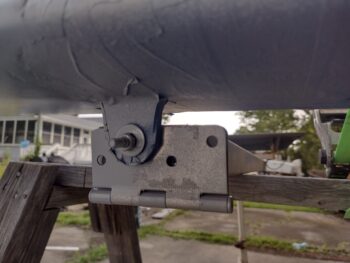 I then mounted the 2x4s to the top of sawhorse with the canard out away from the sawhorse enough so that it wouldn’t hit the sawhorse legs when I flipped the canard inverted for painting the bottom side.
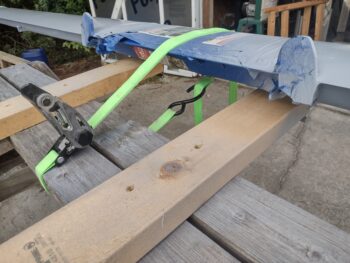
I attached the tie-down strap last night to keep the canard secured in the upright position during its overnight cure, just in case any wind gusts kicked up.
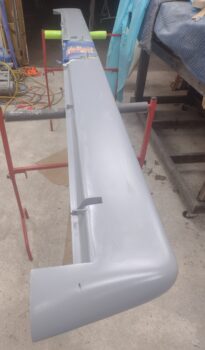
 I then removed the canard from its paint mounting contraption and took it into the shop. Here’s the cured bottom side of the canard. Although I know I have to refine the surface of all these primed parts, it still is motivating to see them all in one color… looking good IMO!
 I then mounted the canard, which required just a tad bit of sanding on the left sidewall opening to allow the canard to slide into place.
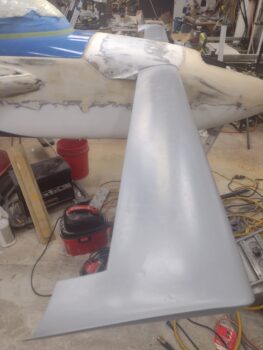
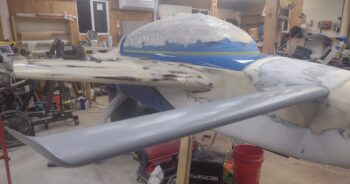 Here’s another shot of the primered canard mounted on the bird with the aft nose/ avionics cover in place.
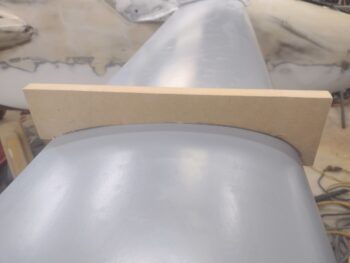
 I did some quick checks with my canard templates and both sides are looking very good! Here’s the topside template.
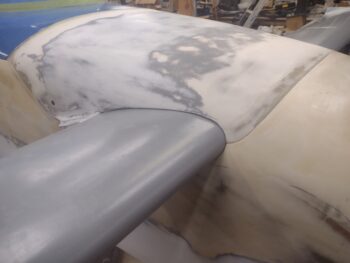
 And here is the interface on the right side canard root with the nose and the aft nose avionics cover (I will close up that gap between canard top surface and nose cover opening edge).
 I also did a fair bit of the initial sanding on the parts I primered, but didn’t grab any pics of those tonight… I’ll add them to tomorrow’s blog post.
Pressing forward!