Prepping the Shop!

Shop Prep Begins!

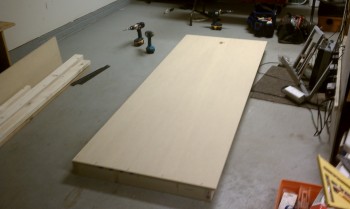
13 March 2011 — Once I finished my fuselage mockup, and had checked & ensured that whatever specialized parts there were that I wouldn’t be able build or make would be available to buy, I started prepping the shop for the build.  The first order of business was a decent work bench along the wall.  I made this one collapsible just in case I needed more space.

Sidewall Work Bench

Sidewall (collapsible) workbench

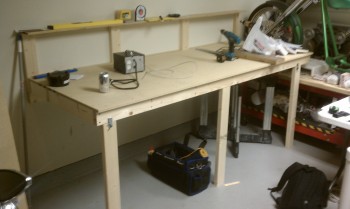
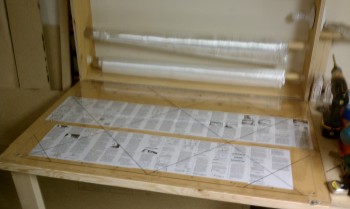
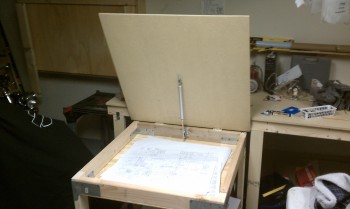
Once I got the workbench in place, I started in on the flip-down glass cutting table.  The glass cutting table also serves as the glass roll storage cabinet.  I think it was the Cozy Girrrls who showed this on their site, along with the thermostat used to turn a light bulb on at a certain temp to keep moisture out of the glass cabinet.  I put the flip down portion of the glass table so that it would come down right next to and be even with the sidewall workbench I had just built.

Glass cutting table/Glass storage

Glass Cutting Table

Glass cutting table (fold up)


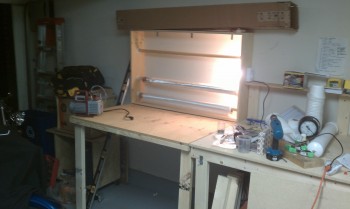
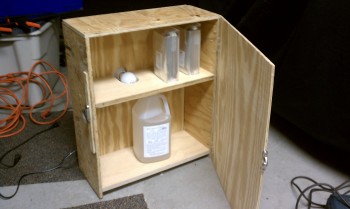
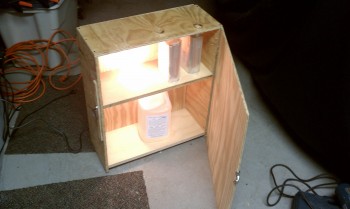
Next, I needed a hotbox to store the epoxy and hardener in when not in use.  The warmer the epoxy and hardener is, just about like every other liquid, the runnier it gets and the easier & faster it wets out the fiberglass strands in a layup.  BTW, most of the components that I made on this page were made out of scrap lumber I had laying around.

Epoxy & Hardener Hotbox

Epoxy & Hardener Hotbox

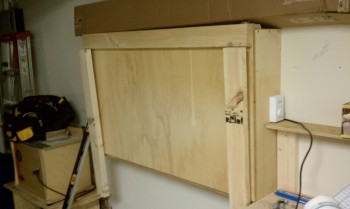
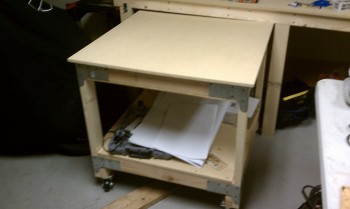
Besides the wall-mounted workbench, I wanted one that was portable and could roll around.  So I made this guy below.  It had a large enough table top to be used extensively for glassing small to medium sized pieces, and it had storage underneath.  Also, I made the top flip up and it was the perfect size for storing the plan’s A-pages (the big drawings) inside the compartment just below the flip up top.

Roll-around work bench

Roll-around - Plans storage

Besides the main 13′ long work bench (spelled out in Chapter 3), this was all there was for building the shop’s major working surfaces.

Recent Posts

Project Update

Hi Folks, 

With the engine, exhaust pipes and cowling in my rear view mirror (I still need to get my exhaust pipe brackets final welded) I’m now in the final micro-finishing stage of this project. 

I had planned on pulling the engine early to start the micro and subsequent sanding, but due to the seasonal threatening cold weather, I needed to waste zero time getting onto the micro finishing.  Moreover, I simply taped up the plexiglass and seams around the canopy and am using that as my micro dust block for the cockpit.

To complete the micro finish on the bird I’ll need to have the canopy set in final position, so once the major wing and strake micro finish is complete, I’ll be knocking out the final canopy latch install.  Then the small remainder nose and forward fuselage micro completed.

Very soon after that I’ll be ready to pull the engine, cut and install the Titanium firewall and finalize the micro-finished top side of the bird to paint. 


  1. Chapter 18/22 – Helluva way to build! Leave a reply
  2. Chapter 18/22 – Canopy latch CLOSE! Leave a reply
  3. Chapter 18 – Canopy latch in focus Leave a reply
  4. Chapter 18 – Canopy latch center block Leave a reply
  5. Chapter 25 – Cowlings ready! Leave a reply
  6. Chapter 25 – Cowls are Close! Leave a reply
  7. Chapter 18/25 – Canopy handle milled Leave a reply
  8. Chapter 18/25 – Cowl-o-sthenics! Leave a reply
  9. Chapter 18/25 – Canopy latch handle Leave a reply