
Chapter 25 – Finishing Elevators
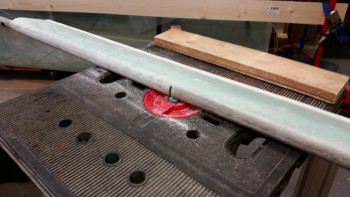
8 October 2015 – After I applied the third coat on each side, I started work on the Left elevator to get it ready for finishing. I double checked the width of the elevator and ended up sanding the trailing edge to get it to a uniform width along the whole length of the elevator. The outboard width of the elevator was 4.578″ inches wide while the inboard was 4.624″ wide. After some very minor sanding, focusing on the inner 2/3rds of the elevator, I got the very inboard edge right at 4.6″. With just a tad bit more sanding, while ensuring my TE was straight, I ended up with the inboard edge at right about 4.597″ …. less than 20 thou along that span is golden for me. Any more sanding was just asking for a “chasing of the numbers” with the result being an elevator that’s too narrow.
I then started sanding then entire front nose area & top of the elevator. Since I got the elevator foam cores from Feather Light, and since Feather Light uses the original Roncz elevator templates, a decent amount of foam along the razor-thin top front edge of the “C” shaped cutout (where the elevator tube is embedded) was broken off or torn away when I micro’d the foam to the elevator tube. I think this is fairly common since using the original template results in that “C” channel just being ever so slightly too narrow for the elevator tube to fit into. In other words, besides either cutting them myself and slightly modifying the channel before hot-wiring the foam, or using Steve’s Eureka CNC elevator cores, the bottom line is that minor carnage on each leading edge of the “C” channel was bound to ensue as the elevator foam is micro’d to the elevator tube.
Why am detailing all of this? Because after glassing the elevator skins, there remains a very slight depression (trough, if you will) along the length of my elevator right at the top junction between elevator tube and foam core. In the picture below, it is the line that is even with the top of the elevator hinge slot, and again, runs the full length of the elevator along the “nose”. Also note in the pic below that the area to the left of the elevator hinge slot is sanded while the area to the right is not.
•••
10 October 2015 – I finished sanding the slight span-wise trough in the right-side elevator in preparation for applying micro along the trough on each elevator.
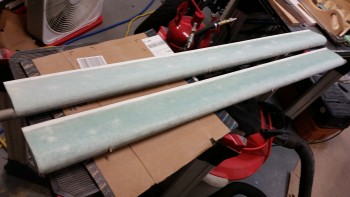
Below is a pic of the applied micro in those troughs. Once the micro is sanded, the elevators will be ready to mounted to the canard.
I waited about 2-1/2 hours and then sanded the micro in the trough while it was in it’s “green” stage. Unfortunately, it was only at the very beginning of the “green” stage and was still a bit more gooey than rubbery. But, since it was late, I sacrificed the already well-used piece of 36-grit sandpaper on my sanding board to plow through the gooeyness and knock down the ridges and lumps on the elevator rounded leading edge.
The next step is to sand smooth the micro I just added to the elevators. After that’s complete I’ll be working on mounting the elevators onto the canard.
•••
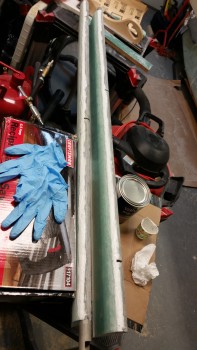
12 October 2015 – I started off today by hitting the cured micro on the elevators with my 36-grit sanding board. After I got the edges somewhat feathered out & the ridges removed, I switched to a piece of 36-grit sandpaper that I simply wrapped around the curve of the front part of the elevators. I then finished up with a few quick passes of 80 grit. Below is a pic showing the comparison of the sanded elevator (top) to the other one still needing sanding. Below that is a shot of both elevators’ sanded top leading edge micro strips.

After sanding the front sides of the elevators, I checked the TE of the Right elevator. Actually, I was checking the width from front to back along the entire span of the elevator just like I had done with the Left elevator. Each end of the elevator was a tad thicker at just over 4.6″ wide, while the center of the elevator was 4.583″ wide. I sanded the elevator on the edge of my long aluminum straight board that has 80 grit sandpaper tacked to it ( I bought this in Germany, and yes, still thinking it’s awesome!). After a few minutes of some very careful sanding, I had the ends narrowed to 4.589″ on one end and 4.587″ on the other. I figured that I would stop while I was close and not muck it up by going too far. Now both my elevator widths are confirmed in specs.
•••
27 January 2016 — Since I took a fair amount of time in rebuilding the elevators, I decided to hold off on the finishing of the elevators at this time. I do strongly feel that getting the parts finished as they’re completed is a good way to go, but since I’m most likely heading back to school in early February to take the Commercial Rating ground school and flight instruction, I want to focus on getting the main gear and associated components installed as a completed milestone before I start back spending a fair amount of time flying.
•••