Chapter 9 — Main Gear Washer Swapout
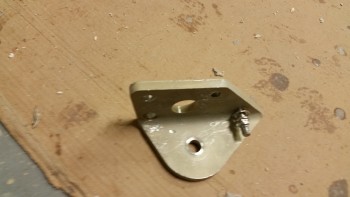
This page covers the mod detailed in a few CSA articles stating that the small AN960-416 washers on the main gear mount bolts should be swapped out with much larger AN970-4 washers to better secure the main gear to the longerons.
28 January 2016 — Today I made the decision to move forward with swapping out the small AN960-416 washers on the landing gear extrusion mounts with the much larger AN970-4 washers as recommended in the CSA newsletter to help spread compression loads better. So I spent over an hour researching details on the washer swap as well as other gear install subjects. I also updated my main gear installation task list, as well as spent some time on resequencing my build steps on the master project plan.
As for the gear mount washers, I do remember that I was frustrated while installing the landing gear mounts with the amount of torque required to get the bolts tight, but the amount of wood & glass crushing to get to a decently tight bolt installation. I also remember using the recommended torque value for 1/4″ bolts on the first bolt or two before realizing it was simply way too much and that I was really crushing the glass & wood, so I started using less torque to keep the bolts in place, which I wasn’t happy with. So I’m hoping that these larger washers will resolve this issue and correct any adverse damage that I may have caused in the original process of simply installing the landing gear mount extrusions.
Unfortunately, unlike some of my other building buddies, I learned about this too late to accomplish the washer swap before I had glassed the outside of the fuselage (I guess it’s the price one pays for just building “too” fast . . . ha!) I’ll have to cut into the fuselage side glass to get these suckers swapped, which was my biggest hesitation in doing this swap. Well, that and the fact that clearly there are a lot of older birds out there that never did this large washer swap/install that are still working fine. Still, I’d rather be safe & proactive now than have to upgrade these washers once the plane is finished & flying.
•••
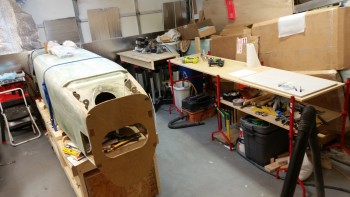
30 January 2016 — I started off today by spending about an hour finishing up cleaning & organizing the shop to enable the main gear installation.
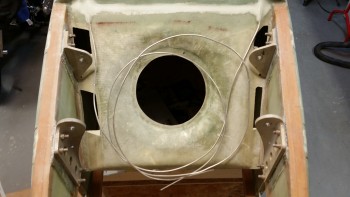
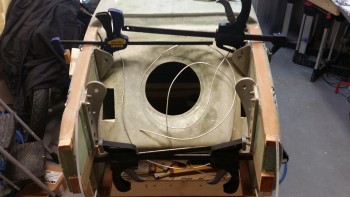
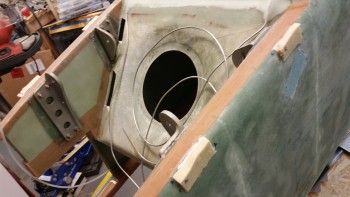
Before discussing the main gear washers swap-out I wanted to show the hell hole area with the long runs of aluminum brake lines, which will get cut much shorter to be connected to stainless steel brake lines that will run down the gear legs.
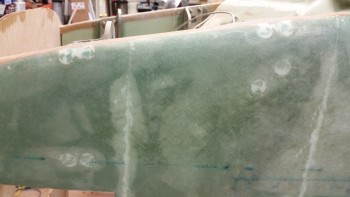
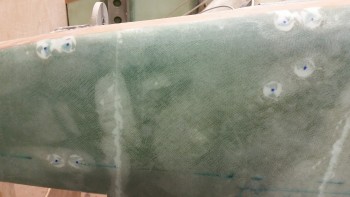
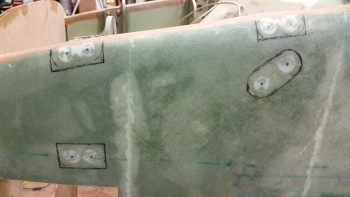
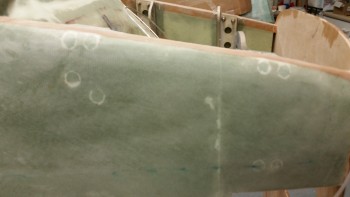
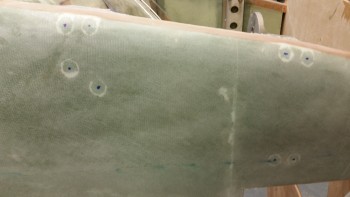
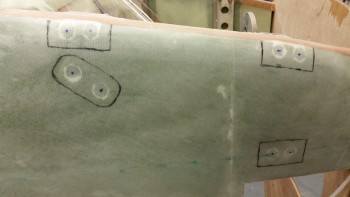
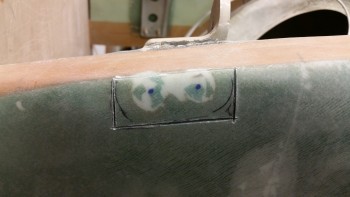
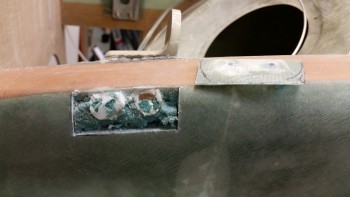
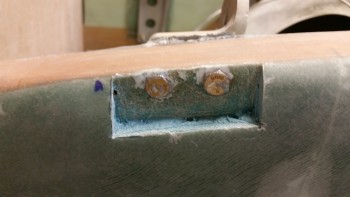
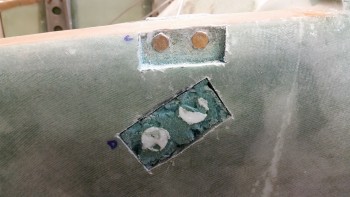
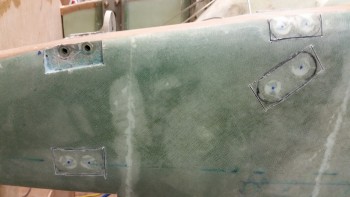
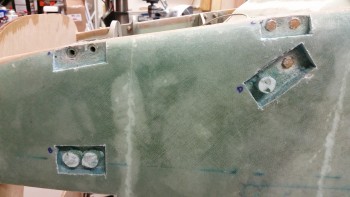
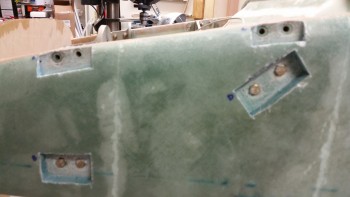
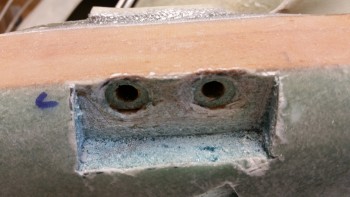
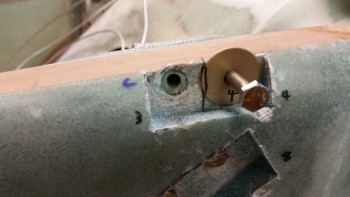
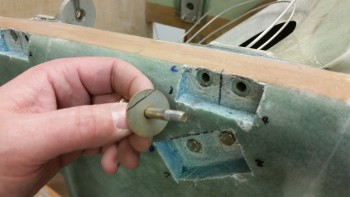
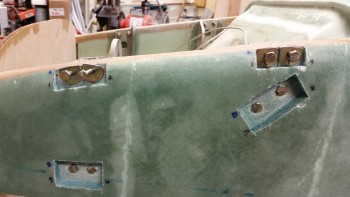
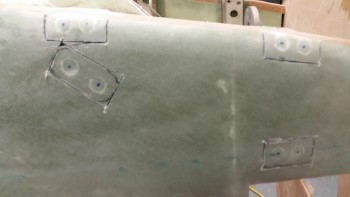
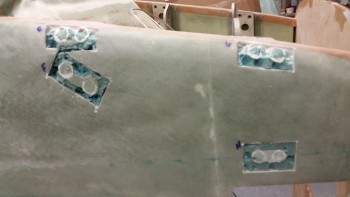
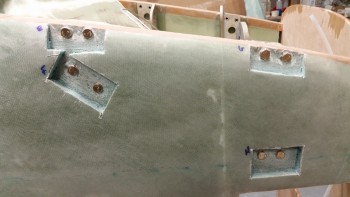
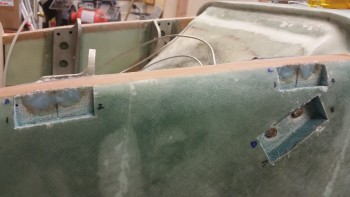
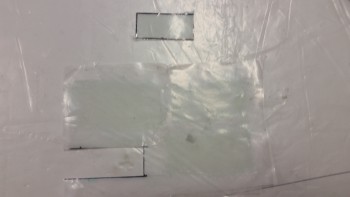
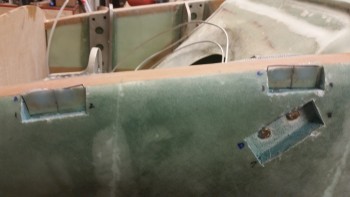
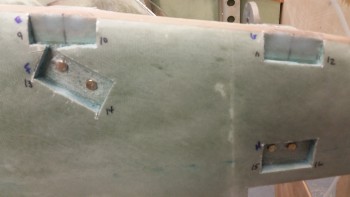
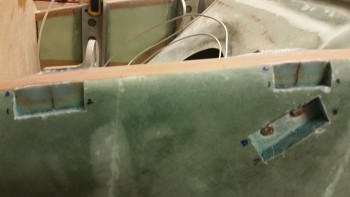
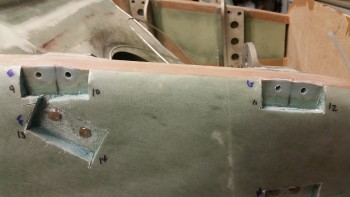
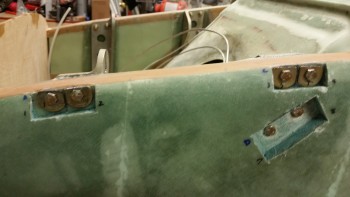
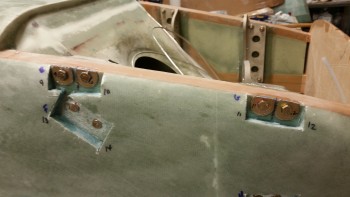
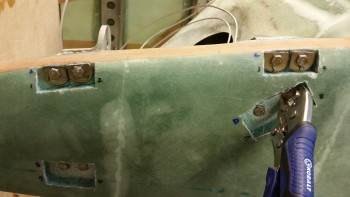
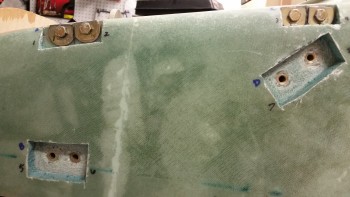
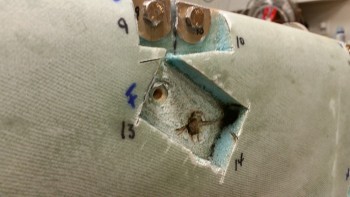
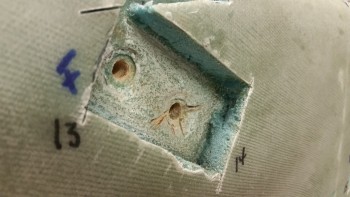
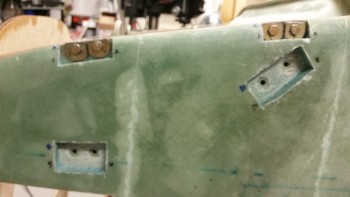
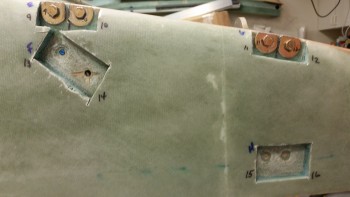
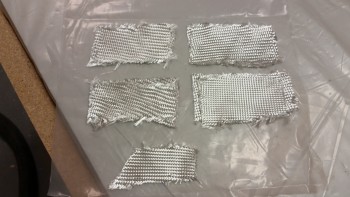
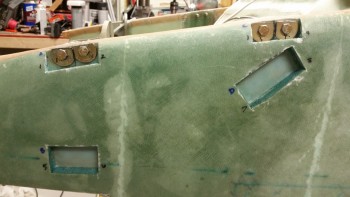
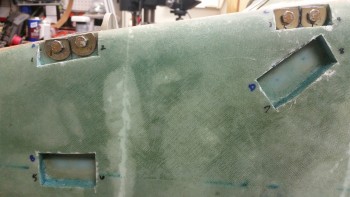
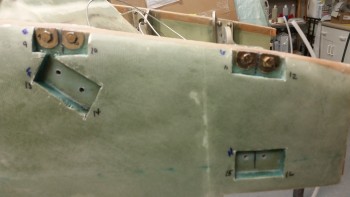
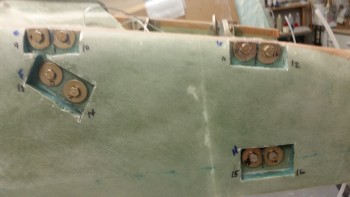
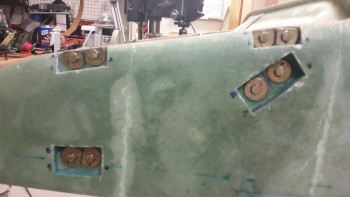
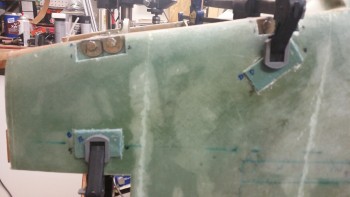
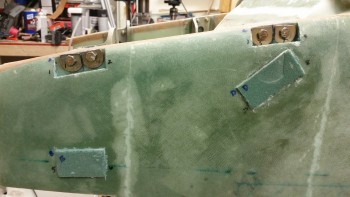
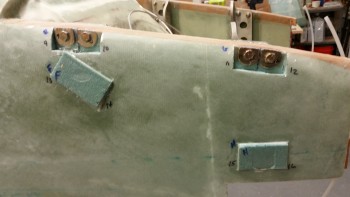
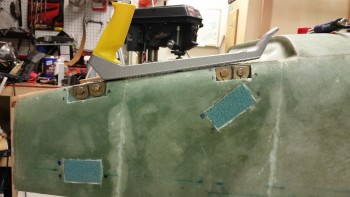
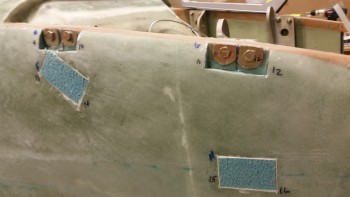
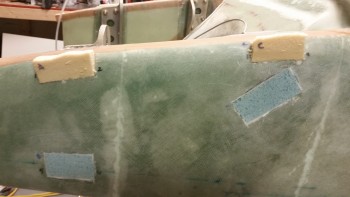
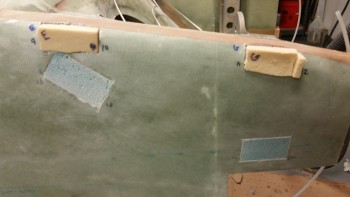
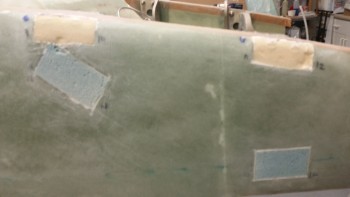
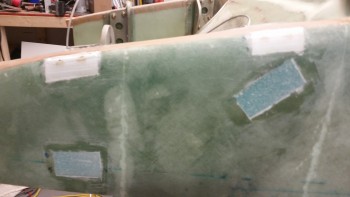
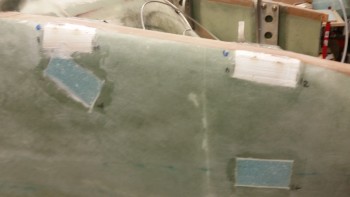
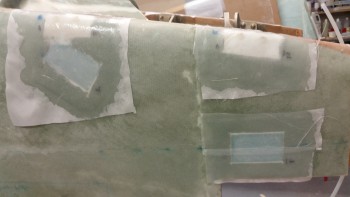
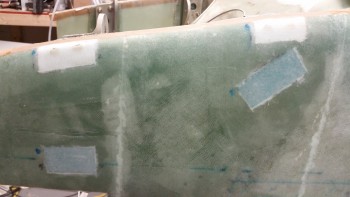
Here’s a shot of the left side of the aft fuselage showing the main gear mounts from the outboard side. You can see the filled foam & micro bolt head channels. In the second pic you can see where I marked the middle of each bolt head. In the third pic I marked the areas where the skin, foam & micro will be removed to gain access to each bolt head.
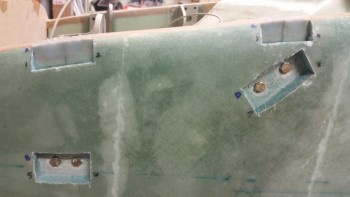
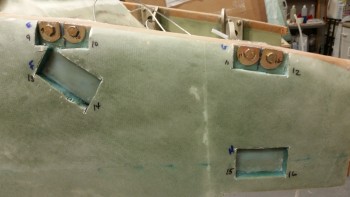
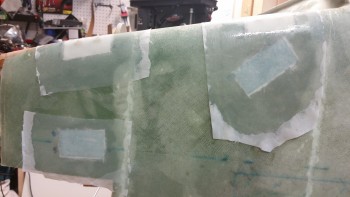
Here are the same 3 pics for the right side.
I then started cutting with the Fein tool on the lower aft left-side bolts.
I popped the skin glass off.
I then dug out the foam & micro from the channel. Also, to ensure I knew what piece of glass was covering what set of bolts, I labeled the removed glass piece and the bolt set that it was associated with, as you can see with the “A” below.
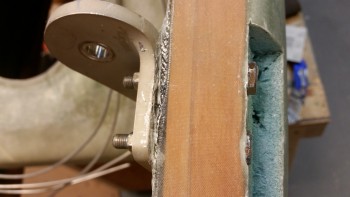
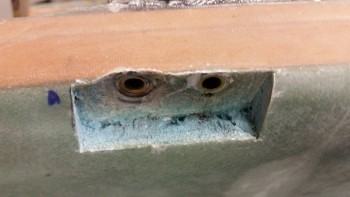
Below you can see the difference between the bottom bolt, tightened to what would normally be used for a 1/4″ bolt & thus crushing the base glass & wood, and the upper bolt, tightened so that visually no glass or wood is crushed, but not tightened to standard torque specs.
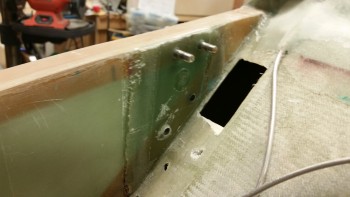
[Note: Below is also a good shot of my widening the top & bottom longerons since I widened the fuselage. My goal was to bring the interior edge of the longeron back to plans’ dimensions by widening the longerons. However, to utilize the carbon fiber engine cowlings that I ordered very early on in the build from Feather Light, I had to revert the firewall back to stock dimensions and thus just ended up with 0.4″ wider longerons top & bottom.]
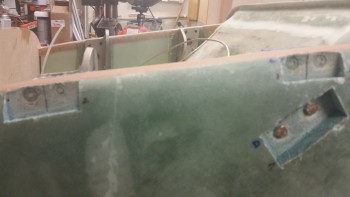
Here’s a shot of the forward bolts on the left side.
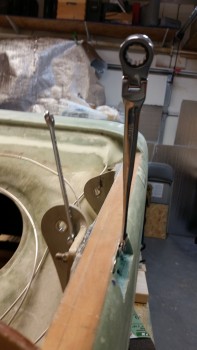
To get the bolts out I started with the basic method using wrenches. That worked, but it was tough & time consuming.
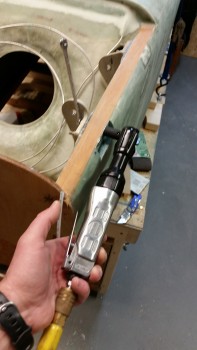
After getting about a third of the way of getting the nut off of the first bolt, I decided to ratchet it up a bit (pun intended!) by using an air ratchet.
WARNING!: This is not a standard scenario where a pneumatic tool would normally be used. There are many variables to account for and any misstep could result in serious injury! I’m conveying how I achieved my results, so use this method only if YOU know what you’re doing & YOU accept the risks involved!
One problem area that is conveyed in just about every builder’s account of swapping out these washers is getting the bolts removed from the mount & the Spruce longerons. Well, using the air ratchet I serendipitously stumbled upon the fact that these bolts are mounted so tightly, that when an air ratchet is used they simply thread themselves out of the hole. About a third of them came out with no help, while the others I simple pushed the bolt from the inboard side with a drift pin & it would easily extricate itself as it was being turned by the air ratchet. Thus, I’d say it took a full 10 seconds on average to remove these bolts!
In prepping for the task of swapping out these washers, I of course looked at my buddy Marco’s blog to get some tips & ensure I wasn’t missing something or about to make a big mistake. Marco noted that he had used AN960-416L washers vs the AN960-416 washers called out for in the plans. The “L” stands for “Light” resulting in the AN960-416L washers being about half the thickness of the AN960-416 washers. Perhaps it’s something with new builders, but I’ll be damned if I didn’t do the same exact thing! Both on the inboard and outboard side of the fuselage wall. This of course makes this washer swap even more pertinent than ever.
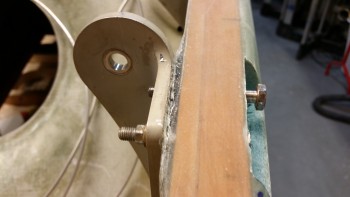
A few pics up I included a shot of the bolts installed in these holes below to show the difference in depth that a “properly torqued” bolt looked compared to non-crushing torqued bolt. Below you can see the depressions made by the bolt head & washer into the glass & wood.
Here’s a wide angle shot below of the bolt removal shown above.
I then started work on clearing around the bolts on the left forward gear mount extrusion.
Getting there…. left side.
My goal for the evening was to get all the bolt heads exposed and the surrounding foam & micro cleared, and the glass around each bolt head clean as well within each newly made pocket. In addition, I wanted to get the lower bolts remounted and then get to work on the upper bolts. In this fashion, I’m following my buddy Dave Berenholtz’s method of swapping out one set on an extrusion at a time, thus not having to remove the floxed-in gear mount extrusions unless absolutely necessary.
Here is the left forward gear mount extrusion with the bolts removed.
I then drew a reference line between the two bolt mounting holes to use to grind the larger AN970-4 washers to fit adjacent to each other within the foam pockets that I had just cut to expose the bolt heads.
I also used the lower longeron as a guide to mark the backside of the washers.
I then ground down the bottom and interior edge of each washer, as well labeled all the washers numerically and their associated hole.
I then grabbed my Fein saw and started work on the right side. I cut the outline into the fuselage skin around each set of bolts.
I then removed the cut skin patch covering each set of gear mount bolts.
And then cleaned them all up.
I removed the lower set of bolts (pic not shown) which went fine with the exception of the aft bolt in the lower forward extrusion. I didn’t have a good grip on the nut on the inboard side when I fired up the air ratchet. Almost instantaneously it stripped the nut (see air ratchet warning above!) so that turned that bolt removal task into about a half hour long endeavor, resulting in me using the Dremel tool to simply cut the nut off, after a number of rounds of unsuccessful attempts to get the nut removed with vice grips, etc. I eventually got it out & all was fine.
Since I needed to re-level the bolt hole divots at the start of each hole resulting from previously torquing down the bolts, flox would be added to backfill the holes & then get covered with 1-ply of BID. Thus, I filled each bolt hole with Saran wrap to keep as much flox out of each hole as possible.
I then whipped up some flox using epoxy mixed with fast hardener. I back-filled each depressed entrance to each bolt hole on the lower sets of bolt holes both left & right side.
I had already pre-measured each lower bolt hole pocket & annotated the dimensions on my white board. I then used those measurements to prepreg 1-ply of BID for each bolt hole set.
I then laid up the prepregged BID into the lower bolt hole sets. Below is a shot of the bolt hole BID laid up with the top prepreg plastic still in place, left side (I did the same on the right side).
After laying up the BID in all the lower bolt holes, I then peel plied the layups. First on the left…
… and then on the right.
•••
31 January 2016 — I started by pulling the peel ply and sanding the edges of the 1-ply BID layups over the floxed lower bolt holes. I then used the Dremel tool with a fresh cutting disk to shape the last set of washers for the right lower aft gear mount (no pic).
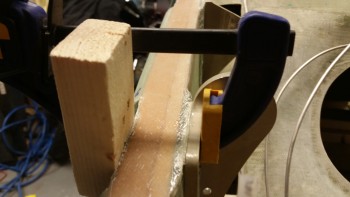
I then clamped a block over each hole & re-drilled all the lower bolt mounting holes.
Here are the re-drilled holes in the lower gear mounts on the right side.
I then remounted the lower main landing gear extrusion mounting bolts with the new AN970-4 washers, after applying some wet flox on the inner face of the washers.
I tightened all the bolts snuggly, but allowed some room for torquing them to approximately 66 in/lbs after the flox cures, which will allow the flox to fill any minor irregularities that weren’t eliminated with the first round of flox & ply of BID.
By the time I finished re-mounting the lower bolts with new washers, it was too late to make some real noise, which the air ratchet excels at producing…. lots of noise. I managed to get the left aft upper set of nuts off the bolts, and then loosen the left forward set as well, but I then figured I would wait until tomorrow to use the air ratchet and use my time more efficiently.
Here’s a pic of the lower bolts & new washers installed (upper in the pic below) to show how with the embedded flox & new washers that only a couple of threads are showing after the install. I’m expecting that after I torque the bolts to specs, that only another thread or two more will show. Conversely, the old installed bolts at the bottom of the pic have quite a bit of thread showing, although I’m sure that replacing the inner thin washers with standard washers also helped cover another thread or two.
•••
1 February 2016 — I started out today by making some noise! I was able to quickly get the 1/4″ mounting bolts out of the left side of the aft fuselage, leaving some rather securely embedded washers in the process. I tried to quickly remove the washers but they weren’t budging, so I left them for a bit while I removed the right-side bolts.
All was going well until I got to literally the last bolt to remove. I have to say I’ve always been impressed with the size & strength of the aircraft grade MS21042-4 nuts, but one huge disadvantage is that if you make one good slip up with the wrench on a very tightly installed bolt, and POW! . . . It’s stripped! And that’s exactly what happened with this last nut/bolt that is one of two –including the other side– that are pretty difficult to reach.
Well, I messed around with this *!&$#@ nut for almost half an hour to no avail. I pulled out the whole armada of tools that I have in the shop … again, with no avail. Thus, in my overwhelming need & desire to win out over an inanimate object (and believe you me, this sucker was INANIMATE!) I figured since I had loosened it up even by the slightest degree, that it had to come out. But, just about as far down on the inboard side in a “V” channel as you can get, there was just no way to forcibly remove the nut & pound the bolt out. I was going to have to attack it from the accessible outboard side.
I taped up the inside of the upper bolt trough with aluminum foil tape (I took a pic but it turned out really blurry) to protect the foam from the sparks. As you can see below, I missed a spot. Nothing like the smell of burnt foam in the morning to wake you up! I spent a good 5 minutes with the Dremel grinding off the bolt head, and then another 15 minutes getting the remainder of the bolt, with nut attached, removed.
As I was using a center punch from the outboard side to dislodge the jacked-up bolt, I quickly realized that it wasn’t going without a fight. If it was departing the airframe, then it was going to bring the lower forward landing gear mount extrusion with it. I don’t know why, but this bolt was seemingly fused to the gear mount extrusion bracket. I eventually let it have its way by unbolting the 2 top bolts to get the whole extrusion bracket out of there. Now, this was after creating about a 1″ gap between the interior side wall (15-ply BID pad mounting base) and the outboard mounting surface side of the extrusion. With this gap, I snuck in my small German hack saw and cut the bolt in half… another solid 5 minutes down the drain! Once the bolt was cut in two, I drove the whole assembly back towards the side wall to get enough clearance to free up the bolt that at this point was gouged & stuck into the aft side of the GIB setback (you can see the divot in the pic below).
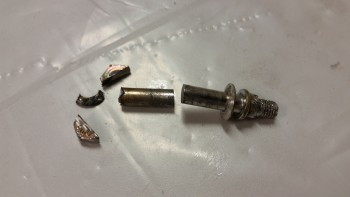
I then removed the gear mounting bracket with the remainder of the Bastard Bolt from Hell! still stuck in the bolt hole. Even after all this, it still took some really sharp blows with the center punch to get this damned bolt removed from the bracket!
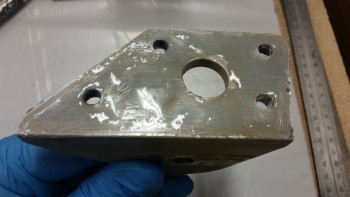
Here’s the skeletal remains of the Bastard Bolt from Hell! after I dismembered it!
Thankfully, it took only about a minute to remove all the scorched foam & clean up the bolt trough.
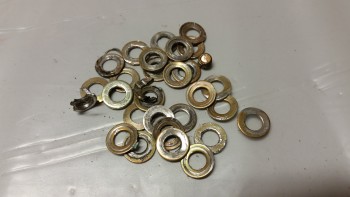
And here are some more casualties of war. I’m still not sure why I mixed up the AN960-416L washers for the standard ones, but again, that completely solidifies my decision to spend a few days swapping out these main landing gear mount attachment washers.
Back to the “peaceful” side of the fuselage, I spent a few minutes (I should add the words “longer than needed” here!) removing the embedded washers. To keep with the slog of a day that I was apparently mired in (ha!) I bent the tip of scribe trying to get these damn embedded washers out! I finally resorted to using a 1/4″ diameter cylindrical punch pin to insert into each washer just enough where I could then push the pin to one side and pry out the washers.
I employed my new found trick on the right fuselage side and removed the washers handily. I then embedded Saran wrap in the aft holes in prep for flox, but in the forward holes I wrapped the Saran wrap with electrical tape to have a dark identifying marker for the bolt hole since I would have to drill the forward bolt holes from the outboard side with no mounting bracket holes as a guide.
This wasn’t just on the right side where I had the issue with the stuck bolt, it was simply a matter of access to drill the holes on the inboard side of the fuselage. The upper mounting bolt holes on the forward main gear mount extrusion simply are located higher than the aft lines of the GIB seat back. Unless I was using a flexible drill bit attachment, it was physically impossible to get access to the inboard side bolt holes to drill them. Thus the dark protective plastic in the forward upper bolt holes.
I then grabbed a couple of strips of the scrap BID that were left over from the nose layup I did a couple of weeks ago. From the BID I made up 2-ply BID pads to prepreg & layup in the upper bolt access troughs cut into the side of the fuselage. I also added a 1-ply piece of BID to repair the punctured seat back from when I removed the Bastard Bolt from Hell!
Below are the left & right shots of the laid up 2-ply BID pads over flox to reset the “floor” of each bolt trough back to level after the damage of the original bolt heads & washers getting embedded too deep in the surface. As I’ve stated before, this damage was part & parcel to having the bolts installed with enough clamping pressure to keep the landing gear mount extrusions mounted securely. Yet another reason I’m really pleased to be performing this washer swap.
While the flox & glass was curing I went to work to knock out some ancillary tasks.
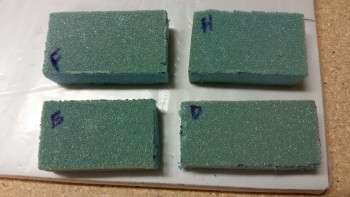
First, I grabbed some spare 3/4″ thick Divinycell PVC foam & cut them into blocks to match the dimensions I had measured earlier for each of the upper mounting bolt troughs cut into the side of the fuselage. As you can see, they’re identified with the letter designator that I labeled each bolt trough with.
I’m not exactly sure how I’ll deal with the lower gear mounting bolt troughs that I opened to expose the bolt heads along the very bottom longeron edge of the fuselage. I’m not really that concerned about the aesthetics of these lower bolt-access troughs because they will reside directly under the newly mounted fuselage sidewall lower extension foam that I will be adding to fill in the aft fuselage to account for a 4″ lower firewall. Again, this is to match my Carbon Fiber engine cowlings that were designed by Mike Melvill & fabricated by Feather Light.
Later on, the flox & BID in the bolt troughs were nearly completely cured, so I pulled the peel ply . . .
. . . and then re-drilled the bolt mounting holes. I have to say that I’m glad I used the dark plastic material for the inserts since I could see where to drill the holes on the forward bolt holes.
After trimming the upper aft AN970-4 washers to fit, I then vacuumed out the troughs & then mixed up some wet flox using fast hardener. I spread a good bead of wet flox on the forward gear mount extrusion and installed it.
I then started on the forward extrusion after mounting the bracket back into place, and mounted all the remaining bolts & washers after applying wet flox to inside face of the AN970-4 washers.
Here’s a shot of the bolts & new large washers installed with wet flox on the left side of the fuselage.
After I ensured ALL the main landing gear mount extrusion bolts were torqued to 70 in./lbs I notched the inside of the trough foam inserts to fit over the bolt heads, whipped up some thick micro, and micro’d them into place in the troughs. After determining the fit was good, I clamped the foam inserts into place on each side of the fuselage.
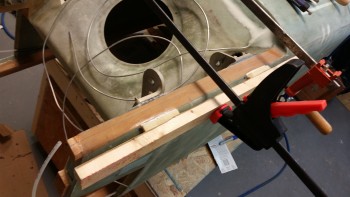
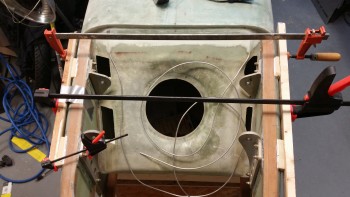
Here’s a shot of the aft end of the fuselage (Hell hole area) showing the foam insert clamps in place.
I have to say that after mounting the bolts I was even more convinced that I had made the right decision to swap out the washers simply by the fact that the remaining threads on each installed bolt went from about 8-10 remaining previously, to around 2-4 threads visible after the washer swap.
•••
2 February 2016 — I started off today by removing the clamps from the upper gear mount bolt foam covers that I micro’d & clamped into place last night.
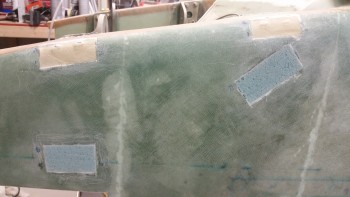
Here’s a shot of the right side upper gear bolt foam inserts micro’d in place.
I then used the Stanley Surform “cheese grater” to knock down the excess foam.
Again, right side after “cheese grating.”
I then did something that I rarely do on this build: I grabbed some of the ton of excess urethane foam I have on hand and cut blocks to fill in the lower bolt holes. Honestly, with as little foam as there is at the lower edge of the bottom longerons, I could have probably just as easily floxed the existing corners & called it a day. But since this edge will have more foam added to it to fill in the space for the aft fuselage fill-in/lowering to match the 4″ lower firewall & cowling, I went ahead & filled these bolt troughs with foam.
Right side lower bolt troughs filled with urethane foam.
I then micro’d the urethane foam filler pieces into place in the lower gear bolt troughs along the lower aft fuselage edge.
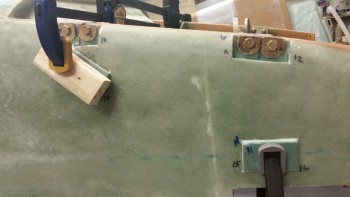
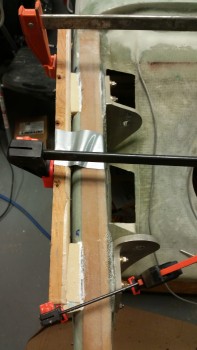
I then used 2 tape-covered pieces of wood to cover the freshly micro’d in place urethane foam inserts and clamped those across the aft fuselage (hellhole). Here’s the left side fuselage.
Since I had one extra small piece of foam all by itself on the lower right side I needed to give it a little extra attention, so it got its own clamp (bottom of pic).
And a wide angle shot of the clamped urethane foam inserts.
After the micro on the lower urethane foam inserts was at least 80-90% cured, I proceeded with the final glassing of all the foam plugs covering the main gear mount extrusion bolt heads.
I sanded down the urethane foam inserts to match the contour of the lower fuselage edge. I have to say that I haven’t worked with urethane much, and it is definitely SOFT, so it requires a much more delicate touch than I admittedly used in sanding the inserts to shape.
After locating & cutting my scrap BID pieces to cover the foam inserts, I then micro’d all the foam pieces.
I prepregged 6 pieces of 1-ply BID, laid them up over the foam inserts & then peel plied all the freshly laid up glass.
•••
3 February 2016 — I started out today by removing the peel ply from the main landing gear bolt swap foam insert layups.
This officially completes the main landing gear mount extrusion bolt washer swap! Although it essentially added 3 days to the build, the piece of mind it provides is well worth it. I’m very happy that I did the swap and also very pleased with how it turned out.
•••

