Wings Test Fit

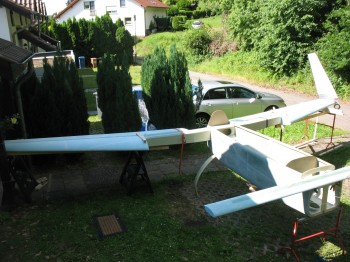
Wings Test Fitting during “The Grand Mock-Up”

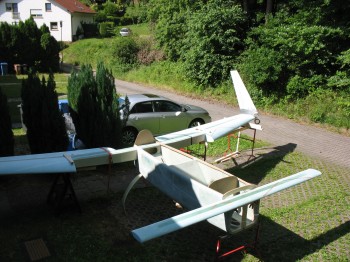
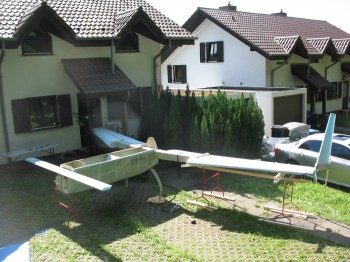
22 June 2013 — Today I pulled out all the stops . . . or should I say I pulled out all the pieces of the build so far.  Before I am separated from my project while I spend a year in the Middle East for Uncle Sam, I wanted to get an idea of what this thing looks like put all together.

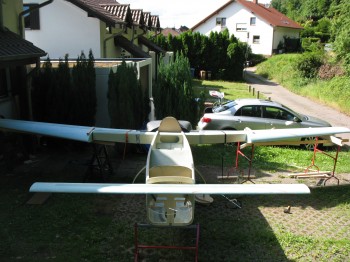
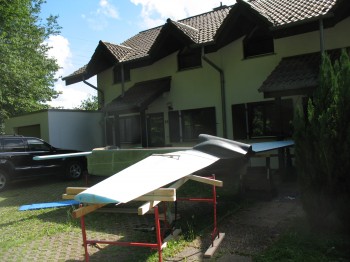
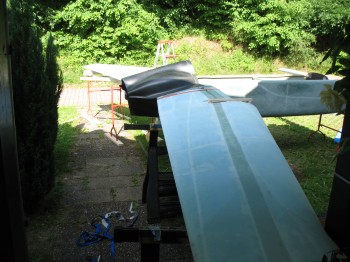
So I pulled the fuselage out into the front yard, and kept it covered while I collected the other components.  After I got the CS spar & firewall in place, I added both of the wings next.

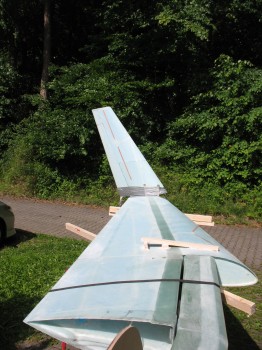
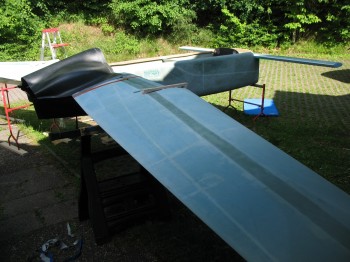
Now let me say, besides the measurements provided to me in the plans, and of course a couple dozen confirmation measurements, I had not lined up either wing with the CS Spar to confirm that the hard points (aluminum extrusions) lined up with each other.  Obviously, I was very relieved to confirm I hadn’t jacked any of my measurements up!  Also, as you can see I had to throw on at least one winglet just to get an idea of how it would look.  Although it was a little awkward to get it on the end of the wing so it looked half-way normal, I think I got in the ballpark.  Well, and of course we can’t forget the canard… yes, it’s on there too!

Long-EZ Project Mock-upChap 14/15/19/20 - CS spar-firewall-wings-wingletLong-EZ Project Mock-upLong-EZ Project Mock-upChap 19/20 - Wings & Winglet mockupLong-EZ Project Mock-up


Chap 14/19/20 - CS spar-wings-winglet

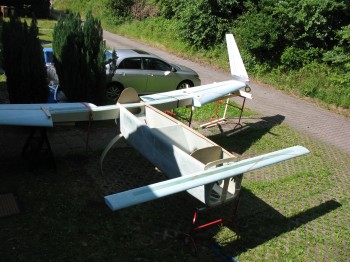
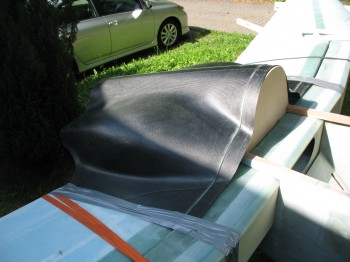
Once I got the pics above taken, now it was time to fill in what gaps I could to make it look at least a little like it had some mass to it.  Next came the engine cowlings.

Chap 19/23 - Wings & Cowling trial fittingChap 19/23 - Wing/spar & Cowling fit

Chap 19/23 - Wing/spar & Cowling fit

Long-EZ Project Mock-up

Chap 10/19/23 - Canard-Wing/spar-CowlingChap 10/19/23 - Canard-Wing/spar-Cowling

Chap 19/23 - Wing/spar & Cowling fitChap 10/19/23 - Canard-Wing/spar-Cowling

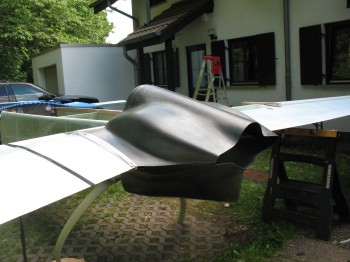
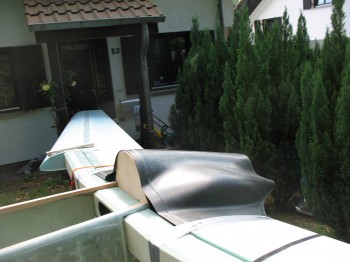
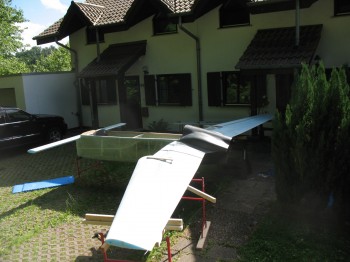
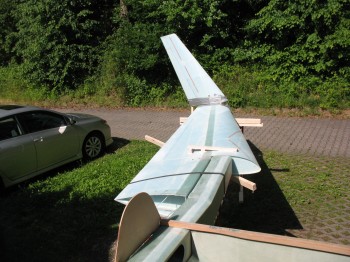
The following pic is a closer-up shot of the upper cowling & wing.

Chap 19/23 - Wing/spar & Cowling fit

•••


Recent Posts

Project Update

Hey Guys,

The perimeter baffle seals are pretty much complete at this point, minus 2 small respective segments near the exhaust pipes.  That being said, I’m moving forward with constructing the Melvill-style exhaust pipe brackets, which the final two segments of baffle seals will attach to (immediately below the exhaust pipes)… then I can declare official victory over the baffle seals!

James rewelded the left outboard exhaust pipe today, so I’m pressing forward in getting the exhaust pipe brackets made and installed before trimming all the exhaust pipes to final length.

  1. Chapter 23 – Bracket plasma cutting Leave a reply
  2. Chapter 23 – Exhaust bracket mockups Leave a reply
  3. Chapter 23 – Exhaust pipe re-welded Leave a reply
  4. Chapter 23 – Exhaust pipe bracket start Leave a reply
  5. Chapter 23 – Aft bottom baffle seals in Leave a reply
  6. Chapter 23 – Right baffle seals installed Leave a reply
  7. Chapter 23 – Right exhaust pipe tab Leave a reply
  8. Chapter 23 – Left baffle seals installed Leave a reply
  9. Chapter 23 – Left aft baffle seals Leave a reply