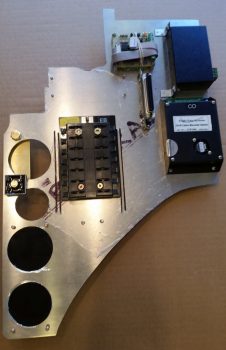
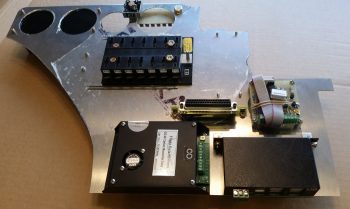
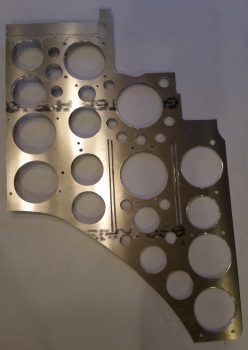
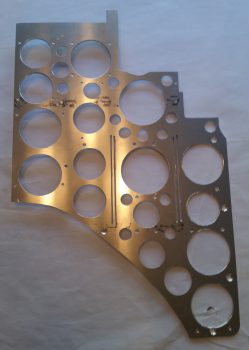
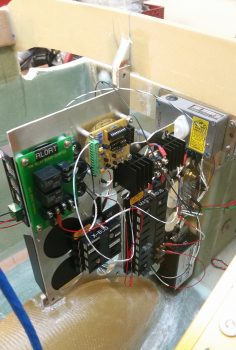
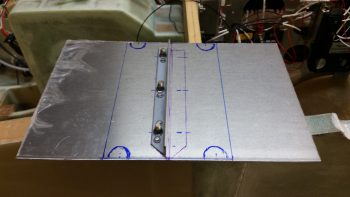
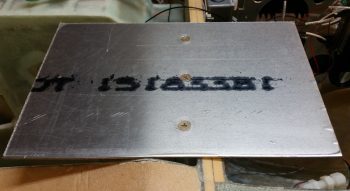
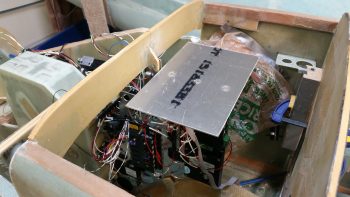
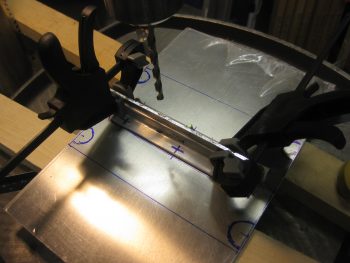
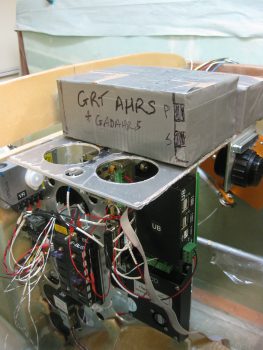
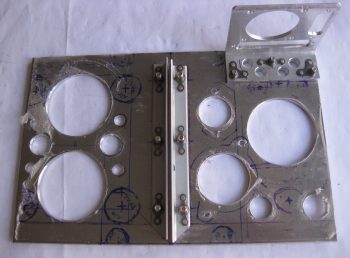
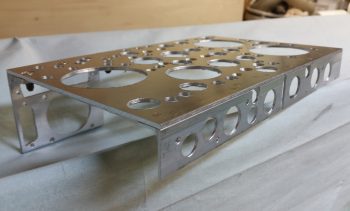
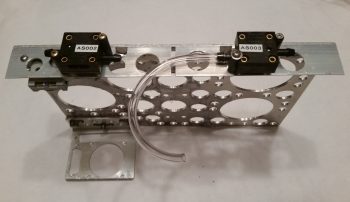
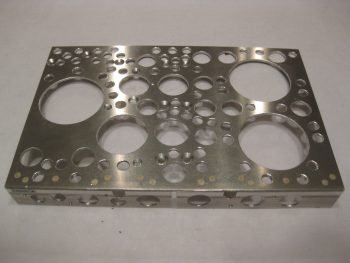
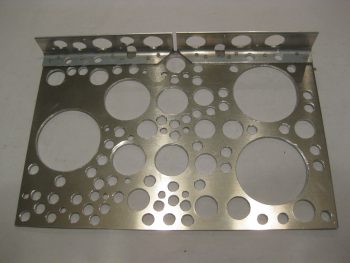
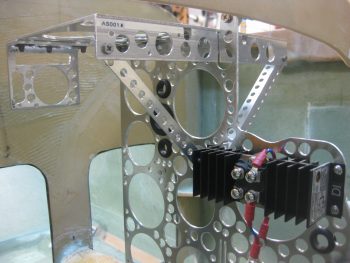
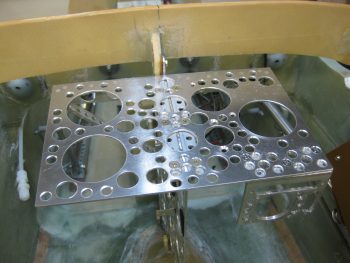
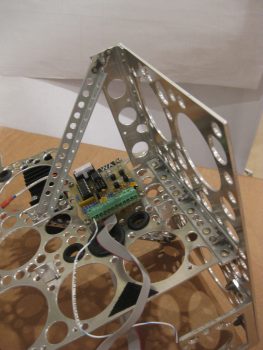
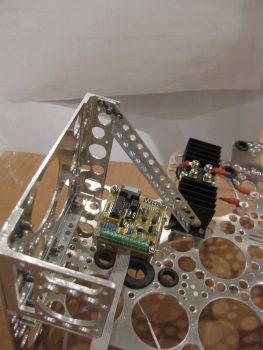
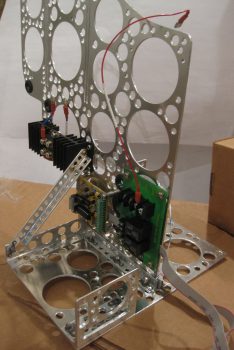
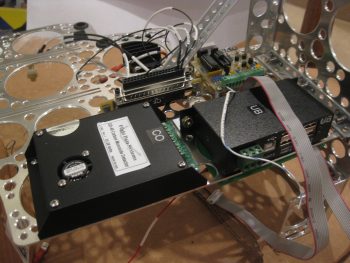
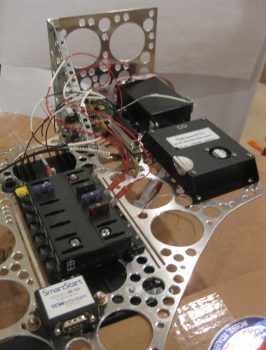
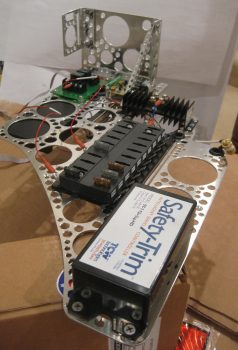
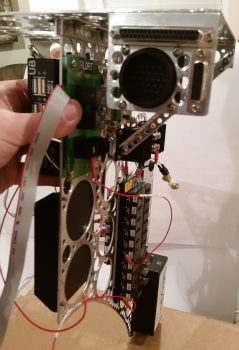
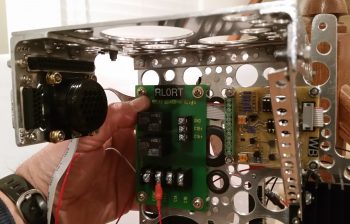
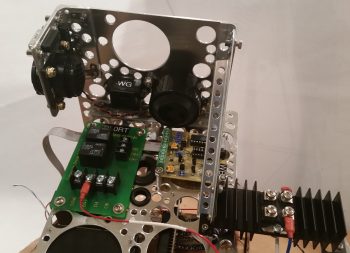
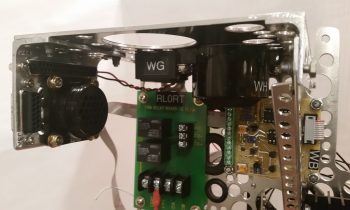
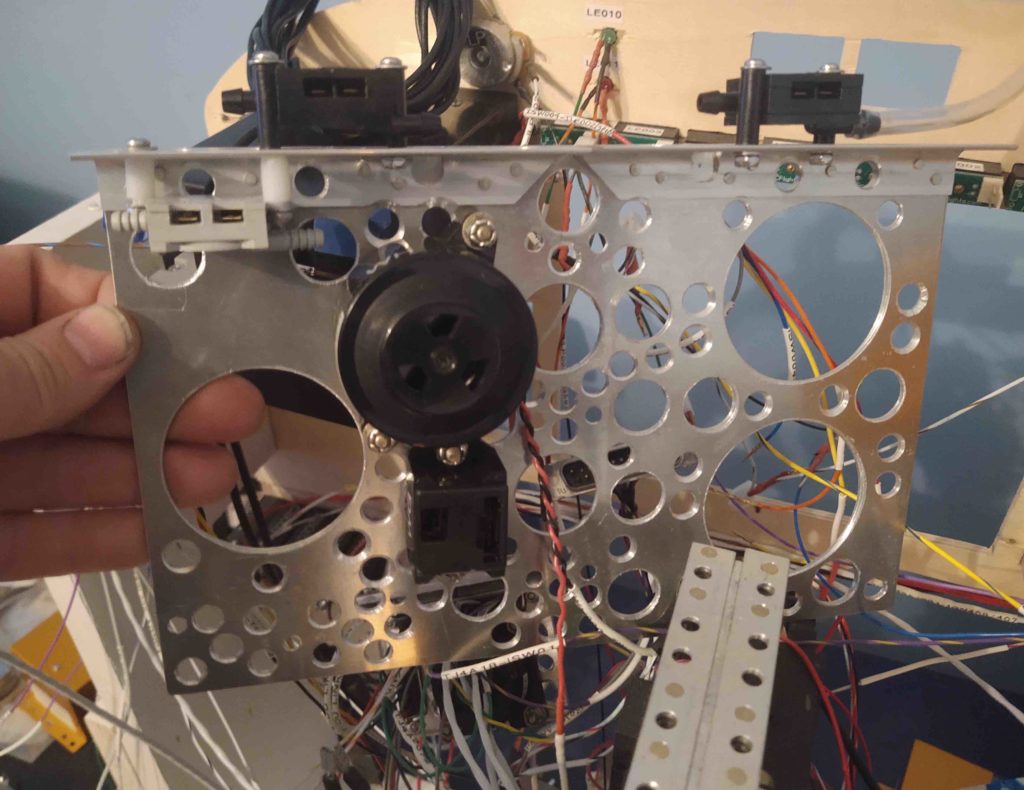
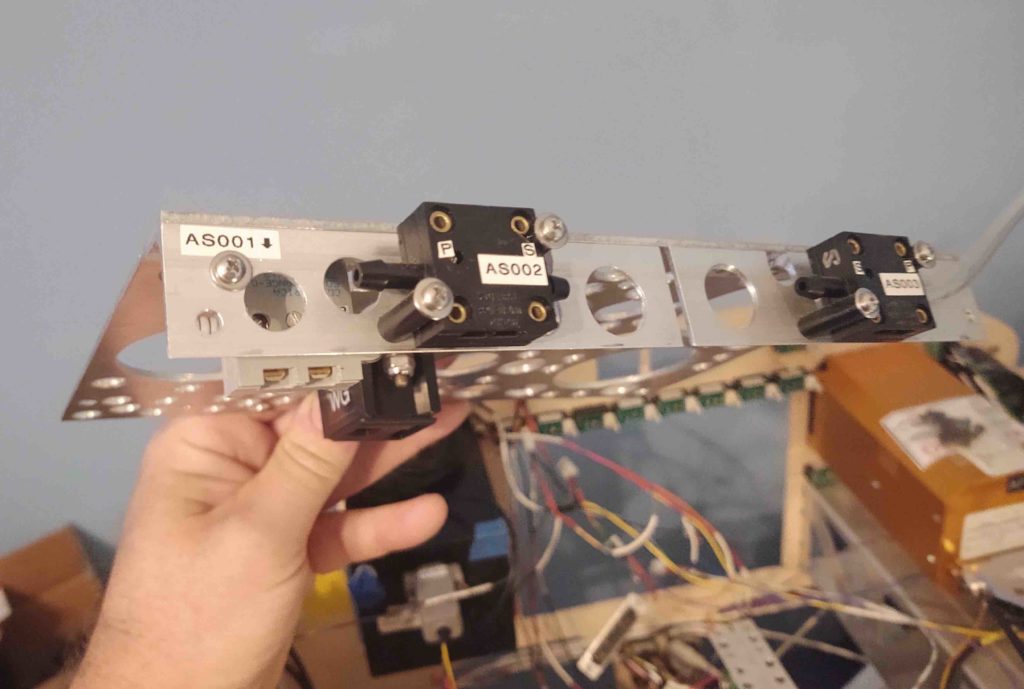
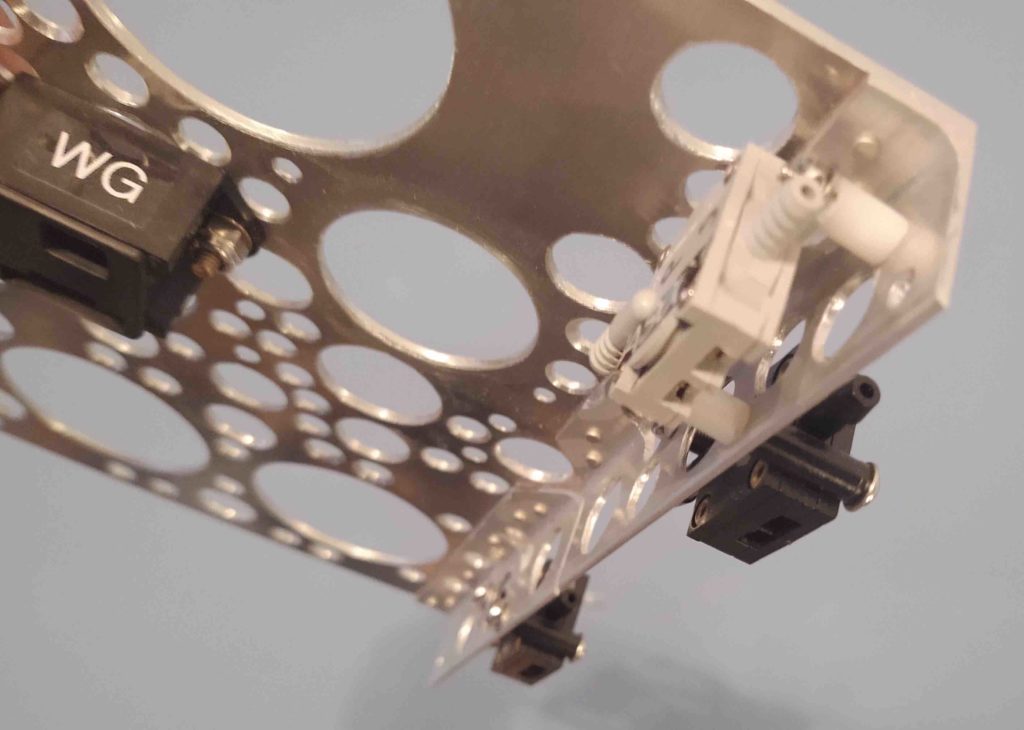
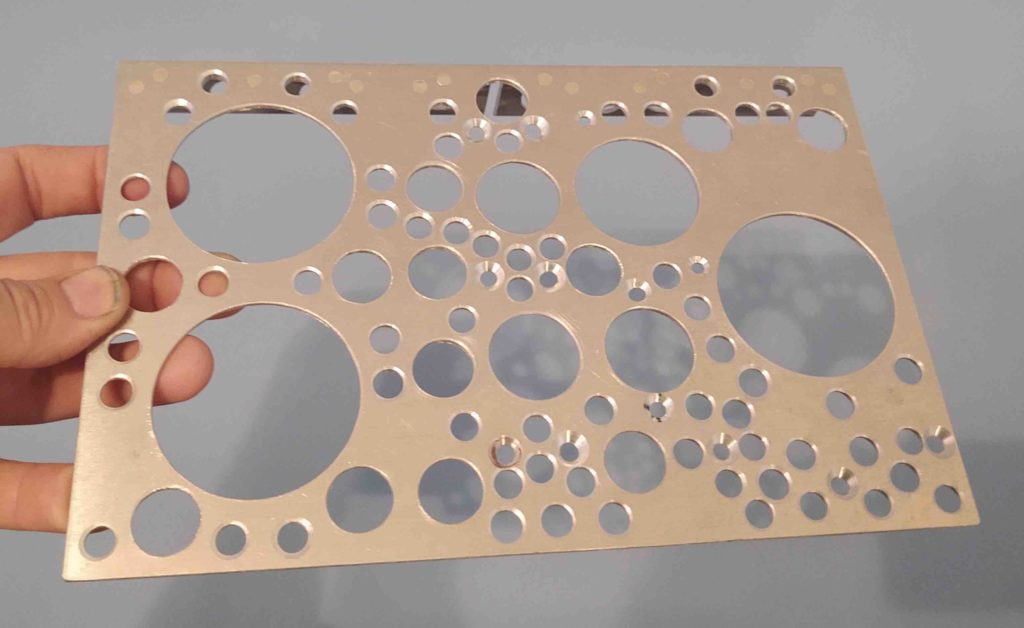
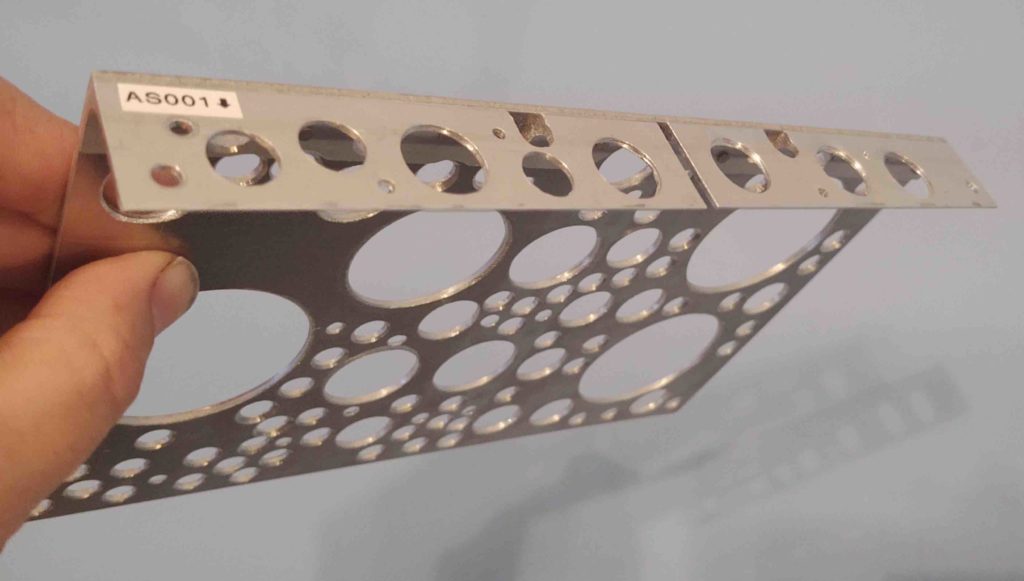
Chapter 22 – Triparagon
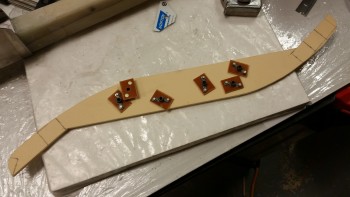
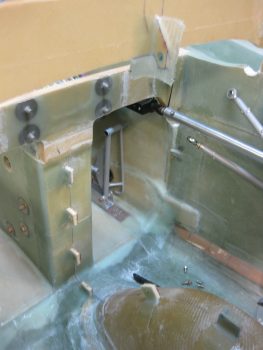
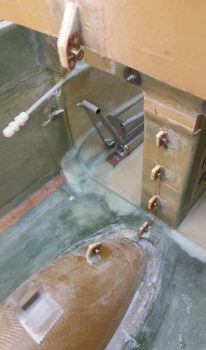
5 December 2015 — I started by taking 6 of K1000-3 nutplate assemblies that I made up last night down to the shop along with a scrap piece of the über dense H250 foam.
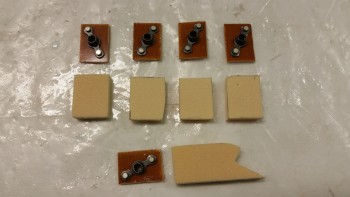
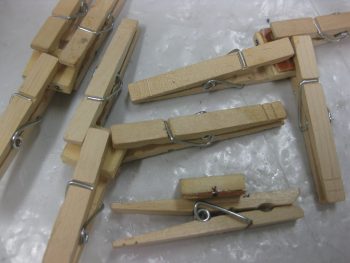
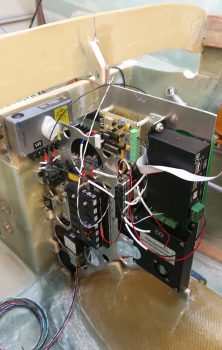
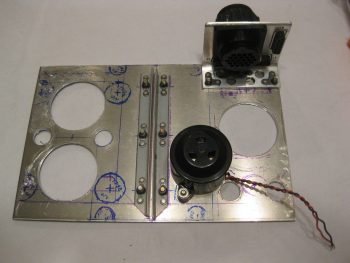
I cut rectangular pieces out of the foam to serve as a base for the individual nutplate assemblies. The odd foam piece below the row of 4 standard looking rectangles will go on the aft side CL of F28, and hang aft at a very sharp downward angle. Again, this is for mounting what is essentially a giant “T”-shaped electrical components & avionics “tree.”
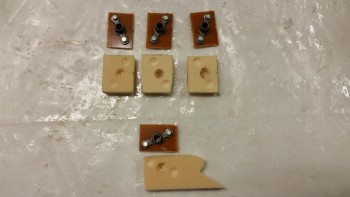
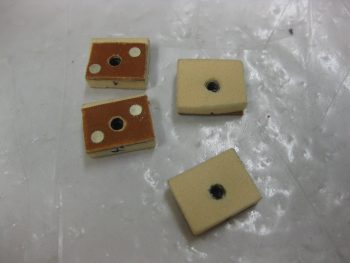
I then worked the foam pieces to allow me to embed a K1000-3 nutplate into the foam.
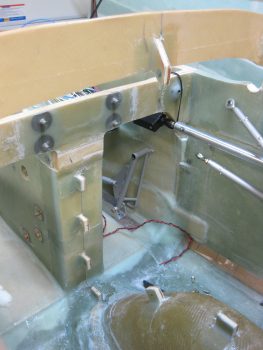
Here are the end results. Now, I had every intention of mounting these onto the backside of the F22 center strut (just forward of the nose wheel cover) and on the bottom aft side of F28, when I took a break for lunch. Reviewing in my mind that I still needed to construct the electrical component structure (I nicknamed it the “Triparagon” … don’t ask me why, but if the Avengers/SHIELD can have a building with a cool name like “Triskelion” than my electrical tree/tower/structure can have a cool friggin’ name too! Ha!), I thought why should I install these now when I can simply bolt them to the structure later, put the whole thing in place with some 5-min glue on these puppies and have all my bolt holes aligned perfectly. Duh! So, I bagged these suckers up and put them on hold.
•••
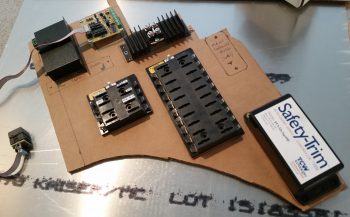
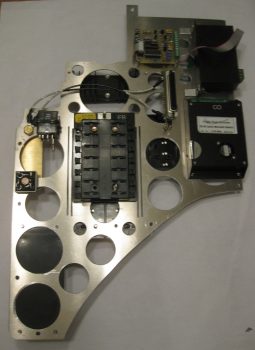
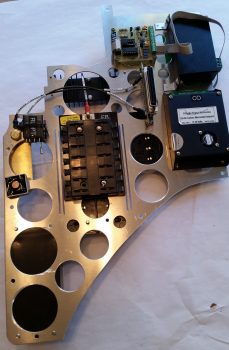
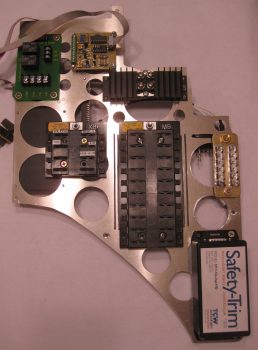
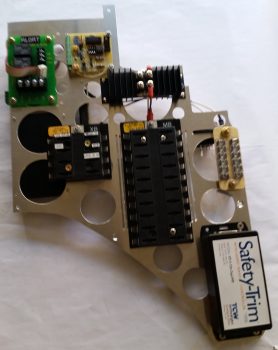
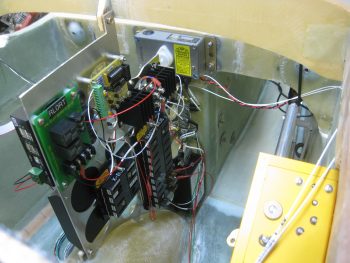
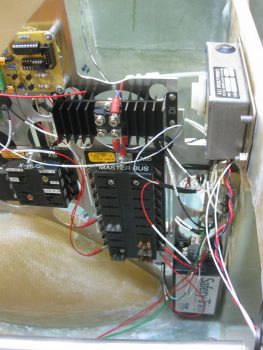
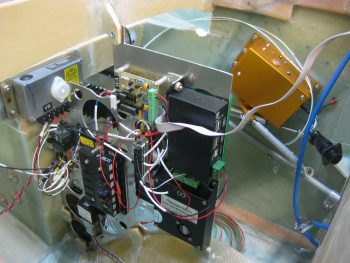
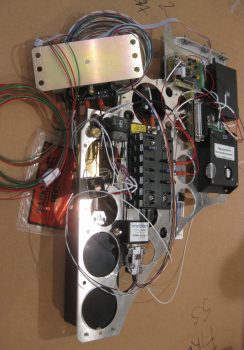
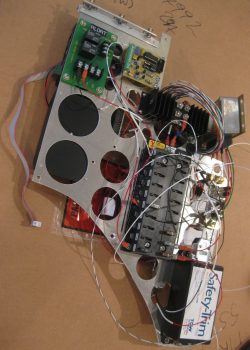
29 October 2016 — Today I did get a bit done, starting off with some of what I worked a little bit on yesterday, then finished up quite a bit today: my “Triparagon”. Or, basically the big motherboard for the vast majority of all my electrical system components: busses, grounding blocks, etc.
Since I now know exactly how my canard controls fit into the forward fuselage/nose, I was able to tweak the size & dimensions of the vertical Triparagon plate. I recut another fresh, updated cardboard mockup and then set about figuring out the placement of my electrical components. I’m extremely pleased with the fact that I’ll easily fit virtually my ENTIRE electrical system on this one plate. And the only reason I say “virtually” is due to any future potentiality that I may have a component that doesn’t fit on the Triparagon, but currently EVERY piece of the electrical system fits on it!
•••
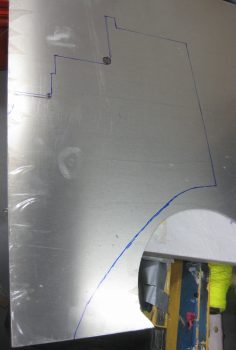
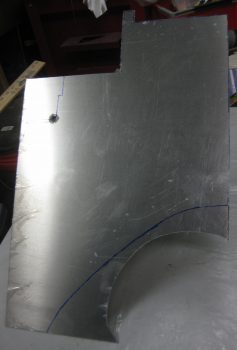
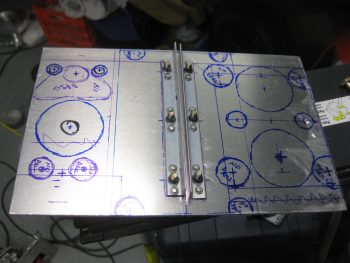
2 November 2016 — I then finalized the dimensions of my cardboard Triparagon template and then traced it out onto my 0.090″ thick sheet of 6061T6 Aluminum (the same sheet that I used for my gear heat shields). I didn’t get the Triparagon cut out tonight, but will do so within the next day or two.
•••
3 November 2016 — I did a project assessment last night and decided for a backup (COM2) radio that the remotely mounted PS Engineering M760REM will do fine for what I need a radio in that role to do. I’m trying to optimize my funds, and using the M760REM vs. the sexier Trig TY-91 radio saves me a good $500. Since the majority of my comms will be via the COM1 radio in my GPS unit, I’m good on this being the right decision.
Today I spent over 5 hours doing research and updating a number of electrical diagrams, in part to re-wicker them to include the M760REM radio into the mix. There were a few other glaring things (such as COM1 & COM2 radio assignments) that I had just never got around to cleaning up. I’m lame right now with a cold, so I figured I could justify “taking a half day off” from building to get some cleanup tasks on the electrical diagrams knocked out. In addition, I added the items I just recently ordered from Stein, the Cozy Girrrls and Amazon to my parts tracking spreadsheet. Lastly, I spent a good 20 minutes on the phone with a Dynon tech to verify that my proposed wiring for the M760REM radio was correctly in sync with the Dynon intercom box that I’m using.
After all that was out of the way I grabbed a quick dinner and then headed down to the shop. My goal this evening was to make some noise! Specifically, I wanted to get the vertical plate of the Triparagon cut and all the holes and hardware configured for bolting the upper engine mount extrusions in place to the longerons & CS spar.
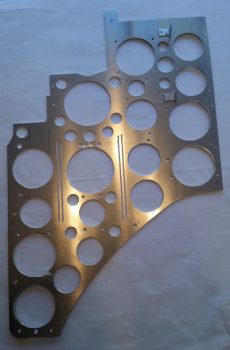
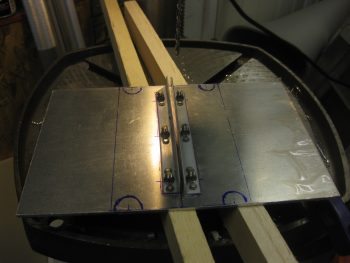
I started with the Triparagon. I had outlined the final shape on the same piece of 0.090″ 6061T6 Aluminum that I used for the brake heat shields.
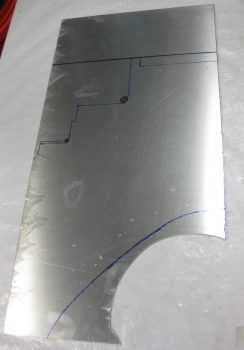
I loaded up my Skil saw with a finer tooth blade and ripped the Aluminum plate to produce the aft edge of the Triparagon.
I then cut out the Triparagon top edge.
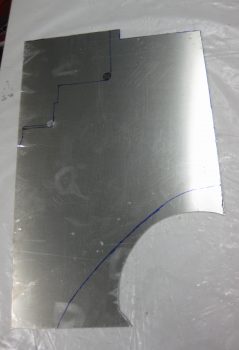
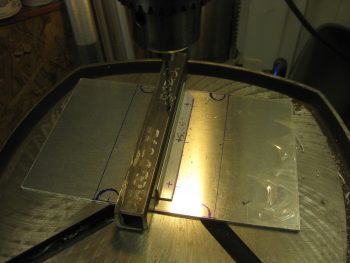
I drilled a large hole in two of the corners on the front side to create a nice radiused inside corner, then continued to use the Skil saw to cut the Triparagon to shape.
I finished all the areas I could on shaping the Triparagon that required the Skil saw. I then switched to using my Jig saw to cut the rest.
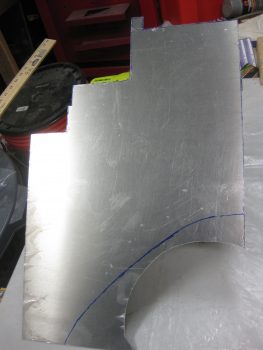
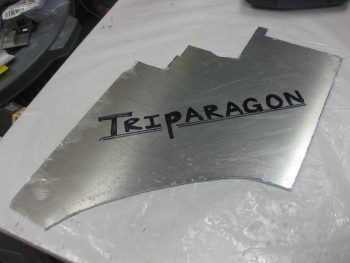
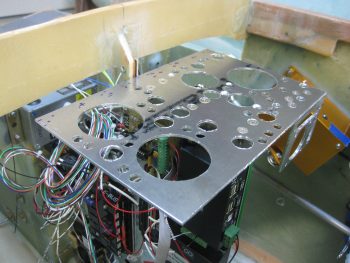
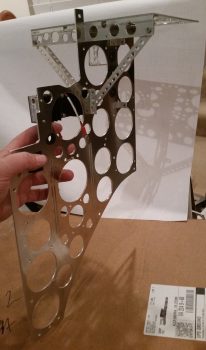
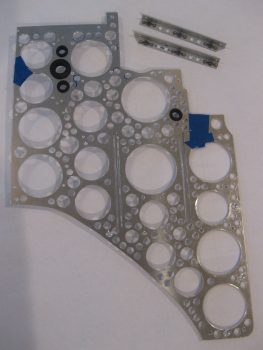
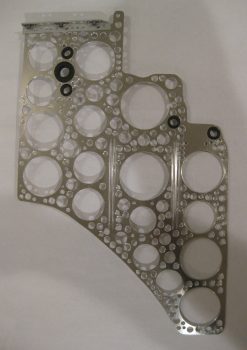
And here it is! The vertical Triparagon plate is cut to shape, and thus the first step of many is complete in the creation of the Triparagon ….
•••
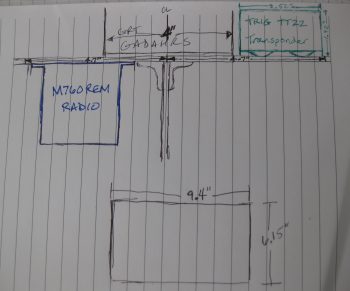
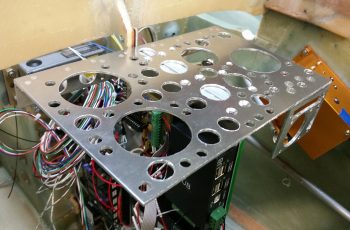
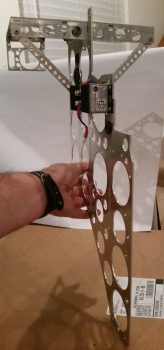
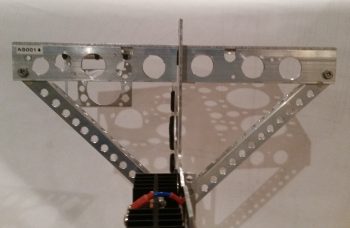
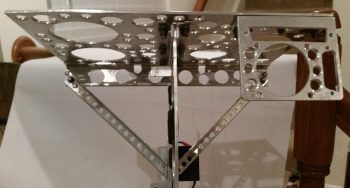
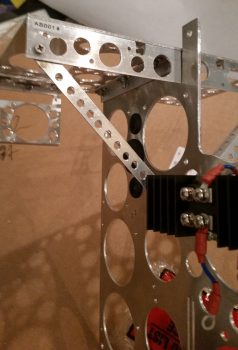
4 November 2016 — My first task of the day was to figure out the exact dimensions of the Triparagon component shelf that will primarily serve as a mounting location for the GRT GADAHRS, Trig TT22 Transponder, and the M760REM COM2 radio. To minimize space, and to allow for a smaller shelf (e.g. less weight), I decided to mount the M760REM radio on the bottom side of the Triparagon component shelf. As you can see, looking at the Triparagon from either straight aft or from the front, it looks like a big “T” . . . thus, it has three main mounting arms, which is the reason for the “Tri-” in the name. Moreover, weird names are conversation starters & keep life less boring! Right?!
•••
5 November 2016 — Early evening today I accomplished something that I couldn’t do last night: find & buy a 10-32 threaded tap to allow me to bolt my stuff to the Triparagon. I looked at 5 places near my house, and none of them had one. I then went down to the Lowe’s in Potomac Mills and they had one. I snatched it up before heading out to dinner.
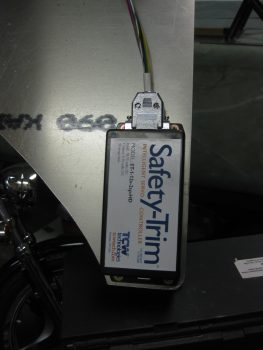
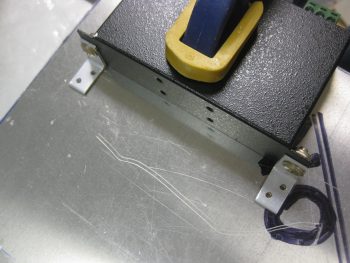
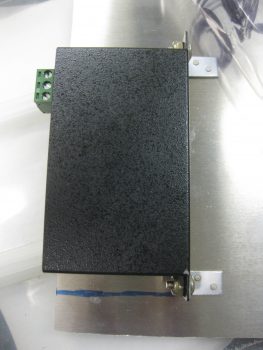
After dinner, I returned home and quickly put the tap to work. I drilled and tapped the 4 holes to mount the TCW Safety Trim module.
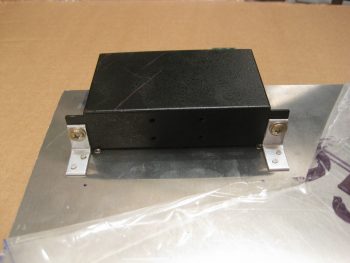
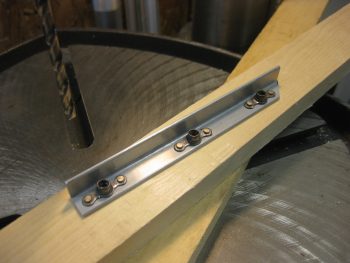
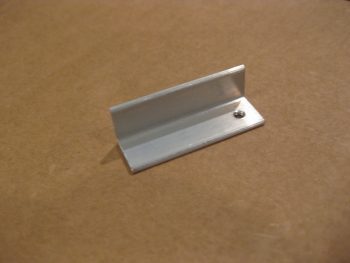
I then grabbed a 1/16″ thick piece of angled 6061T6 Aluminum and made 2 small mounting brackets for the 4-port USB hub (used for the GRT EFIS).
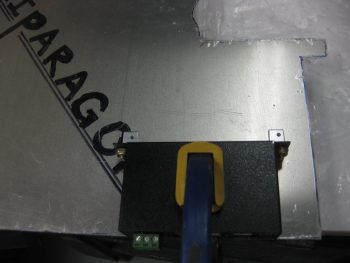
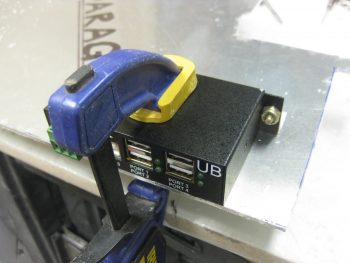
I drilled and mounted the L-brackets to the USB hub mounting tabs, then clamped that entire assembly to the left aft side of the Triparagon.
I then drilled 2 holes in each tab for rivets.
And then riveted the tabs to the Triparagon.
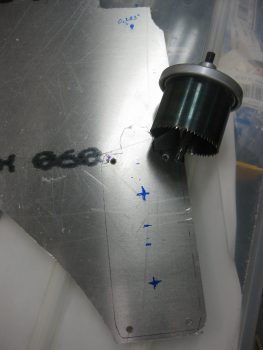
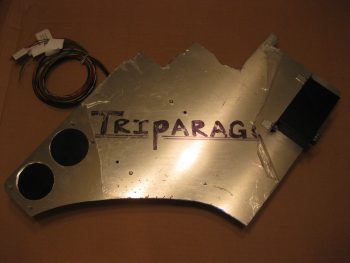
I then broke out my German hole saw to drill 2 large lightening holes under the area where the TCW Safety-Trim is mounted. I have two of these type hole saws from Germany, which is a good thing since I broke the first of those tonight. The ensuing drama at the time is why I don’t have a final pic of the lightening holes, but there is a pic later in this post with the lightening holes visible.
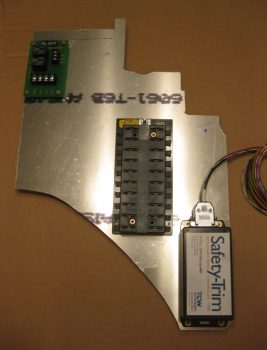
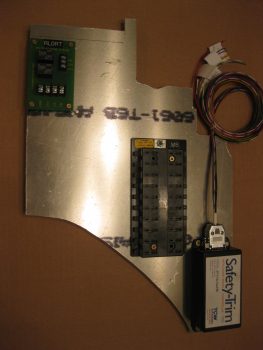
I then drilled, tapped, and mounted the Main Power Buss and the roll trim relay board onto the right side of the Triparagon. I realize that the 2 pics are close, but one is at a slight angle, so I left it in.
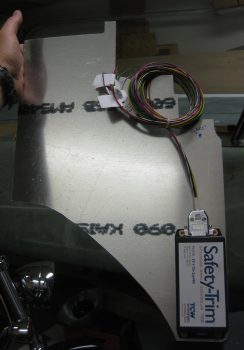
Here’s a pic of the left side Triparagon with both the 4-port USB hub and the lightening holes behind the TCW Safety-Trim box.
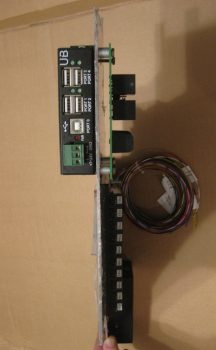
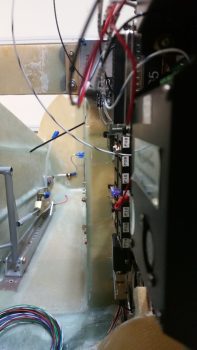
Here’s a shot from the aft side showing the aft profile width of all the Triparagon-mounted components thus far. The spacers under the roll trim board will be replaced with the correct size.
Finally, here’s one more shot of the 4-port USB hub mounting brackets riveted in place on the Triparagon.
•••
7 November 2016 — Today I did a fair amount of physical work on the Triparagon, but what’s not seen is the even more work I did in figuring out optimized electrical component locations, hardware requirements, etc. I also took a quick trip down to the Aviation Dept. at our favorite Orange & Blue big box stores to pick up a few stainless steel screws, etc.
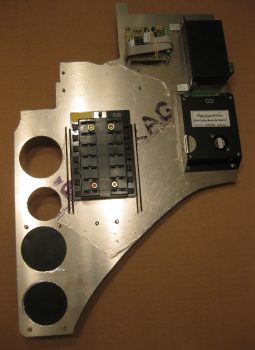
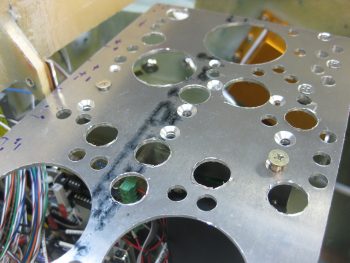
I started out on the Triparagon by positioning and then drilling the 4 mounting holes for the two AG6 Warning Annunciators that I’ll be using. The pic below actually shows the Triparagon upside down. I’ll be mounting the AG6 Annunciator boards back-to-back, one on each side of the Triparagon, with a long #6 screw attaching one side to the other at each corner of the AG6 board. Also, although not shown here, immediately following my drilling of the marked mounting holes in pic below, I drilled a fairly large lightening hole in the Triparagon plate immediately underneath/between the two AG6 Annunciator boards.
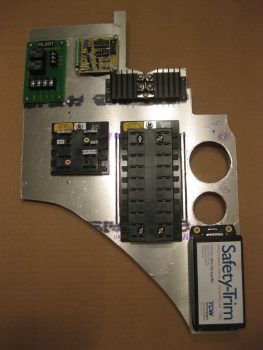
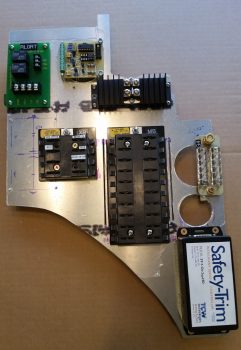
As for the right side Triparagon, besides the AG6 Annunciator board I also mounted the Schottky Diode with its heat sink, and the X-Bus (just to the left of the Main buss in the pic below). As you can see I also drilled 2 more large lightening holes just above the Safety Trim box.
Immediately after I cut the Triparagon to shape, I weighed the panel at 1.38 lbs. After the 3 total lightening holes that I drilled out today, it’s weighing in at about 1.15 lbs. My goal is to get the Triparagon’s vertical plate weight down to about 0.6 lbs, with a total weight at under 1 pound.
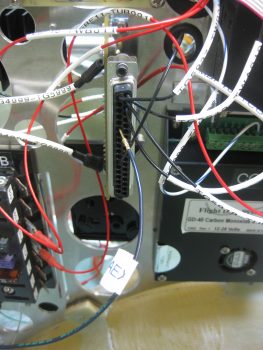
On the left side I added the twin AG6 warning annunciator, as well as the E-Bus that shares the two top bolts for mounting with the Main Buss on the right side. In addition, I mounted the Flight Data Systems’ GD-40 Carbon Monoxide Detector. I’d like to point out that although the CO detector may look a bit bulky in the pic, it’s actually very light and only weighs a few ounces. Today actually marks a pretty cool milestone considering that all my busses are in place and ready to be wired up & installed with the Triparagon into the plane!
You may have noticed a couple of slots that I “machined” (Ha! That translates to “Skil Saw”) along each side of the Main Bus, and thus on each side of the E-Bus. These slots are nothing more than wire management slots that will allow me to secure the wires to the Triparagon with either zip ties or cable lace. They are clearly in a very rough state, as is the entire Triparagon actually, and will be cleaned up later.
Obviously I’m trying to get the majority of electrical components mounted to the Triparagon, which then allows me to determine hardware, space, wiring, and connector requirements now so that I’ll have as much of it as possible on hand for when I hard mount the Triparagon into the front of the plane. I should also point out that once the Triparagon meets my design & operational requirements, I’ll mount it into the fuselage directly behind the F22 center post with around 6 each K1000-3 nutplate assembly hardpoints. The nutplate hardpoints will allow me to remove and install the Triparagon whenever I need to during the build, and of course after the build as well!
•••
8 November 2016 — I started off today by mounting the main panel ground buss (G4), or “Forrest of Tabs” if you will, on the right side of the Triparagon.
On the left side I mounted the avionics ground buss (G5), and the bridge rectifier used for the Trio auto trim system.
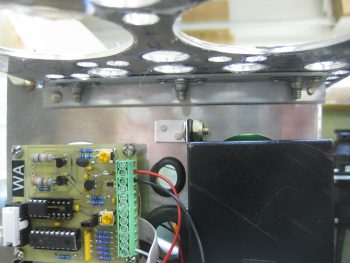
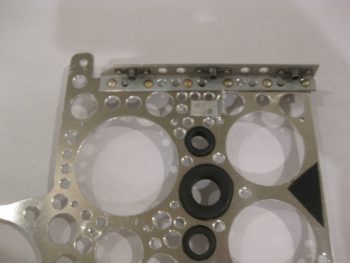
Here’s a closer view of the components on the upper aft side of the Triparagon.
After mounting all the electrical components to dial in their configuration & spacing, I then pulled off all the components to commence drilling the lightening holes. Which I did, spending the next couple of hours drilling the lightening holes.
I’ll note again that after I initially cut out the Triparagon vertical from a panel of 0.09″ 6061T6 Aluminum it weighed just over 1.38 lbs. After drilling all the lightening holes the Triparagon weighed in at 0.71 lb, so almost half of the original weight. I expect that when all is said & done, the installed Triparagon structure with the top cross plate and support struts, will weigh in at just over a pound.
•••
9 November 2016 — I then spent a few hours cleaning up the lightening holes by hand. I also figured out where my #12 mounting holes for the Triparagon screws will be placed. After figuring out the mounting screw locations I drilled the mounting holes and then countersunk the screw holes.
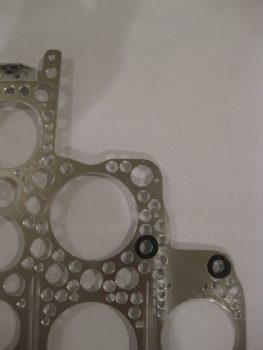
Here you can see the left side of the Triparagon with the cleaned up lightening holes.
You may have noted that there are a some visible gouges on the edge of a couple of the lightening holes. This is directly attributable to the new style cordless drill batteries in that they twice the batteries seemed to have died while I was drilling and as I was removing the hole saw bit from the lightening holes, the drill surged again causing these edge gouging. Obviously I’m not happy about these unsightly marks, but it doesn’t change the functionality of the Triparagon, it just slightly diminishes its appearance and thus knocks down my cool points tally a bit!
After cleaning up the Triparagon lightening holes I then worked for about 3 hours on redesigning my electrical system by removing the relay that controlled the circuit between the battery buss and E-buss as per the recommendation of Bob Nuckolls. Technically, I repurposed that relay to be used as the heated pitot tube control relay with a net result of one less relay in the system. I then updated the main electrical system diagram & the grounding buss matrix list.
•••
10 November 2016 — Today I started out by spending over a half hour tweaking my main electrical system diagram & grounding matrix list, and then printed them out.
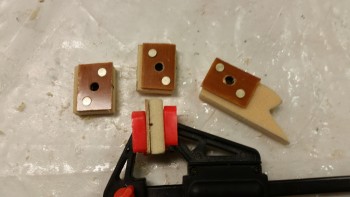
Down in the shop, I started out by bonding the Triparagon phenolic nutplate assemblies to their foam backers. By the way, I used the tough H250 foam for the backers to add some oomph to these Triparagon mounting hard points.
I used 5-min glue to bond the nutplate assemblies to the foam.
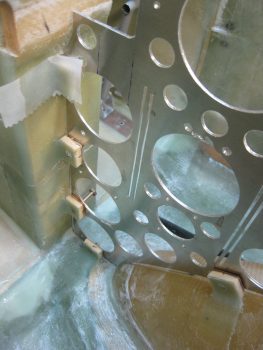
Here are 4 of the 7 mounting hard points bonded together with 5-min glue. You may recall that I actually assembled these about a year ago. I have one more rectangular nutplate assembly that I hadn’t fully put together before, so that needs finished. I have another one in this bag that is an odd shaped nutplate assembly for mounting the very top of the Triparagon to the aft side of the F28 bulkhead.
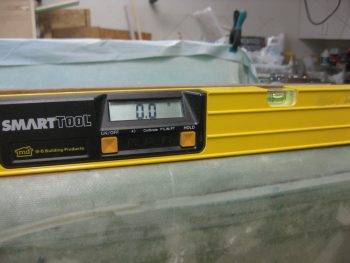
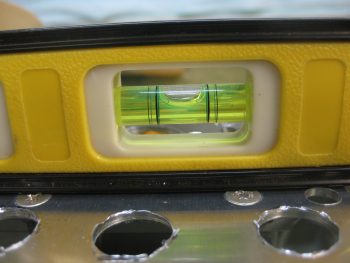
I then verified that the fuselage was level to allow me to match the top “shelf” of the Triparagon at 0° level for the eventual mounting of the GRT GADAHRS.
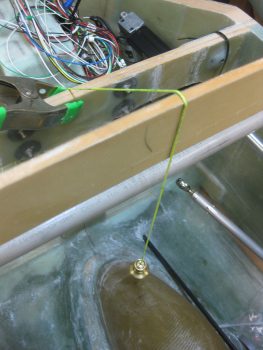
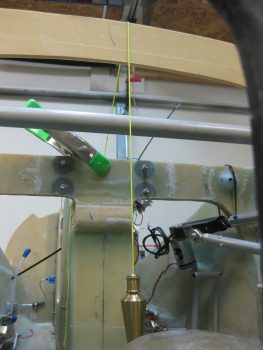
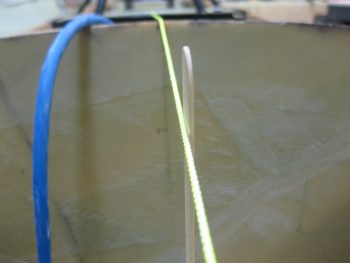
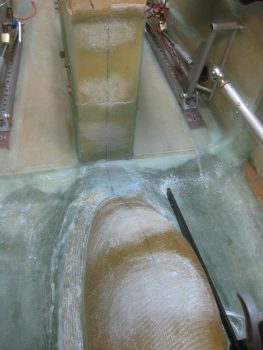
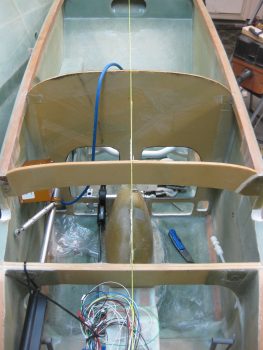
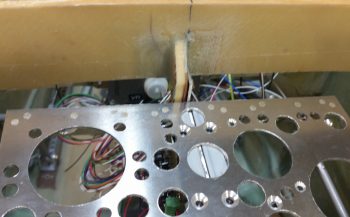
My next task was to mark the fuselage CL on the nose wheel cover (NB). To do this I dropped a plumb line using my CL marks on the F22 & F28 bulkheads.
Here’s another shot of the plumb line for marking the CL.
After marking the CL on the nose wheel cover (NB), I then ran my plumb line down the CL of the fuselage to allow me to install the Triparagon as close to on-CL as possible. At a minimum, I wanted the Triparagon mounted parallel to the CL, even if off center say 0.1″ or so.
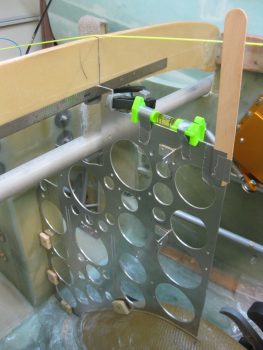
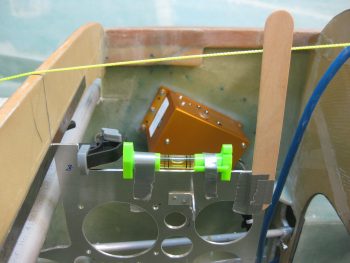
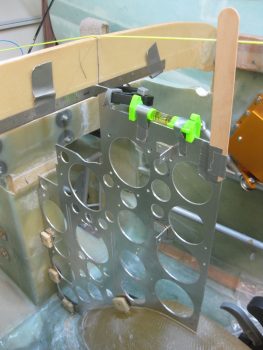
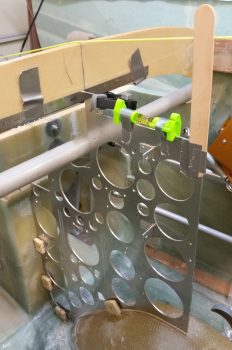
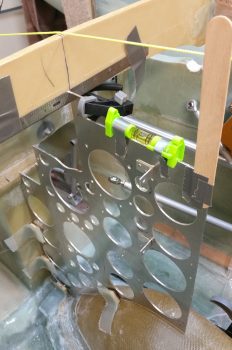
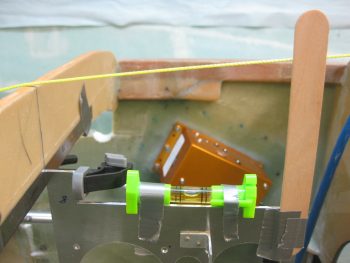
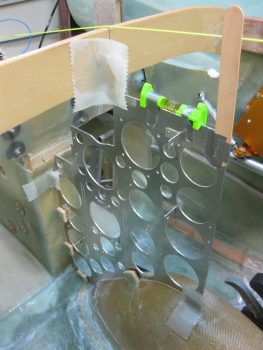
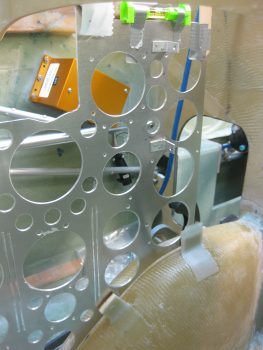
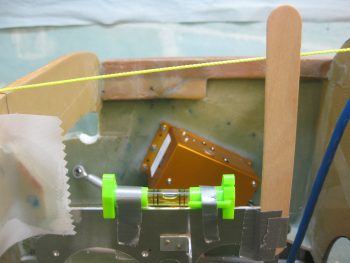
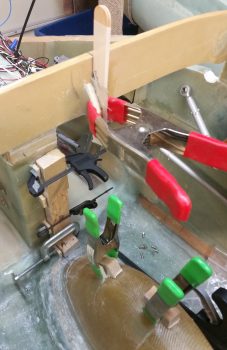
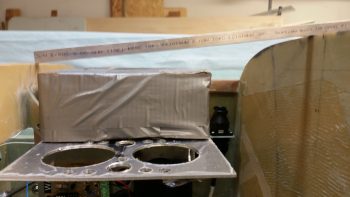
I taped a level in place on the top “shelf” of the Triparagon. I also taped a mixing stick to the top portion of the Triparagon to allow me to monitor its alignment to the CL string that I strung in place. I then mocked up the Triparagon with the 4 nutplate assemblies screwed into place.
I clamped the Triparagon top mounting tab to the aft side of F28. It took some trial & error to dial in the correct spacer thickness between the Triparagon top mounting tab & aft face of the F28. It turned out my decimal fraction ruler was the thickness that did the trick to get the top shelf level with the longerons.
Below is a shot of my mixing stick aligned to the CL string. I intentionally taped the mixing stick on one side of the Triparagon plate so that the actual plate would sit very closely / directly under the CL string.
I marked the areas where the Triparagon nutplate mounts will get secured to the aircraft, removed the Triparagon and then sanded those mounting spots in prep for glassing the nutplate mounts in place.
Then, using 5-min glue on the nutplate assemblies, I glued the Triparagon into place. I re-clamped the top mounting tab to the aft side of F28 while monitoring the Triparagon’s alignment.
I then set a 1″ dia. aluminum tube representing the elevator control spool tube –that will traverse from one side of the fuselage to the other– to ensure clearance between the spool tube and the Triparagon.
I then assembled my last rectangular nutplate assembly (the one that came with some assembly required!) and then made up an entire new nutplate assembly along with its foam backer.
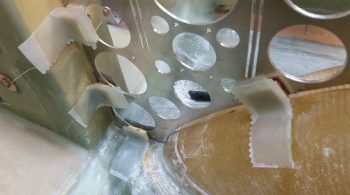
I then cleaned up the 5-min glue on each of the 4 installed nutplate assemblies. I then glassed these 4 nutplate assemblies in place with 3 plies of BID at each nutplate mounting hard point.
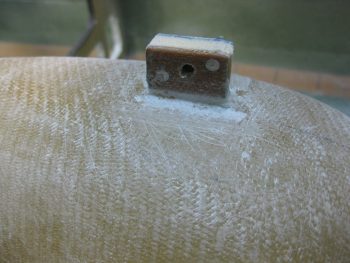
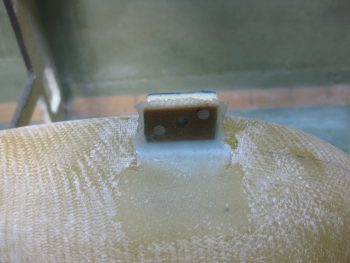
Here’s a closer shot of the Triparagon nutplate mounting hard points glassed in place with 3 plies of BID. I then of course peel plied each layup.
After a couple of hours since the entire mounting process started, and with each of the 4 nutplate mounting hard points glassed in place, I double-checked the Triparagon’s alignment… which looked spot on.
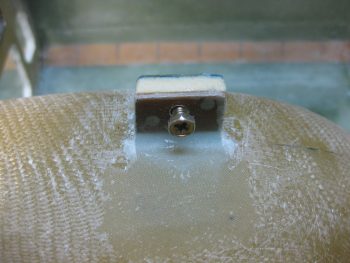
As the 4 installed nutplate mounting hard points’ 3-ply BID layups cured, I dialed in the placement of the remaining 3 nutplate mounting hard points. I marked the Triparagon where the bolt (vs screws on the other 4 mount points) holes would go, then removed the Triparagon and drilled the 3 new AN3 mounting holes: one at the very top adjacent to the aft side of F28, another at the very aft bottom side of the Triparagon attaching to the nose wheel cover (NB), and finally one at the forward top edge of the Triparagon where it mates to the aft side of the F22 center strut.
I then reattached the Triparagon with the 3 new nutplate mounting hard points bolted in place, with 5-min glue slathered on the mating side of each of the nutplate foam.
Once the 5-min glue cured, I cleaned up the freshly installed nutplate mounting hard points, then added flox fillets (as I had on the first 4) and laid up 3 plies of BID on each nutplate assembly.
Below is a couple different shots of this. Also note that I had just previously pulled the peel ply and cleaned up the 3-ply BID layups on the first 4 nutplate mounting hard points that I installed.
And here’s a shot looking aft.
•••
12 November 2016 — I started off today by taking a pic of the pitch level of the mounted Triparagon. As you can see, the addition of the last 3 nutplate mounting hard points tilted the Triparagon ever so slightly forward. Nothing that can’t be reworked or overcome during the installation of the top “shelf,” but it is something for me to take note of to ensure I get 0° level.
Here’s a shot from the top to show the mounted Triparagon in comparison to the CL. Again, you can see that the Triparagon is very closely aligned, so not bad.
I cleaned up the left side layups on the Triparagon nutplate mounting tabs. In the pic below you can see that the top F28 Triparagon mounting tab still needs to be cleaned up.
I then laid up 2-ply BID layups on the RIGHT side of the Triparagon nutplate mounting tabs. I then clamped these right side layups so that the glass would cure as flat & tight as possible to allow the Triparagon to mount back into place close to its original installed position.
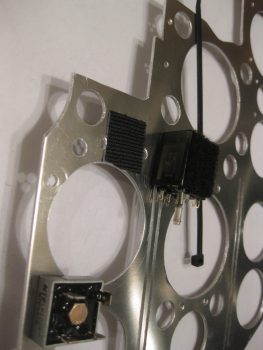
I then started back working on the actual Triparagon by remounting the electrical components to it. I also drilled a couple holes to allow a zip tie to be used for mounting the Trio autopilot Autotrim relay –along with a patch of velcro.
I wired up the G5 avionics ground buss to connect it to the bolt mounting the G4 panel ground buss. Here’s a shot of the left side Triparagon.
Another shot of the left side Triparagon. You can see below that I also wired the E-bus to the Schottky diode.
Below is a shot of the electrical components remounted to the right side Triparagon (with a pic hue for some reason).
And another shot of the right side Triparagon. Again, note that I wired the E-Bus feed by adding a wire between the Main Buss terminal to the Schottky diode (sorry for the slightly blurry pic).
A few hours later I removed the clamped blocks off the Triparagon nutplate mounting points and cleaned up the 2-ply BID layups.
•••
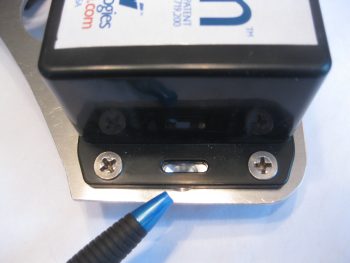
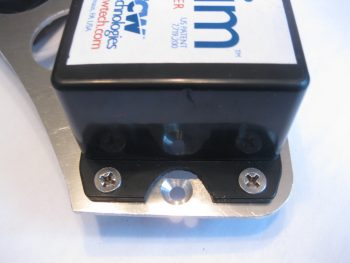
14 November 2016 — I started out today by undertaking the task of removing part of the TCW Safety Trim box’s lower mounting bracket, which was covering and in the way of the bottom Triparagon mounting screw hole.
So I removed a half moon notch of the mounting bracket and uncovered the bottom Triparagon mounting screw hole.
In other news, I fried my heat gun last night. So after a trip to Harbor Freight to pick up a nice cheap replacement heat gun, the weather was nice so I got to work outside to complete quite a number of cuts that were required with aluminum pieces & stock.
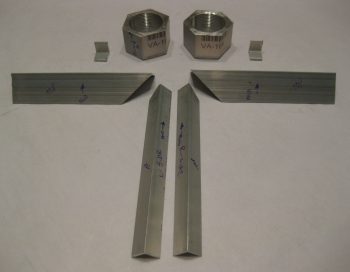
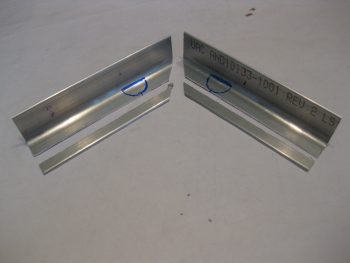
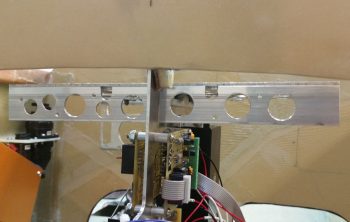
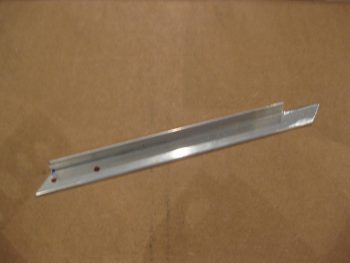
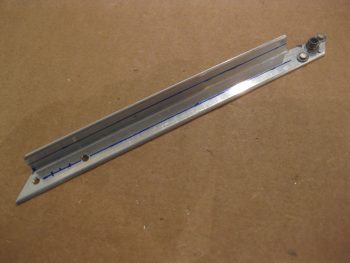
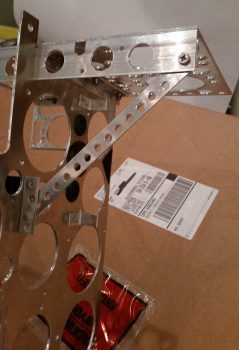
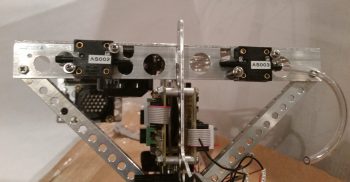
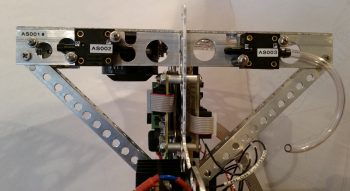
I spent a good bit of time cutting the angled aluminum extrusions for the Triparagon upper cross shelf. The 2 extrusions in the foreground of the pic below are for actually attaching the Triparagon’s top horizontal cross shelf to the vertical plate. The larger angled pieces shown left-to-right are primarily additions to the front of the cross shelf that will be used for both mounting smaller components, such as airspeed switches and the warning horn, and also for the diagonal supports for the Triparagon top cross shelf.
I’m working on the Triparagon right now with my main goal in finishing it at this point of the build being threefold:
- Ensure the Triparagon concept works & can be incorporated with a minimal (and acceptable) weight penalty.
- Install the Triparagon and ensure it fits while I have access to the nose area.
- Wire all the resident components on the Triparagon. This is primarily wiring cross-connects for ONLY those circuits on the Triparagon. All other components will get wired as they are installed.
I should state that part of my fit & finish testing for the Triparagon includes the B&C Voltage Regulator, which is not actually mounted on the Triparagon, but immediately forward of it on the aft upper side of F22. So I also wired all the connections from the Voltage Regulator to Triparagon components.
•••
15 November 2016 — Today it was truly time to test install this monstrosity known as the Triparagon.
After spending a good couple of days here & there populating the Triparagon components with wires to & fro the various parts, and finalizing a large number of circuits for the resident things on the Triparagon, it then stood to reason –and begged the question: Does it work? A test install was in order!
So I did a mock up install of the wired-up Triparagon onto its mounting tabs in what I call the Avionics Bay (instrument panel to F22) of the Long-EZ. I also installed the Voltage Regulator to see how it fit into the mix. Below you can see the left side of the Triparagon & the Voltage Regulator.
And a shot of it from the right. I’d like to point out that up to this point the Triparagon has definitely met, or exceeded, my design goals.
To give you all a sense of space…. specifically the space NOT taken up by the Triparagon (aka “legroom”) I took a couple of shots from close to straight in line with the edge of the the NG30 plates that house the nose gear motor. In addition, the nose wheel cover (NB) also provides a “natural” barrier & offers a bit of standoff protection from wayward feet or legs to help keep the Triparagon out of accidental harm’s way. I would like to point out that the current Triparagon wiring is in the initial “free form” stage and has not been organized, nor secured in place yet.
•••
18 November 2016 — I finished today down in the shop as I cleaned up the aft lower Triparagon mounting tab. I didn’t like the way the lower glass was attached on this tab from my original 2-ply BID layups on the right side of the nutplate mounting hard points, so I ripped off the glass and sanded it down to remove the stubborn stuff.
I also took the time to clean up the other tab layups, ensuring the edges were sanded down smooth. I also drilled out the remaining holes in the glass for the mounting bolts. All this sanding, trimming and drilling made a bit of a mess so I took a few minutes to vacuum up the mess I had made in the avionics bay area..
I then grabbed a small piece of plastic and prepregged 2 plies of BID and laid up the aft lower Triparagon mounting tab. As you can see, and not surprisingly, I then peel plied the layup. What you don’t see is that I then lightly clamped the same block of tape-covered wood that I used before to compress the glass a bit. Finally, I used the leftover epoxy to seal the exposed bare foam on the 3 edges of each Triparagon nutplate mounting point.
With the lower mounting tab BID curing, I then took the Triparagon upstairs to finalize the on-board wiring cross-connects. I started by printing out a number of wire labels on the white shrink tubing. I then terminated two 22AWG red wires into one FastOn tab, one leg each to power the respective AG6s. This FastOn connector will be mounted above the 2 shown on the left side of the E-Bus in the very left of the pic below (using the installed 1A fuse).
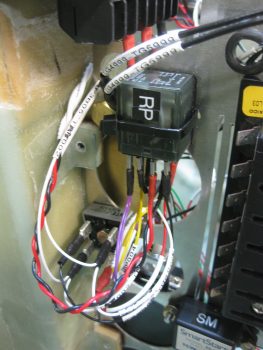
I then spent well over an hour finalizing the wiring for the Trio autopilot’s Autotrim feature. For the autotrim to work it must interface correctly with the TCW Safety Trim box. While I was over in Qatar I worked with the respective gurus, Chuck at Trio & Bob at TCW, to finalize the circuitry for the autotrim. With both of the gurus in coordinated agreement on the wiring scheme 2 years ago, I am just now finally able to implement it. If you look along the upper left edge in the pic below (which is the actual upper forward edge of Triparagon), starting from the bottom you’ll note the DB15 connector housing from the Safety Trim box mounted on the other side of the Triparagon, then a Bridge Rectifier, then a relay marked “RP”. These components make up the Triparagon side of the Autotrim system. Once these interfaces are combined with 2 wires coming from the AP pitch servo and 2 wires coming from the Atkinson pitch trim servo motor, then Voila! … the Trio AP autotrim feature is wired for operations!
Being the social butterfly that I am, I then took the rest of the night off and went to dinner & a movie. When I returned, I pulled the peel ply and checked the 2-ply BID layup on the aft Triparagon mounting tab. Looks good!
•••
20 November 2016 — I started out today by trimming the reglassed aft lower Triparagon nutplate mounting tab with the Fein saw. I then cleaned it up by sanding down the edges and then redrilled the hole to allow me to thread in the mounting bolt, which as you can see I’ve done below.
With all my mounting tabs good at this point, I then brought the Triparagon down to the shop and officially mounted it! Here’s a shot of the right side Triparagon. Note the 2 white wires circling around to the right side of the pic and laying atop the Trio A/P pitch trim servo are the 2 Autotrim wires that interface with the servo.
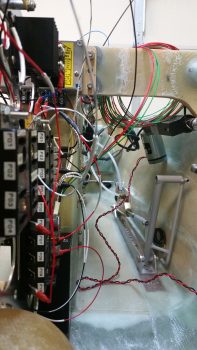
A shot of the right side Triparagon. Again, after all the wires are in place I’ll do some major cable management on this rats nest before it flies.
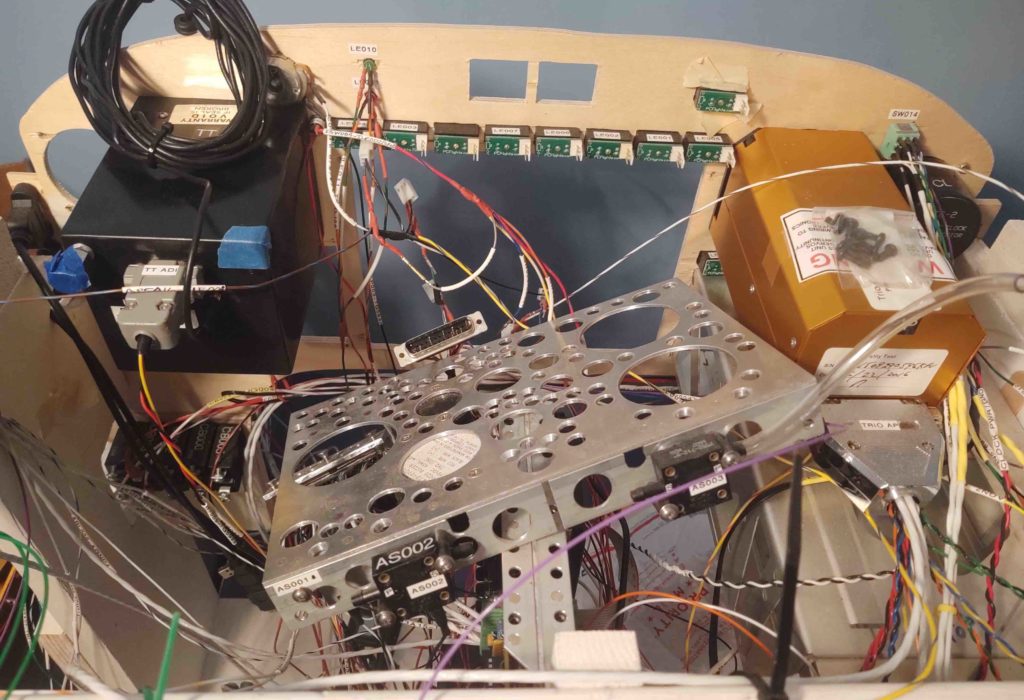
Here’s the left side Triparagon. As I mentioned before, I’m extremely pleased with how this turned out. My next task will be to configure & mount the top cross shelf that will primarily hold the GRT GADAHRS, Trig TT22 Transponder and M760REM COM2 Radio. Also attached to the upper level will be 3 airspeed switches, the Gear & Canopy Warning module, the piezo warning buzzer, and possibly some pitot/static manifold blocks. All these components I just mentioned above make up virtually the entire electrical system other than those components that will be mounted on the Instrument panel.
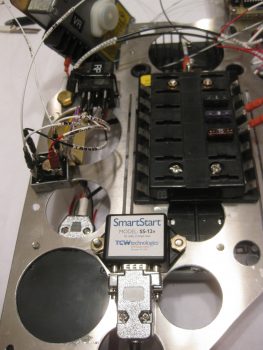
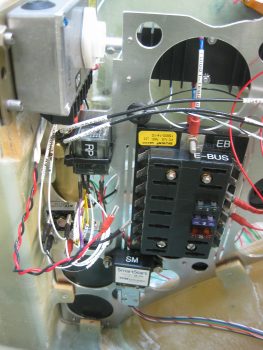
In the pic below of the left side Triparagon, you can see the Voltage Regulator in the upper left of the pic (again, mounted to F22, not Triparagon), the Endurance Buss (E-Bus/EB), TCW Smart Start module (SM), and the Autotrim components on the forward edge. Note in the middle of the pic you can see the twisted red & black wires coming from the Atkinson pitch trim servo motor, terminated with small FastOn connectors to mount on the Autotrim relay (RP) tabs.
Here is a close up view of the Trio A/P Autotrim components: a bridge rectifier (AT) and a DPDT relay (RP). Again, these components interface with the TCW Safety Trim box, the Atkinson pitch trim servo, and the Trio A/P pitch servo for the autotrim feature to operate.
You may note some chicken scratching writing on the wire labels (…at least you do now!). When I added the Triparagon as a Component Wire Location Identifier [N=nose, I=Instrument Panel, H=Hellhole, etc.] I not only changed these wire labels from A (Avionics Bay) to T (Triparagon), but also the end component 2-letter designator on a few items, including both of these autotrim components. Since this wire label heat shrink is not exactly inexpensive, I made the decision to choose function over form here in an attempt to be both cost effective & pragmatic. Especially on wire labels that honestly are rarely going to see the light of day once this plane is flying. To put this in perspective, I’ve already printed almost 100 wire labels and have attached about 2/3rd of those.
One thing I didn’t show in this post was the unraveling and sorting out of the rats nest of nose gear & AEX wires that sat atop the NG30 cover. I had zip tied them up to keep them out of the way while figuring out my rudder/brake pedal placement, and it looked like an unsolvable/untraceable mass of wires. In reality, since I had labeled so many of the wires, after a good 10 min I had it all pretty much figured out and the wires in place, close to their final runs. So, for the nose gear & AEX power, ground & warning signal wires, I heat-shrinked a bunch of the second labels in place, cut the wires close to their final length and crimped connectors onto a number of them as you can see with the AEX ground wire below that will terminate into the Avionics ground buss (G5).
•••
21 November 2016 — Today I got to work on the Triparagon cross shelf. I marked out where the GRT GADAHRS will get mounted along with the centerline, then configured the angled mounting bracket locations. I marked the mounting screw locations on the angled mounting brackets, then took the angled brackets and the cross shelf down to the shop to drill the holes.
After I got the 3 mounting screw holes aligned & drilled, I then riveted nutplates to the left angle bracket.
I then countersunk the 3 left side screw holes on the top of the Triparagon cross shelf and then screwed the shelf to the left side angle bracket.
Here’s a top view of the 3 left side countersunk screws.
I then quickly mocked up the Triparagon cross shelf. Again, I really am liking how the Triparagon is coming along.
•••
22 November 2016 — Today I clamped the right side angled aluminum Triparagon shelf mounting bracket in place, with a scrap piece of 0.090″ aluminum as a spacer, to the screwed-in-place left side bracket. I used my drill press to drill the 3 screw holes through both the angled aluminum bracket and the Triparagon cross shelf.
I then riveted 3 each K1000-3 nutplates to the right side angled aluminum mounting bracket, and countersunk the 3 screw holes on the top side of the Triparagon cross shelf. As shown in the pic below the cross shelf weighs in at 0.6 lbs, so current total weight of the Triparagon structure is at 1.3 lbs gross. I’m certain I can knock half of the shelf weight off with lightening holes, so I expect the total weight for the installed Triparagon structure to be around a pound.
I then test mounted the Triparagon cross shelf to the installed Triparagon vertical plate. So far so good.
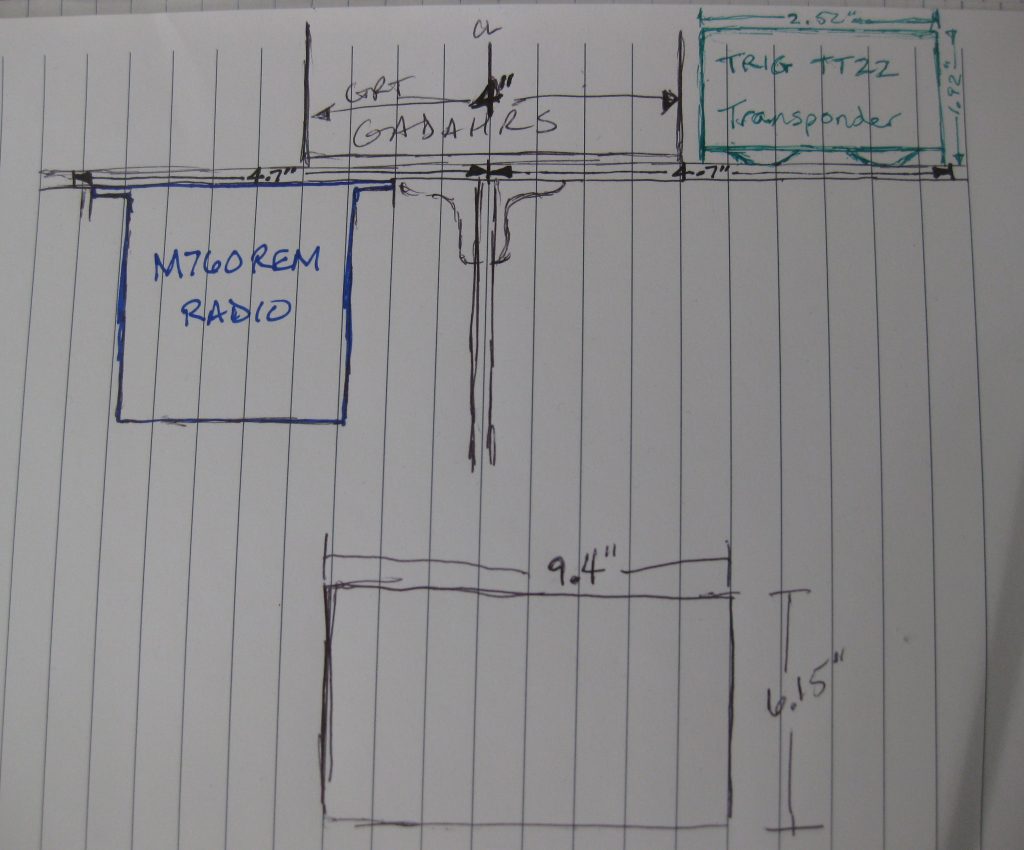
I then took the cross shelf upstairs & diagrammed out the installation location for the M760REM COM2 radio. To set up the following discussion below, I’ll point out that I plan on having a 1″ x 1″ piece of angled aluminum mounted to the bottom front edge of the Triparagon cross shelf, one on each side of the vertical plate, for mounting what I now call the “CrackerJack Parts” (small airspeed switch size components). To be clear, these angled aluminum pieces are NOT shown in the diagram below.
Now, to optimize the installation of the radio in relation to the GRT GADAHRS (see above), I decided that I need to trim the cross shelf’s front side angle brackets horizontal sides down by 0.4″. In other words, the vertical arm of each front angle bracket will be 1″ with the new trimmed horizontal arm (that mount to the the underside of the cross shelf) being 0.6″ wide. This will allow me to move the radio forward on the left underside of the Triparagon cross shelf, and provide better clearance between the mounting screws of the radio & GADAHRS. It will also allow for the aft edge of the Triparagon cross shelf to provide more of a protective overhang for the radio’s antenna & DB15 connectors.
•••
29 November 2016 — First, I settled on the acronym PQD—Panel Quick Disconnect– to describe the connectors and bracket that I’ll be employing to make the task of removing the instrument panel infinitely EZier than without this configuration. Although there will be some wires & components that will not be disconnected, either through their location just off the upper main Aluminum panel face, or because their wiring is not conducive to being split by a mid-point connector (eg Avidyne IFD COM plug P1002 & Dynon intercom wiring harness).
Speaking of the “upper main Aluminum panel face,” after some impromptu research I’ve decided that since I’m keeping a very large portion of the original panel in tact for strength behind the Aluminum panel face, that I’ll be using 0.063″ 2024T3 for the instrument panel. I was actually in the process of ordering that panel from ACS, when I double checked my spreadsheet and lo & behold, I had a spare 2′ x 2′ panel on hand from years ago. Woo-hoo!
Ok, back to the PQD. I had originally ordered a 1/8″ thick 2-1/2″ x 2-1/2″ angled piece of 2024 from McMaster-Carr quite a while ago thinking that I would hang a bunch of stuff off these cross shelf overhangs in the same fashion that I’m doing now with the clearly much smaller sized 1″ x 1″ angled aluminum overhangs. This angled aluminum extrusion was just too big & heavy to use in any reasonable quantity, plus as my Triparagon design matured I just didn’t have a need for it. So into the massive spare pile of aluminum it went.
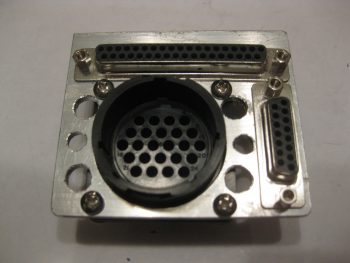
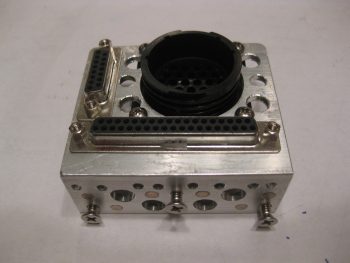
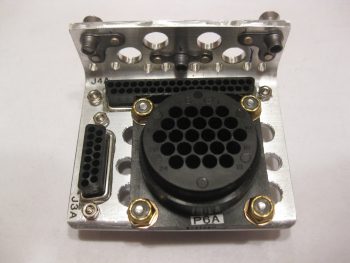
Then when I was finally hit between the eyes seeing Paul Dye’s panel on the VAF forum as I was trolling for pitot-static info, I finalized my decision to make my panel fully & EZily removable. So I had to get serious on both the quantity & type of connectors to use and where they would reside. I had had a nascent thought all along of a drop down bracket on the aft right corner of the Triparagon cross shelf IF I did the fully removable panel mod. Well again, it was time to get really serious so out came the big gun: the 1/8″ thick 2-1/2″ x 2-1/2″ angled 2024. If you remember I posted a few days ago, over the Thanksgiving holiday, a mockup of my connectors on the end of this massive 2′ long piece of aluminum. With my electrical connections confirmed, and with the only mod to the actual connectors being that I swapped out the 19-pin AMP CPC connector for a higher capacity 24-pin connector (same diameter), I was ready to install the J3, J4 & P6 connectors into the PQD bracket, and of course make the PQD bracket itself.
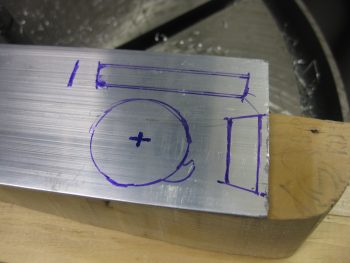
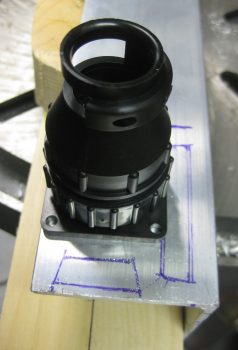
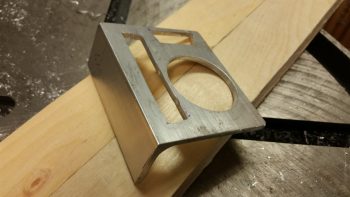
I started by marking the connector outlines on the angled extrusion.
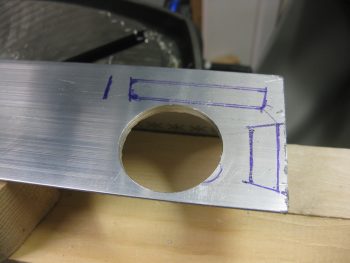
I then used a hole saw to drill the 1-1/2″ diameter hole for the P6 AMP CPC connector.
Of course I had to check the fit…. looking good so far!
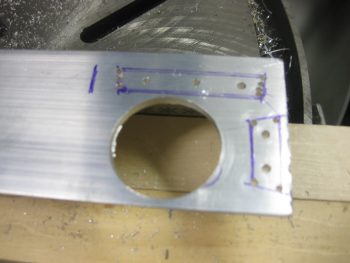
Then came the odd shaped 37-pin & 15-pin D-Sub connectors. I figured this would be a total hand-jam custom build process (“custom” means it works fine, but it ain’t always pretty!). I drilled some small starter holes, focusing especially on the corners.
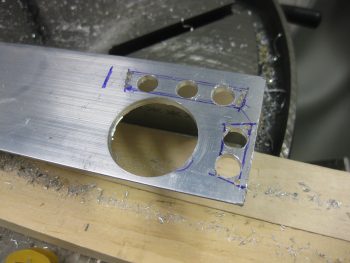
I then expanded out the center area holes with a large diameter drill bit, which is the same diameter as the width of the D-Sub connectors.
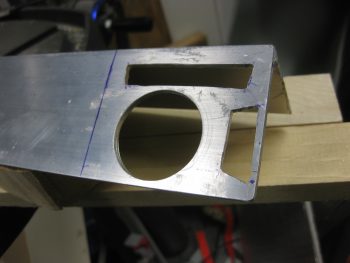
I then employed my jig saw –and a few expletives!– to finalize the cutouts for the D-Sub connectors. Here’s a shot of the initial rough connector cutouts in the beginnings of the PQD bracket.
And another shot after I cut the bracket out of the angled 2024 extrusion (it was raining so I plunged forward using my Skil saw to cut the bracket out!).
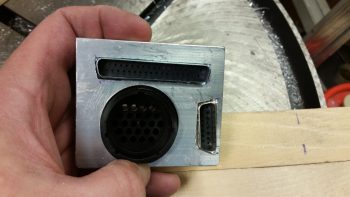
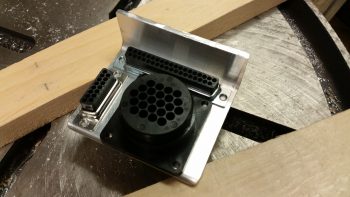
I then test fitted the connectors in the PQD bracket.
Here’s a shot of the backside of the connectors test mounted into the PQD bracket.
I then took the PQD bracket upstairs and mocked it up on my Triparagon cross shelf. After finalizing the mounting location for the PQD bracket on the cross shelf, I then digressed a bit from the PQD bracket and figured out where my first round of lightening holes would go on the cross shelf.
I took the cross shelf and the PQD bracket down to the shop and proceeded to drill the mounting holes for the bracket into the bracket tab and the cross shelf. I then added 3 K1000-8 nutplates to the PQD bracket mounting tab. As you can see, I also drilled 4 lightening holes in to bracket’s mounting tab.
Here’s a view of the top of the PQD bracket mounting tab, with the flush rivets of the 3 K1000-3 nutplates visible.
I then diverged from working on the PQD bracket for a bit and drilled out the first round of a bunch of lightening holes into the Triparagon cross shelf. After finishing round one of lightening holes, I then went back to work on the PQD bracket and drilled countersinks for each of the 3 -8 screws into the top of the Triparagon cross shelf (shown 2 pics below). I then mounted the PQD bracket to the cross shelf.
I then test fit the cross shelf back onto the vertical Triparagon plate. Note the 3 countersunk -8 screws securing the PQD bracket into place. (Note: while I was drilling the PQD bracket mounting holes through the mounting bracket into the cross shelf, the bracket misaligned slightly. Nothing earth shattering, but definitely a slightly-sloppy mounting AND a loss of cool points!)
After I finished with the PQD bracket mounting on the Triparagon cross shelf, I headed out the door to an auto racing shop just across the river in Maryland that sells some high end stuff. I knew that they sold the same quick disconnect fittings that I’m using for my pitot-static system, so I wanted to take a quick break from the build and take a gander. Well, it had been raining all day, but there seemed to be a lull. So I grabbed the keys to the shed, pulled out my table saw and trimmed down the 1″ x 1″ angled 2024 aluminum extrusions that will serve as my Triparagon cross shelf mounting tab overhangs.
I trimmed these angled extrusions down on the sides that will mount to the front underside edge of the Triparagon cross shelf. I took 0.4″ off, with the obvious resulting width of the top horizontal extrusion arm being 0.6″. This took all of 10 minutes, and it actually started sprinkling again as I was putting the saw back away in the shed. With my overhang extrusions cut, I was then off to the racing shop in Maryland.
As a reminder, besides simple weight savings, I wanted to trim down the left side angled extrusion, specifically, to allow me to mount the M760REM COM2 radio about 0.4″ forward on the left underside of the Triparagon cross shelf. This served to better deconflict the mounting screw placements between the COM2 radio and the GRT GADAHRS that’s mounted on the top side of the cross shelf. The right extrusion was merely along for the ride since I might as well make them symmetrical, right?!
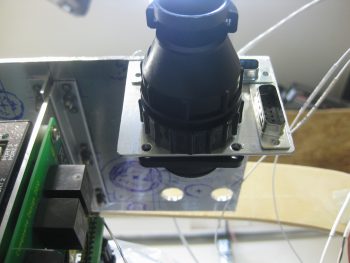
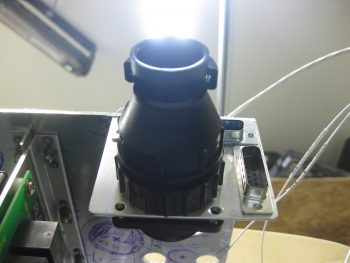
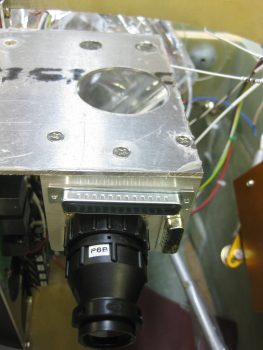
Moving on, I then drilled and then mocked up the PQD connectors P6, J3, and J4.
Since I was holding the camera down low taking low-to-high angle shots of the PQD bracket through the right leg hole, I took a few rounds to ensure that I got a good pic. I had to leave this one in the mix since it looks like something out of Star Wars with a pure beam of energy coming out of the back of the P6 connector. That’s right folks… no wires for me! Just pure energy transfer in my ship! HA!
Here’s another shot of the PQD bracket and its connectors. Note that although I originally wanted to mount the D-Sub connectors on the aft side of the PQD bracket (which would be the forward side of the plane), it initially appears that the connection hardware with the mating side D-Sub connectors will be tough to do if I left them aft-bracket-side mounted. I’ll play around with the hardware a bit, but I think that this will most likely be the mounting configuration for these connectors.
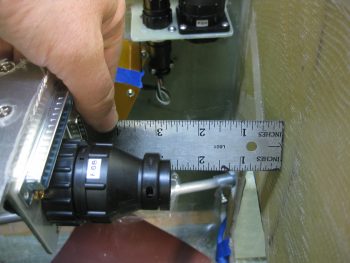
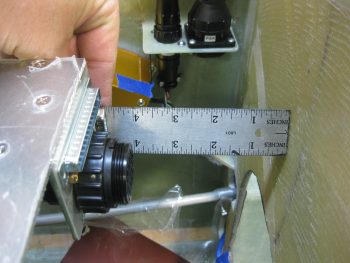
An issue that I noted was after I test fitted the aft side P6 connector’s cable clamp: Hmm, don’t think it’s going to fit since the gap spacing between the cable clamp and the panel is only about 2-5/8″. It would most likely actually fit, but then of course all the wires would exit and then immediately have to take a hard 90° turn to get to their final destination. Not good. So . . .
Be gone vile & wicked cable clamp! (said in thick British villain voice… sorry, my Brit Canardian Peeps. ha!)
Ok, much better! As you can see with the P6 connector cable clamp removed I get about another 1.5″ clearance and 4″ spacing overall. Still slightly tight, but since the GRT HXr EFIS is low profile on the backside this is EZily workable.
And yet another shot showing all my current Avionics Bay connectors.
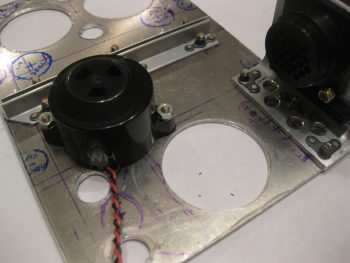
Back on the Triparagon cross shelf, with the PQD bracket configured & installed, I then started in on some of the final pieces parts (aka “CrackerJack Bits”) that I need to mount to round out the final electrical system components install on the Triparagon. I found a good spot for the Piezo Warning Horn on the right underside of the cross shelf. I mocked it up, ensuring it had good clearance with the vertical Triparagon components (it’s close to, but not touching, one of the mounting screws to the right side AG6 warning annunciator). I drilled the holes for #6 mounting screws and then countersunk the 2 screws on the top side of the cross shelf.
Here’s a closer shot of the mounted Piezo Warning Horn with the #6 mounting screws installed. I used standard nuts on the screws to mock up the warning horn & make it EZily removable.
I then test fitted the Triparagon cross shelf onto the vertical plate to double check the clearance between the warning horn and other Triparagon components. In the pic below you can see the 2 countersunk #6 screws, and the warning horn itself through the lightening hole.
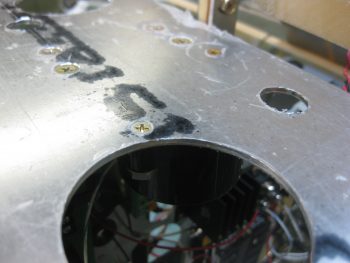 Here’s a final shot of the mounted Piezo Warning Horn on the right underside of the Triparagon cross shelf (pic taken from the front of plane). You can see that it’s close in line to the wiring bundles that will spew forth from the PQD bracket, but also clearly not in the way either.
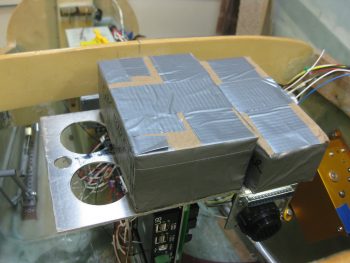
I then brought my cardboard component mockups that I made a year or so back to check out their general fit on the Triparagon cross shelf. Below you can see the GRT GADAHRS (their new term for their new AHRS) and the Trig TT22 Transponder behind the GADAHRS.
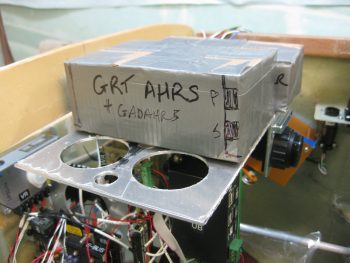 Another shot of the cardboard GADAHRS & XPDR mockups.
Just an idea of the fit of the Trig TT22 Transponder on the Triparagon cross shelf.
And the cardboard GADAHRS and XPDR on the Triparagon cross shelf with the rest of the left side Triparagon in view.
•••
30 November 2016 — With it being a bit later in the evening I wanted to make a decent amount of noise on the Triparagon cross shelf. Thus, I detoured from the stick grip cable for a bit to drill 10 new lightening holes into the cross shelf — 8 small diameter and 2 bigger diameter holes. The 2 bigger diameter holes, just to the right of the center brackets in the pic below, sit immediately above the mounted Piezo warning horn (bigger, lower hole) and the gear & canopy warning module that I mounted tonight (see next pic).
Yes, folks, it’s the marvel of modern technology! Getting a gear & canopy warning module into the space of a couple of stacked matchboxes . . . why it’s just pure science! (ok, and integrated circuits… ha!) Not wanting to NOT gain any progress on the Triparagon today, I mounted the nose gear & canopy warning module with some -6 CS SS screws. As per usual, I drilled the countersinks on the topside of the Triparagon cross shelf, although admittedly one of the holes didn’t want to cooperate and the countersink is a bit larger, lopsided, and messier than I would prefer. Still, once the screw is in & the module mounted it would be bit difficult to tell unless really looking hard at it.
I brought the Triparagon cross shelf back upstairs and weighed the whole thing without any mounted stuff. It currently weighs in at 0.57 lbs, which when added to the Triparagon vertical plate at 0.7 lbs gives me a current total weight of 1.27 lbs. This is about a quarter pound heavier than my 1 lb goal weight. The prescription? I gotta fever for some more lightening holes! So back to the drill press for another round of sharp-bladed weigh loss!
•••
2 December 2016 — Yup, today was a light build day! Today I drilled a notch in each of the two 1″ parts mounting overhangs that will reside on the bottom front edge of the Triparagon cross shelf. Since I kept the shelf as small in dimensions as possible, space is tight all around. Thus, the mounting screws at the 4 corners of the GRT GADAHRS box are located very near the cross shelf’s front and aft edge. At the front side, the GADAHRS mounting screws on each side actually project through the cross shelf plate into the corners of the front parts mount overhangs, at the corner of the angled extrusions no less.
To create a notch to allow for the GADAHRS 2 front mounting screws, I simply clamped the parts mounting overhangs together and then used a larger 21/64″ drill bit to create the notch on each extrusion. When I finished, the notch was deep enough on the vertical arm, but not the horizontal arm. To remedy this I just remounted & reclamped them together with the horizontal extrusion arms positioned vertically together in the clamped assembly, then redrilled. Voila! Good notches with space for the GADAHRS front mounting screws.
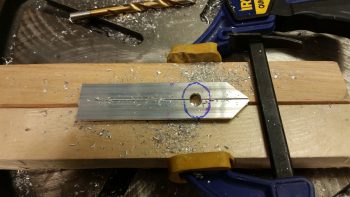 I mixed up the order again slightly on my building task timeline due to my pics. Before I drilled the notch in the parts mounting overhangs, I actually started out by going to town on Triparagon cross shelf and drilling a bunch of 5/8″ and 3/8″ lightening holes, as you can see below. I feel like I should post a shot of the theater masks showing both funny & sad faces, because that’s exactly what this is… a bit of a lesson in futility it seems like! I drilled all those holes only to have the cross shelf weigh in at 0.53 lbs. Thus, a total weight loss of only 0.04 pounds! Wow! I still have a few more spots where I’ll drill some holes, but I realized after this round of drilling lightening holes that my total target weight of 1 pound for the entire Triparagon assembly is probably not going to be met. I will of course strive to make it as light as possible, but I think it will most likely have a final weigh-in of 1.2-1.3 lbs. Still much lighter than when I started out, considering the Triparagon vertical plate alone started out at just under 1.4 lbs!
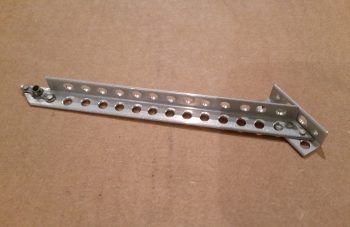
I then spent a good 20 minutes measuring, assessing, checking, visualizing, test fitting, analyzing, mocking up & designing my final plan for the diagonal 1/2″ x 1/2″ angled aluminum supports that will be secured to the Triparagon vertical plate about 1/3 of the way down in line with the front edge of the Triparagon cross shelf. The left & right diagonal supports will connect to the front edge of the cross shelf by being attached to the outer most edge of the parts mounting overhangs.
I will also have one diagonal support on the aft side that traverses from the inboard edge of the PQD bracket to the about midpoint on the aft edge of the Triparagon vertical plate. Clearly this is a total of 3 diagonal supports to keep the cross shelf secure specifically to provide a stable mounting surface for the GRT GADAHRS. I suspect that once all the wiring bundles are in place and attached to the PQD connectors, and all the other bunch of wiring bundles around the Triparagon, that those will greatly assist in securing the cross shelf from any adverse movement as well. If not, I’ll be prepared to run another cross shelf support from anywhere in the avionics bay to ensure the cross shelf is stable for the GADAHRS.
The last thing I did before taking off for the majority of the day/evening was to take my 1/2″ x 1/2″ angled support strut extrusion and use it to double check that the space gap between the top of the GADAHRS box (the tallest component on the cross shelf) and the nose structure between the instrument panel and F28 was good. It’ll be a little tight after some foam & glass goes in there, but the spacing looks fine.
•••
6 December 2016 — I started off today by marking up the front top edge of the Triparagon cross shelf in the location where I would drill the beginning holes for the rivets that will secure the parts mounting overhang tabs.
My first real action though was drilling the front & aft rivet holes on the mounting flanges that secures the cross shelf to the vertical plate. These are the first 2 of 4 total larger diameter rivets that I’ll use to secure connect these Triparagon pieces. I couldn’t actually press the rivets in place since I can’t get in there with my rivet pressing tool, so I’ll have to mount the rivets when I remove the vertical Triparagon plate.
I drilled the aft rivet hole first (right, above) since the cross shelf needed to come up about 0.070″ on the front side to be at 0° level, which is what the double-checked longerons showed. After drilling the front side & inserting the rivet, I confirmed that the cross shelf was still level from front to back, matching the 0° longeron level… which you can see it did!
I took this shot specifically to show the 6 countersunk screw positions that are used to hold the cross shelf to the vertical plate via the angled mount extrusions and nutplates. You may note in the next pic that the nice aluminum material in the areas between the pairs of countersink holes were targeted for lightening… Yes, the weight loss program continues!
In the pic above you can see all the dots along the leading edge of the top cross shelf where I marked the it for the rivet drill points. I then drilled a 1/16″ pilot hole at each dot where I would be installing a rivet. I then I clamped each overhang piece in place, drilled the #40 hole through the cross shelf pilot holes into the overhang extrusion clamped underneath. I then deburred all the rivet holes, and then mounted one overhang at a time. I would drill the countersink on a rivet hole, press the rivet into place and then move onto the next rivet. You can see all the rivets installed below, which of course means that the overhangs are mounted. Also note there are a number of new lightening holes. After I drilled the new lightening holes, I spent a good 20 minutes cleaning up the rough edges of the larger cross shelf lightening holes.
The overhangs have the dual purpose of providing a mounting surface for the CrackerJack parts, and also to provide a flange to mount the upcoming diagonal supports that will secure the outboard ends of the cross shelf to the upper mid-point area of the vertical plate. You can see that I pre-identified the locations for the airspeed switches and drilled the mounting holes on the overhangs before riveting them in place.
Here’s a shot of the overhang rivets . . .
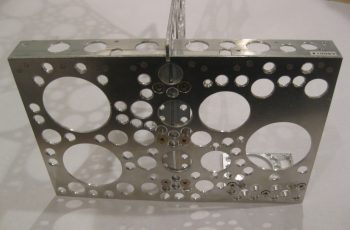
And a shot of the entire Triparagon cross shelf . . . in repose! ha! I weighed the cross shelf with its attached brackets, and with the new lightening holes it weighs in at 0.476 lbs. Add that to 0.7 lbs of the vertical upright (which will get another round of lightening holes) and I get a respectable 1.176 lbs total currently. Again, I suspect that I’ll come in at about 1.1 lbs for final Triparagon install weight.
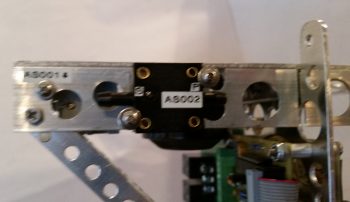
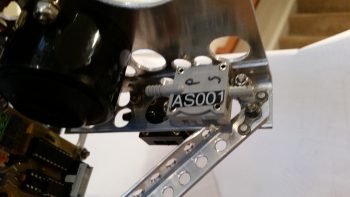
I then mocked up and test mounted my Crackerjack parts, aka airspeed switches, onto the front overhang mounting tabs. Note that airspeed #1 is mounted on the right side (left in the pic) on the aft side of the overhang tab staggered behind and just to the left (looking from front) of airspeed switch #2. I mounted airspeed #1 to allow me to adjust the target airspeed set point with the setscrew.
I then spent a good couple of hours updating my IBBS wiring diagram and determining the pinouts for my PQD (Panel Quick Disconnect) connectors.
•••
8 December 2016 — Today I started out by finishing up the lightening holes on the Triparagon cross shelf. I drilled small 3/8″ holes in literally every spot that there was space to, again to get this thing as light as possible without compromising strength. I removed the PQD bracket to drill lightening holes on the cross shelf above where the bracket mounts.
After drilling the last of the lightening holes, I then spent a good hour and a half deburring the holes and cleaning up the cross shelf. I still need to finalize the deburring, but I at least got the rough stuff off the hole edges.
I also drilled lightening holes in the PQD bracket, which again I need to finalizing the deburring on those holes as well. I then mounted the P6, J3 and J4 connectors.
Here’s another view from the top.
And an aft bracket view (technically a forward view).
•••
13 December 2016 — I started off with a couple of shots of the Triparagon showing how it looks as removed from the airplane with all the electrical accoutrements attached. You can see on the right side that there’s a big bare spot where the original X-Bus once resided. Now I have more space to mount more toys in the future!
The goal for the day was at a minimum to get the diagonal supports in for the cross shelf. I was able to accomplish that. I was also trying to get the last round of lightening holes drilled on the Triparagon vertical plate . . . that did not happen.
I got to work by stripping the Triparagon of all of its encumbering components, ensuring that each component and its hardware got bagged so as to keep track of they myriad of little pieces parts.
I then gathered up my 1/2″ x 1/2″ by 1/16″ thick 2024 angled aluminum extrusion and did a bunch of figuring out, measuring and head-scratching to configure the right side diagonal support. Because of the location and angle that it intersects with the vertical plate, I went ahead and decided to simply mount it with 2 x 4-40 screws to the aft end of the Schottky diode heat sink, which in turn is of course mounted to the Triparagon vertical plate.
After getting all my measurements and angles finalized, I marked up the extrusion and cut it. Since it’s really cold outside and it was more trouble than it was worth to pull out a miter saw, I simply cut this by hand using my German hack saw. I needed to remove a length of one side of the angled extrusion on the top-oriented end to make room for the static line attached to airspeed switch #1. I cut the perpendicular side with my hacksaw, but for the rip cut at the corner edge I used the Dremel with a cutoff wheel (pic is a bit blurry).
I then drilled a hole for a #8 screw through both the diagonal support and the right corner of the cross shelf overhang mounting tab. I then drilled and riveted a K1000-8 nutplate to the top end of the support arm. As you can see, I also marked the diagonal support arm with lines running the full length to drill lightening holes.
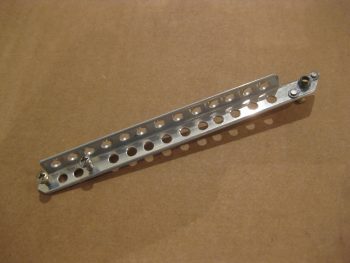
I then drilled a series of 3/16″ lightening holes. Although I used my drill press, they’re still far from perfect. But they lighten the piece and provide holes to secure wires to, so requirement met!
Here’s a shot of the finished right-side diagonal support arm for the Triparagon cross shelf.
On the left side I had nothing to mount the support arm to on the lower end of the arm, so I cut a 1.55″ piece of 1/2″ x 1/2″ by 1/16″ thick 2024 angled aluminum extrusion to make a small mount bracket. I planned to have the mount secured to the vertical Triparagon plate using the same 2 screws that also secures the aft edge of the Schottky diode heat sink (different screws than the 4-40 ones used above to mount the right side support arm).
I set the length (technically height) of the mounting bracket so that the screw holes would be about 0.2″ in from the top & bottom edge, so after cutting the mounting bracket to 1.55″ I simply marked and drilled a hole 0.2″ from the edge. I also tapped the hole to accept a 4-40 screw. I can of course drill this out later if I simply want to use a nut with the screw later on.
I then mounted the bracket in place, removed the lower screw and marked the hole with a Sharpie. I then removed the bracket and prepped it for drilling.
Jumping ahead (I had a pic or two in-between, but they came out frustratingly blurry!), here’s the completed left side diagonal support arm. Note that I used rivets to secure the arm to the mounting bracket. Also note that I drilled a number of lightening holes in not only the support arm, but the mounting bracket as well.
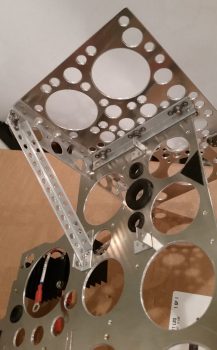
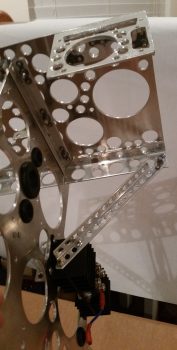
I then mounted the diagonal support arms in place on the Triparagon and snapped a bunch of pics.
Here’s a shot from the front right side of the Triparagon looking aft.
And another one from the front left side looking aft.
A head on shot looking aft.
And what you would see if the instrument panel was see-thru.
A bit closer from the front right & left looking aft.
A low angle shot looking from the left side forward.
And the final low angle shot looking from the right side forward.
•••
14 December 2016 — I started the day off by finalizing and pulling the trigger on both a Mouser order and a quick ACS order (it appears that someone –ha!– forgot to order some 22 AWG shielded wire…).
I then got to work on the Triparagon vertical plate. I stripped off the cross plate, diagonal support struts and the Schottky diode/heat sink and got to work for the last and final serious round of lightening holes. The starting weigh-in this round for the Triparagon vertical plate, with the grommets and cross shelf brackets including 6 x K1000-3 nutplates, was 0.82 lbs. My goal was to get the weight down by another 0.2 lbs.
After drilling a 1″ lightening hole and 10 each 5/8″ holes, it weighed in at 0.78 lbs. At this point it was really time to get work. As you can see, I Swiss cheesed this thing like no tomorrow to drive the weight down to its possible lowest, without sacrificing strength. I used an 11/32″ (0.344″) drill bit to get all the in-between spots that I could while, again, still leaving enough meat on the bone for this thing to be as strong as it was before. It is an interesting concept that you can remove so much material, but when I flex it, it feels as strong as when it was a solid panel.
After squeezing in as many 11/32″ holes as I could (I have about 3-4 more places I can get with a slightly smaller bit), and drilling 3/16″ lightening holes on the upper arms of the cross shelf mounting brackets, I’m sitting at 0.68 lbs. for these components. Obviously, this isn’t quite as low as my 0.62 pound mark, but I’ve squeezed just about all the weight out of this thing that I reasonably can.
When I weighed the entire Triparagon assembly as a whole, it weighed in at 1.18 lbs, including hardware. Since I have just a handful of lightening holes to drill, if I add in the weight of the aircraft-side mounting tabs and the hardware, I’m right around, or just a hair over, 1.2 lbs. My initial goal was a pound or less for the entire Triparagon’s added total weight, so an extra 3.2 ounces ain’t bad… I can definitely live with that.
Thus, as Vince Lombardi said, “Perfection is not attainable, but if we chase perfection we can catch excellence.” Clearly I didn’t reach my ‘perfect’ requirement, but I got pretty close. In putting in a lot of effort to get as much weight off these components as possible, I feel like I’ve definitely achieved excellence in that regard.
•••
15 December 2016 — I’d like to first off point out that it was a year and 10 days ago (Dec 5, 2015) when I first used the term “Triparagon” in my build blog. Now I of course use it as a common term. And what was once just a flurry of ideas and thoughts regarding the Triparagon has made its way into finalized reality. What the Triparagon has become is even better than what I had envisioned about 13 months ago when I first had the epiphany to do this.
The best plans rarely account for everything, and as far as the Triparagon is concerned I greatly underestimated the time and effort it would take to simply create the lightening holes. Thus, when I looked at the Triparagon this morning, after the “last & final” round of lightening holes, I should have been put in the looney bin when I decided I could go just one more round using a smaller 0.190″ drill bit. So that folks is exactly what I did: an entire FINAL round of lightening holes!
I also noted that I could actually remove a bit more weight by rounding the corners of the vertical Triparagon plate. So before I started in on the final round of 0.190″ lightening holes, I drug out my Saber saw and did some cutting. After I finished rounding off the corners, I then got to work drilling the small holes. If the area could take a 0.190″ hole and still have a good amount of metal for strength, it got drilled!
After the final round of lightening holes was finished, I then set about for the next 3-1/2 hours in chamfering the holes. I did it the in my typically poor man’s milling machine style by using my drill press with a slightly larger bit, and going very slowly (the downward motion, not the bit) to create a nice edge on each hole, albeit a fair number of them are a hair off center.
After chamfering the smaller holes I then finished the edges of the larger holes. [I had to finish up the last handful of smaller holes with a cordless drill since my chuck assembly literally fell out of my drill press while chamfering one of the holes. Luckily the hole wasn’t next to anything important because it created a decent sized crater where a nice lightening hole had once existed!]
I then drilled and installed 6 larger rivets across the top of the cross shelf mounting brackets to permanently mount them to the Triparagon vertical plate. Afterwards, I drilled 0.190″ lightening holes in-between the rivets.
Then, for the first time, I officially mounted the cross shelf to the Triparagon vertical plate!
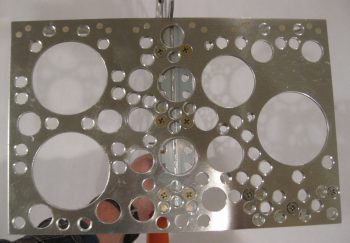
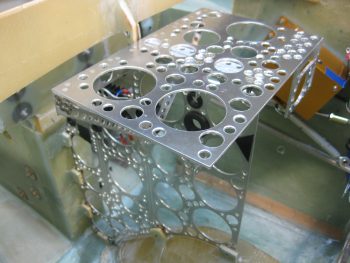
Here’s a top view of the cross shelf. You can see the lightening holes of the cross shelf mounting brackets through the lightening holes in the cross shelf.
And another view of the cross shelf, after I installed the diagonal support arms (which again requires mounting the Schottky diode heat shrink).
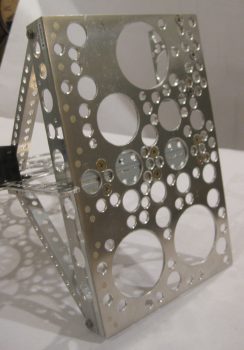
Here’s a side view of the finished & assembled Triparagon structure.
I then took it down to the shop for one final test fit (and the requisite round of pics!) before remounting all the electrical components back onto it. I figure it will be a long time before the bare Triparagon structure sees the light of day again.
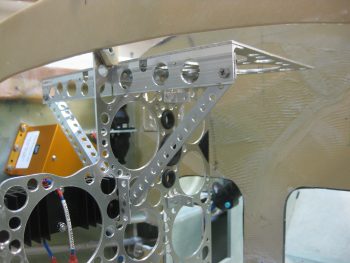
Here’s a shot primarily showing the diagonal support arms and the front cross shelf overhangs.
And from the right…
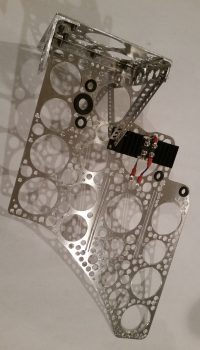
Here’s a shot from the aft side of the now permanently (but removable!) cross shelf attached the vertical Triparagon plate.
I removed the Triparagon from the fuselage avionics area and took it back upstairs to start reattaching the electrical components to the structure.
Besides the required Schottky diode heat sink, the next items to get attached were the back-to-back attached AG6 warning annunciators (AG6A & AG6B).
I then remounted the Roll Trim relay board.
Now, I wanted to use some type of thread locker but all I had was red & blue. I went out on a quick quest to find some purple Loctite, for small diameter screws, but as per usual it was a lesson in futility after visiting 3 different stores. I remembered reading a forum post regarding thread locker from our friends in the VANs world. Sure enough I found it. A guy on the forum reported success with grey silicone RTV, and recounting in my mind the characteristics of the blue RTV I had used (not wisely!) to protect the bolt threads of my canard mounting tabs when I glassed the shear web, I figured I would use that vs. an actual thread locker (second pic below). To be clear, I only used it where I wasn’t using a nut on the other side of the plate to secure a screw.
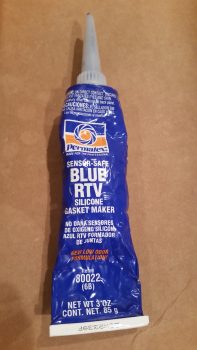 I then remounted the 4-port USB hub with locking screws & nuts, and then the Avionics ground bus (G5) and Carbon Monoxide detector (CO), both with blue RTV.
I then remounted the Main Bus and E-Bus, which share the top 2 screws & AN3 nuts, and thus are physically clamped onto the Triparagon plate. The bottom screws for the E-Bus got blue RTV. Only one bottom screw for the Main Bus got blue RTV because the other one is shared as the aft mounting point for the SmartStart module, so it too gets an AN3 nut. Below you can see the E-Bus and the SmartStart module mounted on the left side of the Triparagon.
And here’s the right side of the Triparagon, with the Main Bus remounted. I also remounted the Trim relay box (TCW’s Safety-Trim) which shares its aft upper screw as the forward mounting point for the SmartStart module on the opposite side. The other 3 stainless steel countersunk screws on the Safety-Trim box got slathered up with blue RTV.
I then remounted the PQD connectors: 1 AMP CPC connector and 2 D-Sub connectors.
Here’s a shot of the aft side of the remounted PQD connectors. Notice how bare the area is just to the right of the PQD connectors …
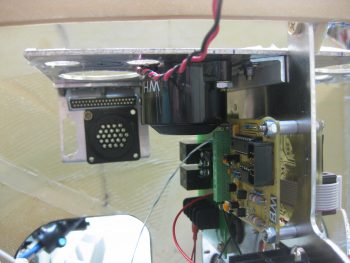
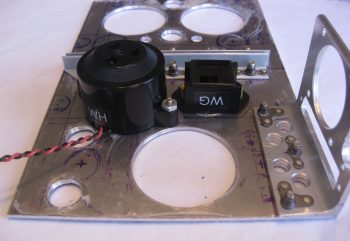
Not anymore! I mounted the gear & canopy warning module (WG) and the Piezo warning horn (WH) in the space just forward of the PQD connectors, on the bottom left side of the cross shelf.
Here’s another shot of the installed gear & canopy warning module (WG) and the Piezo warning horn (WH).
I then got to work on doing a final mount of my 3 airspeed switches. Airspeed switch #2 and #3 were fairly EZ, but #1 was a bit of a pain. I had to remove and trim down the top of the horizontal arm piece on the left diagonal support to allow clearance for the airspeed switch. Specifically clearance for one of the FastOn connectors that mount on the underside of the airspeed switch, which was not accessible with the current configuration of the diagonal support arm.
After trimming the diagonal support arm, I remounted it and test fitted airspeed switch #1. There was still just a bit of interference with the support arm, but I had removed all that I could before actually cutting into a lightening hole. I found a 3/4″ 4-40 spacer and cut it in half, and tried out the 3/8″ spacer (vs the 1/4″ spacer I was already using!). Voila! That did the trick. I then mounted airspeed switch #1 to finish off the mounting of all the “CrackerJack” parts.
Here’s a closer, albeit blurry, shot of the right-side mounted airspeed switches. You should still be able to make out the airspeed set screw for airspeed switch #1 through the hole in the cross shelf overhang.
And here’s a shot from behind, showing the staggered #1 and #2 airspeed switches. Note the clearance between airspeed switch #1 and the top of the diagonal support arm.
The final, no kidding, total weight penalty for installing the Triparagon is right at 1.2 lbs. Of course if you take into account the amount of wire in runs saved, and the myriad of separate mounting hardware, glass and epoxy to mount things on the sidewalls in the avionics area, I’d argue that there’s at least a quarter of a pound there, making the comparative weight penalty more around 3/4 of a pound. The weight comparison also doesn’t take into account the increased ease-of-use for the Triparagon.
•••
16 December 2016 — As I mentioned before, my final act on this big first round of working on the electrical system will be to wire up all the cross connections I can from points A → B on the Triparagon itself.
I started off working on the gear & canopy warning module, and its partner in crime: the warning horn. I wanted to get those wired up as best possible since they reside immediately above all the PQD connector wiring. My first task was to extend the positive side (red) lead out of the Warning Horn, which connects through a 3A fuse on the Main Bus. I fired up my trusty soldering iron and soldered a length of red 22AWG wire to extend the Warning Horn lead. I then added heat shrink over the joint, labeled the wire, and then terminated it with a FastOn connector.
Here’s a big picture shot of my work on the right side Triparagon. Once I get the cross connects on this side complete, I’ll move to the left side.
Besides airspeed switch #1, the majority of my cross connects have been between right side Triparagon resident components and the PQD connectors; primarily the big P6 connector, which you can see in the upper right corner.
Here’s a quick shot of the area where I do the majority of my cable building and connector terminating/assembly.
•••
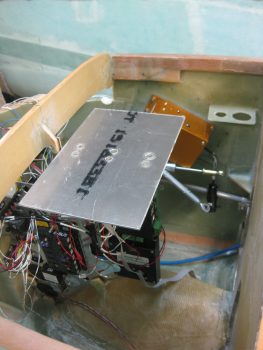
11 October 2017 — Today I spent a good 45 min working on the placement of my panel components on the back side of the panel. Also note that I quickly mounted the Triparagon back into place to verify how the instrument panel instruments align with it.
With the Triparagon mounted, I did a quick test fit on the GRT HXr EFIS GADAHRS. It looks like it will fit in its planned spot nicely.
I then double checked the elevation of the GADARHS unit… also good.
•••
18 December 2019 — Today I started down the road of mounting the Trig TY91 remote COM2 radio, the GRT HXr AHARS, and the Trig TT22 Mode-S Transponder to the Triparagon top shelf.
Since the weather has turned somewhat and it is quite cold during the mornings, I thought I would let the workshop warm up a bit before venturing out and working on it. And not surprisingly, I’m quite tired from the endless days of working on the shop. So I thought I would take the morning off to work on the plane just a bit. It’s been a while!
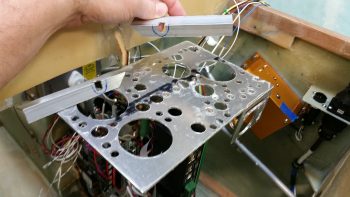
Of course, the easiest way to mount this stuff to the top shelf of the Triparagon is to remove the shelf itself. The physical removal of the top shelf is the easy part… getting it unencumbered even with the scant amount of stuff it currently has mounted on it is a bit more time consuming.
Attached underneath is the gear/canopy warning horn as well as the JBWilco gear/canopy warning system module. The tricky part here is simply keeping track of the small screws, washers and nuts after removing this stuff.
Then came the airspeed switches. Same thing… I want to ensure this all goes back together nicely and easily!
Here’s a shot of the JBWilco gear/canopy warning system module and the 3 airspeed switches.
Once the Triparagon top shelf was free of stuff, I could then get to planning out just how I was going to mount these 3 devices.
You’d think mounting 3 components to this top shelf would be a fairly simple and quickthing to do… but finding all the hardware, after deciding what you’re going to use, after figuring out what will fit, etc, etc, etc. . . . Wow, a couple of hours had already flown by after I rounded up all the hardware I was going to need.
Let alone figure out how to mount the two Trigs.
Why are the Trig components a question? Well, as I mentioned before in previous posts, I had not planned on using the Trig TY91 COM radio —but rather the MicroAir M760REM–when I finalized my design for the Triparagon over 3 years ago. Specifically, the top shelf where the TY91 is going to be mounted since the MicroAir was to be mounted underneath in order to, if you’ll recall, save space and minimize the width of the Triparagon’s top shelf.
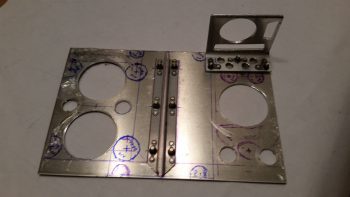
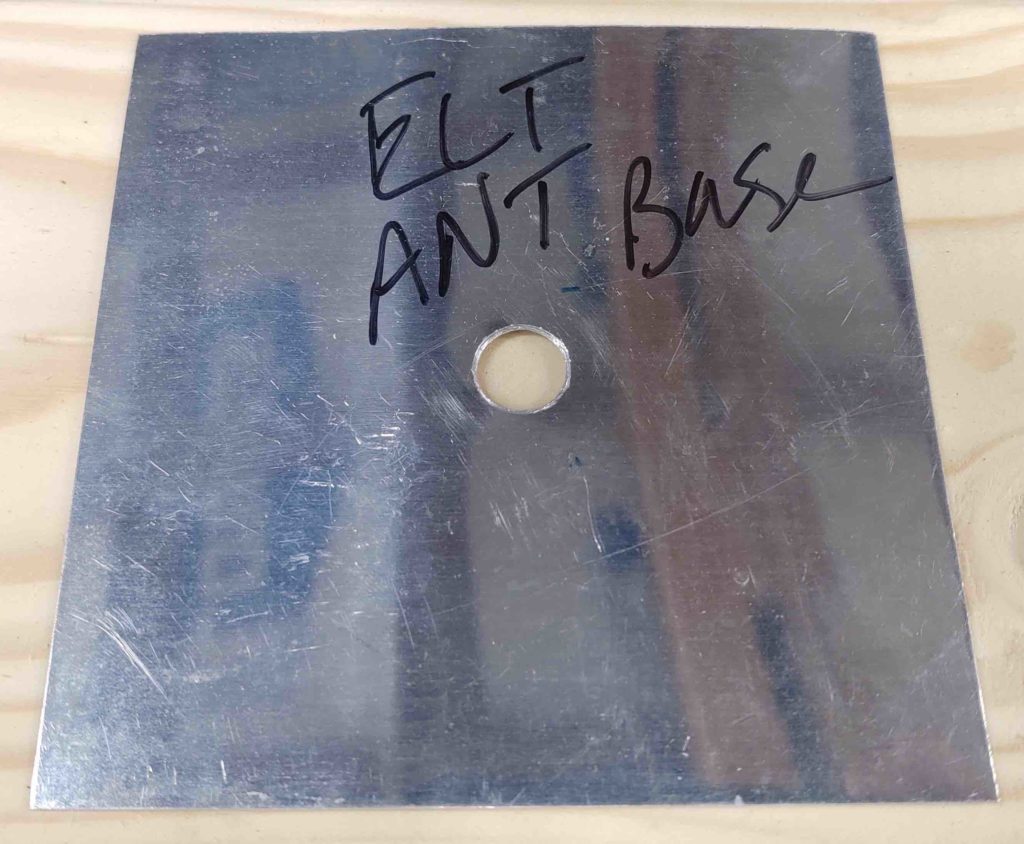
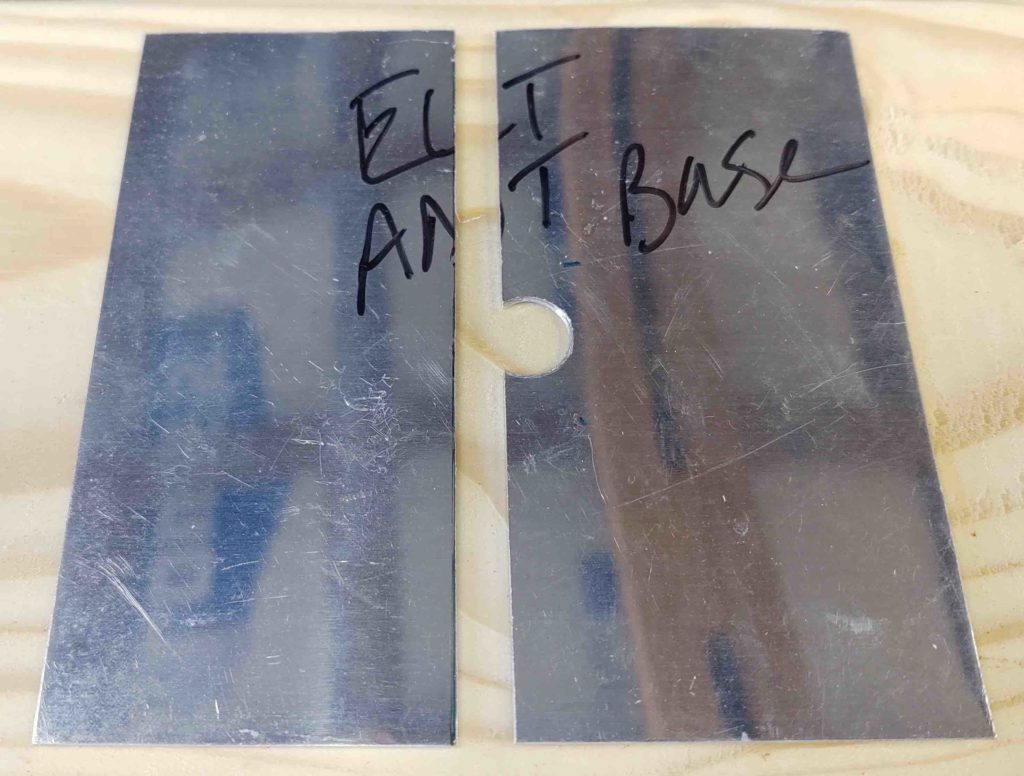
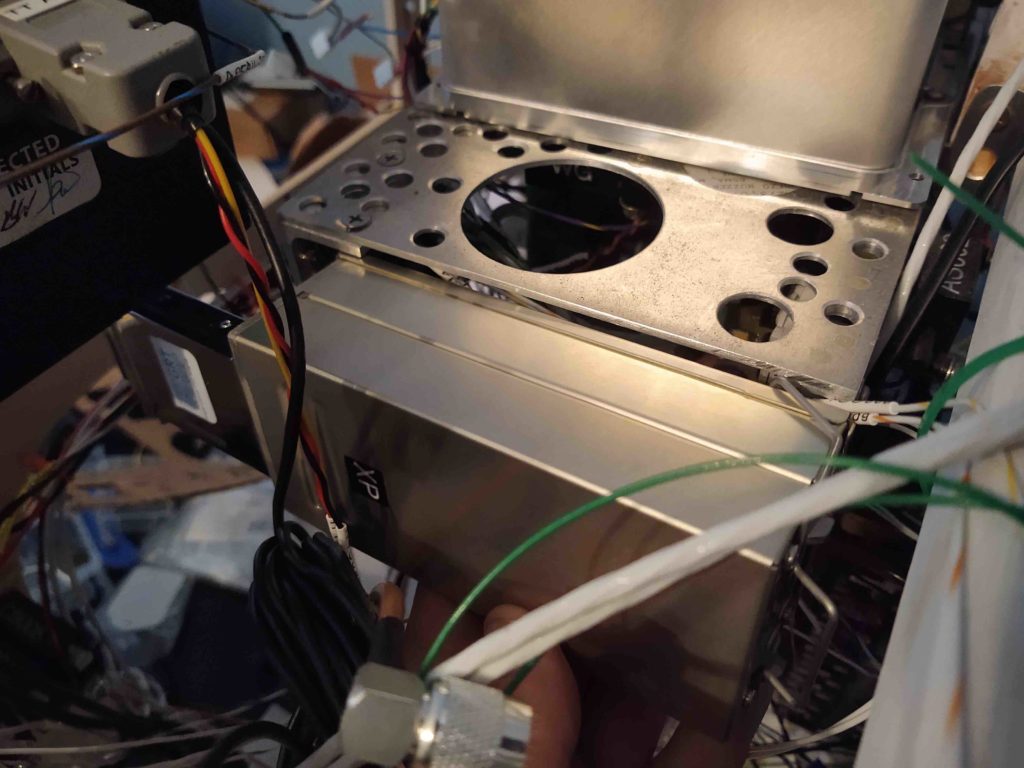
Moreover, since I “Swiss-cheesed” the Triparagon top shelf to save weight, I effectively removed all but one possible mounting point of the 3 required for the Trig TY91’s mounting adapter. Thus, I needed a decent-sized metal plate that will go on the underside of the top shelf to serve as the bottom-half clamp portion opposite of the actual TY91 mount on the upper side of the top shelf. As I was looking for the unused mounting plate for the EFII fuel boost pump since it was the perfect thickness (which I couldn’t locate) I found this old ELT antenna base (or maybe actually for a transponder?) that I constructed back in Germany.
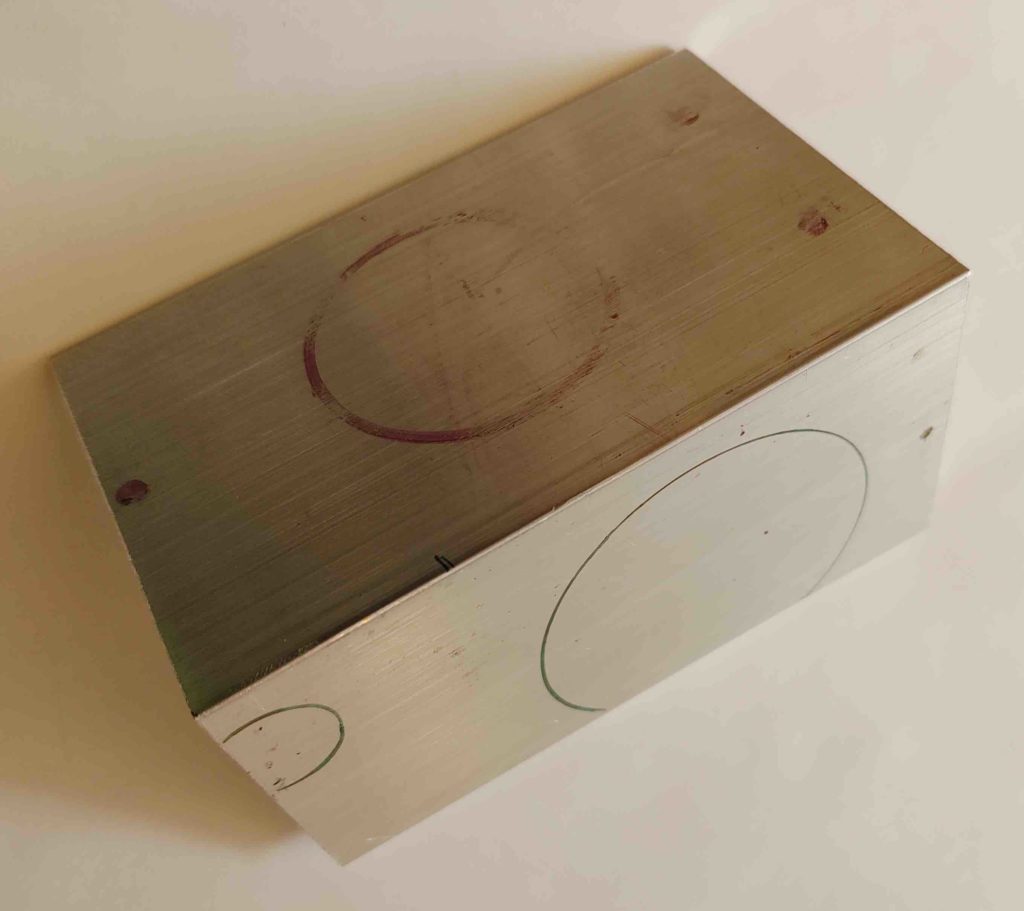
With my L2 transponder antenna in hand and since this is not required for my ELT, I know I’ll never need this antenna base as constructed. It’s a nice thin, yet strong, piece of aluminum so I lopped off the portion I needed and will use it to mount the Trig TY91 remote COM2 radio unit.
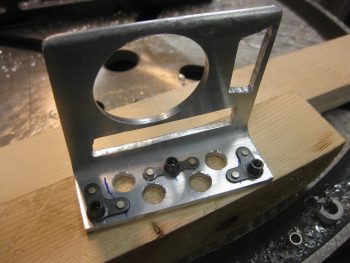
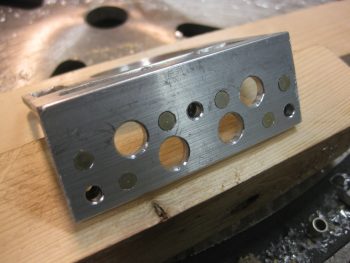
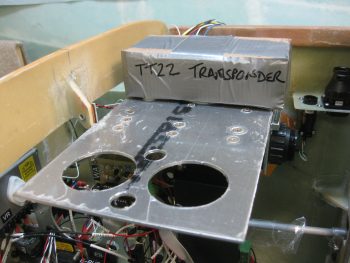
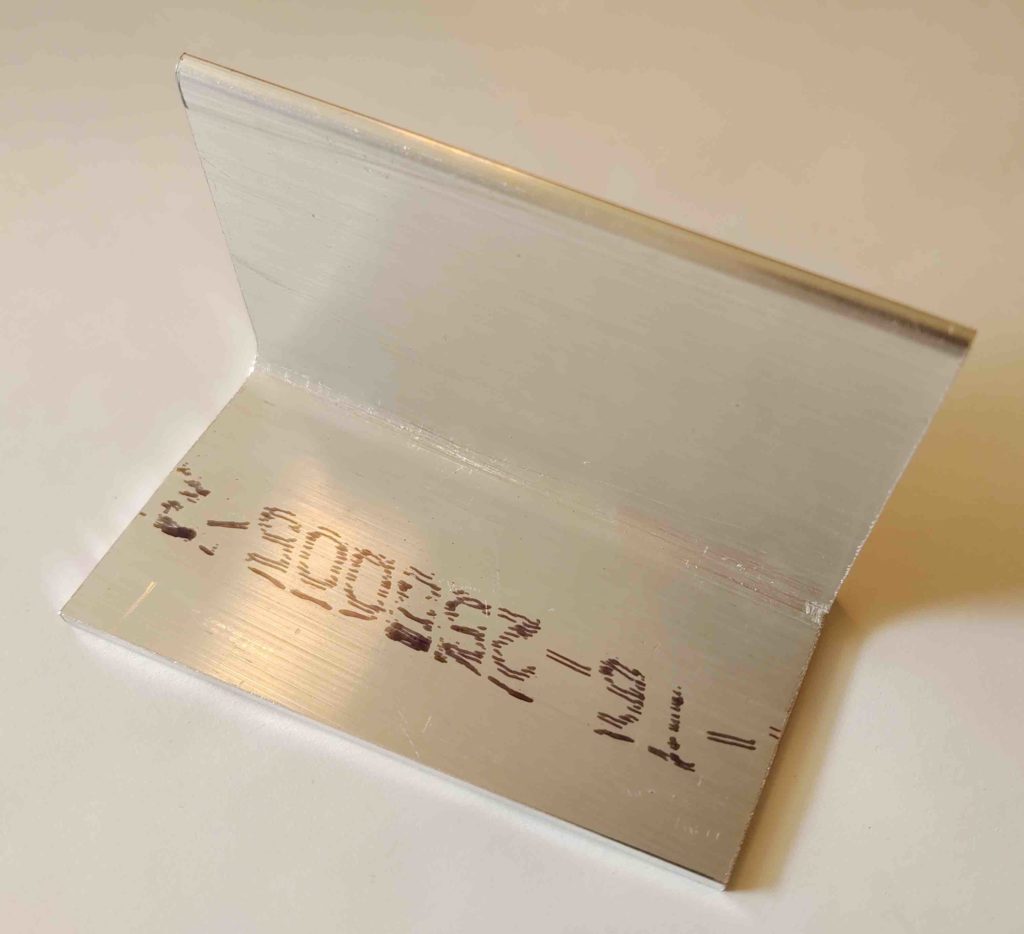
As for the Trig TT22 transponder mount… a few days ago while I had the chop saw out working on the roof I grabbed the stock of 2.5″ x 2.5″ x 1/8″ thick 6061 aluminum angle that I just recently ordered from Aircraft Spruce and cut it at just a hair over 4″ long. I would have preferred 0.063″ or maybe 0.090″ thick over 1/8″, which is a bit more robust than I need. But to get the 2.5″ width required this was all they had. Of course after I add some lightening holes it won’t be overly weighty anyway.
To remove as much unnecessary material as required, I angled the horizontal side that will be mounted to the underside of the Tripargon top shelf. I’ll do the same for the vertical side that the transponder mount will be attached to. Again, I’ll then make some decent sized lightening holes to get this as light as possible.
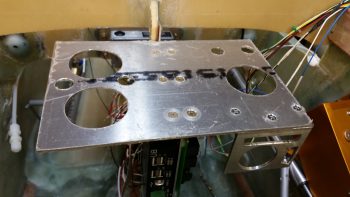
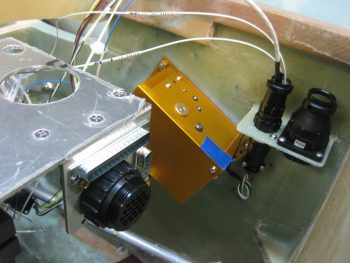
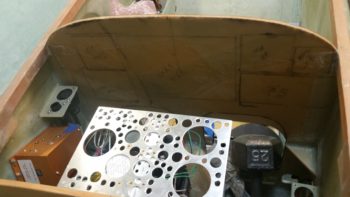
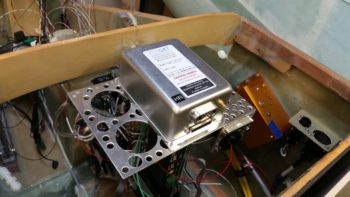
As a reminder, this bracket will allow me to mount the Trig transponder on the right end of the Triparagon top shelf. In the pic below the panel is left and the nose is right. Also, the bottom half of the AHARS is visible in its position at the center of the Triparagon’s top shelf.

