
Chapter 18 – Canopy Interior Finish & Paint
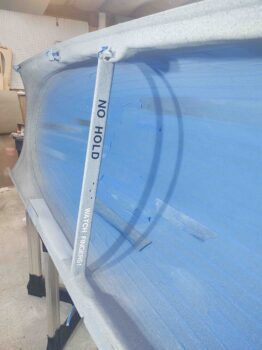
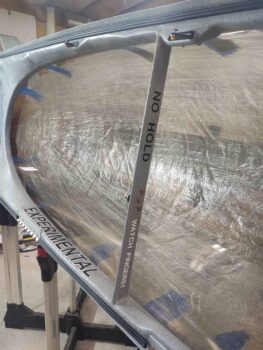
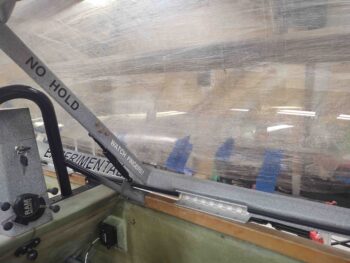
6 October 2020 — I taped up the canopy and painted the cross support bar white on the right side and black on the left, just on the aft side facing the GIB/passenger. These colors will be used as background colors for “NO HOLD” and “WATCH FINGERS” warnings on the cross bar. The fingers warning on the side where the canopy strut scissors up and down.

As the paint was drying I realized I had a number of pin holes on the surface. And since I was mixing up some micro to apply to the canopy front lip . . .
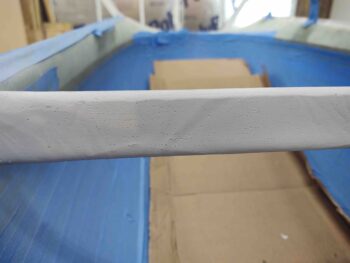
I went ahead and slathered some on both the white and black painted surfaces of the canopy crossbar.
•••
7 October 2020 — Today I worked on the canopy some more. I reshot a couple of coats of white and black on the aft side of the crossbar (not shown) after I plugged a myriad of pinholes with micro. I then hit the front half of the interior canopy frame with gray primer, my real target being the front lip from the seal groove forward. Since this surface contour mirrors the glare shield on the aft nose/avionics cover, I don’t want to use the nice flaw-hiding granite rock paint since the build will be too high and most likely end up transferring gray granite paint to my black glare shield. Or worse, act as a glue on a hot day and really mess things up!
After the front lip cured for a couple of hours, I went back over it with some raw epoxy in a few areas and some micro to help fill in some divots and hide some imprinting glass weave that was showing through.

•••
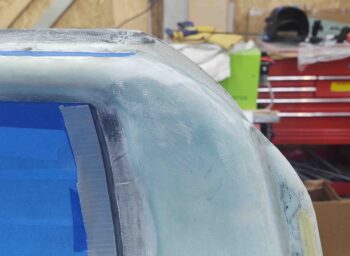
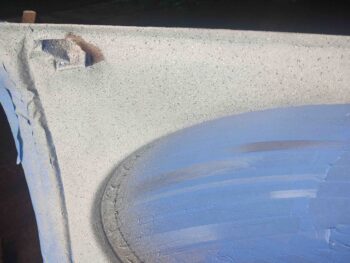
8 October 2020 — I spent a good half hour plus sanding the front lip of the canopy to dial it in a bit more. As I mentioned in my previous blog post, since the front lip interfaces with the nose-side glare shield I won’t be using speckled granite paint on the lip (or the glare shield).
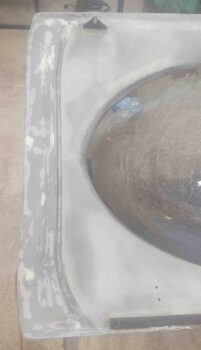
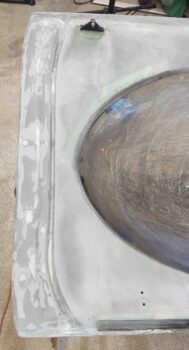
I got another few coats of primer on the lip, and for comparison’s sake jumped ahead a few hours with the pics side by side. Two points of note are that A) I will be –again– going with a much darker gray for the final color on the lip, and B) although not quite visible on camera, a half dozen spots, divots, etc. require cleanup and re-sanding before any further coats.

•••
9 October 2020 — Today I used the small bit of epoxy left over from a previous layup to whip up some micro to fill in some holes, divots, scratches, etc. on the front lip. I would normally use my Metal Glaze filling compound for these small filing jobs, works much better, but I found that my hardener for that is toast… will have to order some more. So I tried some micro for the minor fills I’m doing here.
I then left it to cure…
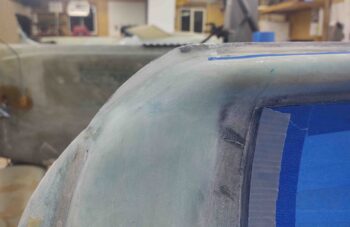
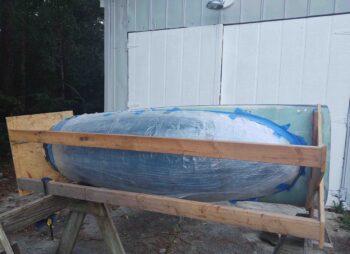
Many hours later, after it cured, I took the canopy outside in front of the shop and hit the front lip with a few good coats of darker gray paint + primer. I’m not looking for perfect here, but there are a few glaring areas I want gone. Compared to how this thing looked just a few short weeks ago, it’s a vast improvement.
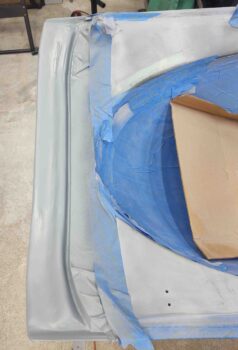
I then spent a few hours doing the final trimming and cleaning up of the glass edge around the interior perimeter of the canopy. The amount of small pieces of yellow painters tape was surprising… I had missed a fair bit on my initial cleanup. But being this is the last cleanup session before final interior paint, I was much more thorough this time around.
•••
10 October 2020 — Within hours of discussing canopy scratch removal via email with my buddy Dave Berenholtz I watched a Long-EZ video on YouTube that lo and behold, along the edge of the canopy and frame junction were those rascally scratches that we were talking about. Now, if we hadn’t just been discussing them these scratches would have still been noticeable, but not what I would have been focusing on regarding the video content.
Moreover, after having just finished my diatribe in my project update of NOT seeking cosmetic perfection over build efficiency, here my first post out of the gate is about seeking cosmetics over an actual flying or safety-related requirement. In fact, this post is ALL about cosmetics… ha!
The bottom line is this is one of those things where the scratches along the edge of the canopy are just too plain ugly for me to live with. So, for me, I need to do what I can to best remove them.
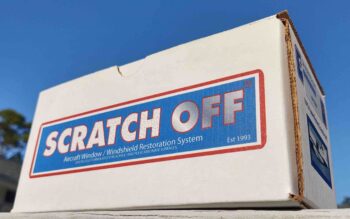
And after some research and the very often helpful input from our RV-building brothers on the VAF site, I pulled the trigger on a Scratch Off kit from VANs. I’ll point out that besides the overwhelmingly positive reviews and testaments I saw online, on the side of the box they highlight that this product is used by NASA…. not too shabby.
With that knowledge in hand, I invoked Tony Stark’s line in Iron Man, “sometimes you have to run before you can crawl” (or something like that!). I chose the most inconspicuous spot for viewing for either me (pilot) or GIB to test a scratch to remove. Clearly this would show if the canopy were open at a fly-in if the test were a fail, but I figured I needed to press forward.
In the instructions for the Scratch Off kit it notes that they do not necessarily recommend the use of wet sanding, but that their kit picks up where 600 grit sandpaper leaves off. In other words, if you have deeper scratches then some sanding will be required to remove them. They recommend 600 grit, but I only had 500 or 800 grit (and higher) on hand, so 800 it was.
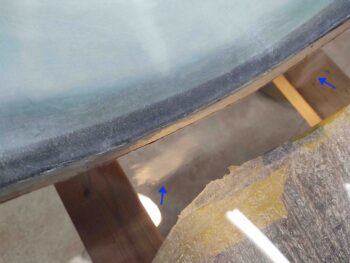
I first tried just using the Scratch Off kit for two distinct scratches on the upper aft edge of the canopy. Grant it, I was only using it by hand and the kit is made to be used with a powered hand drill. After using the most abrasive solution and pad included in the kit with no removal of the scratches, I resorted to using 800 grit wet sanding of the scratches (blue arrows).
If this isn’t a test of faith, then I don’t know what is!
Again, by hand, I proceeded to use the most abrasive solution and pad included in the kit and was able to nearly completely buff out the scratches I had made in removing the deeper scratches. Satisfied, with this test, I pressed onward . . .
… to this area. Probably the worst area on my canopy for scratches. It’s located on the left side just forward of the aft corner. Moreover, I decided to simply use an entire wet sanding protocol starting with 800 grit, then moving upward in finer papers to 1000, 1200, 1500 and then 2000 before then using the Scratch Off kit.
Yep, this looks pretty ugly after all the wet sanding was complete (gulp!).
But even just after the first round (I still have the finer solution and pad to use) the wet sanding marks were removed. The myriad of finer scratches are gone, while the deepest scratches are still visible, but greatly minimized in depth and severity.
I should note here that I’m doing this scratch removal on the interior canopy now since I’m prepping the interior canopy frame for painting. I really don’t want to paint the canopy frame (either interior or exterior) to then subject the painted edge to a spinning foam applicator AFTERWARDS and risk damaging the paint. Thus, in my mind it’s either now or never for removing scratches along the edge of the canopy.
With that said, some of the scratches you may see in these pictures are actually on the exterior canopy surface. I’ll do what I can to remove/mitigate those scratches on the exterior canopy surface later, prior to painting the exterior canopy frame.
I was just finishing up buffing out the edge scratches on the forward half of the left hand side of the canopy when my out of town visitors showed up. In all, I was able to get over 2 hours in on the canopy, finishing the majority of the back edge and the left side almost up to the front center point.
I will highlight that as per usual in these types of endeavors, that after working the aft left side my confidence grew immensely in using the wet sanding protocol followed by cleaning up the sanding scratches/marks with the Scratch Off kit. I highlight this because it’s a bit difficult to figure out what side the scratches are on for every scratch. The deeper scratches you can feel with your fingernail, but the lighter ones, although visible, aren’t quite as easy to ascertain what side they’re on.
So on the forward (pilot) edge of the left side I simply wet-sanded nearly the entire edge to clear away as many scratches as possible before getting the first of the four Scratch Off kit steps completed before my friends arrived.
•••
11 October 2020 — I started off today spending well over 2 hours finishing up the scratch removal/mitigation along the interior edge of the canopy where it meets the glass frame. I also did one more step in the buffing out process along the interior perimeter of the canopy (approx. 6″ from frame).
I then gave the canopy lip a really good sanding with 220 grit paper, then wet sanded it with 320 grit… which really dialed it in.
I then assessed my Metal Glaze hardener and realized that the bottom part of the tube probably had usable hardener. I snipped a corner off and tried it out. Worked a treat and the glaze was rock solid in just a few minutes, so I used it on the canopy lip. A bit later I realized I needed it in a few more spots so I whipped up another mini-batch and applied it to those spots.
About a half later I got to work on the Metal Glaze spots. I used 100 grit sandpaper to knock down the majority of the applied Metal Glaze before switching to 220 grit paper. After a bit (~45 min) of sanding with the 220 the lip is ready to go…. smooth as silk!
I need to re-tape up a good portion of the canopy for both painting the canopy frame, but the lip will get shot first. Since it’s late I’ll do all that tomorrow.
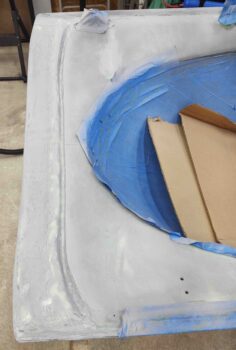
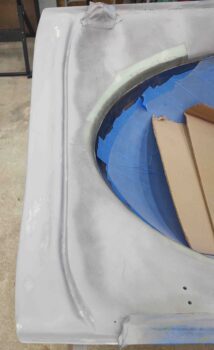
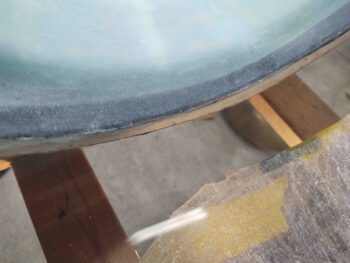
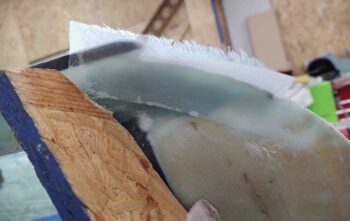
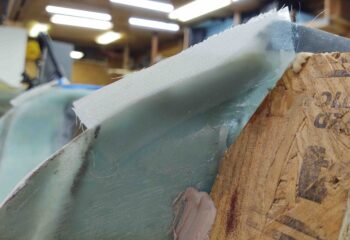
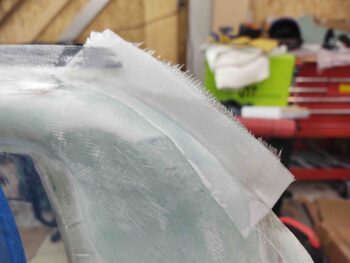
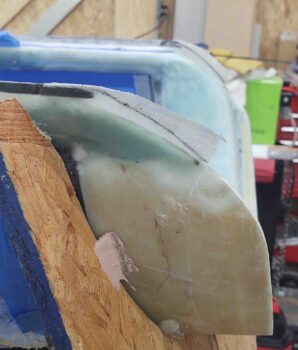
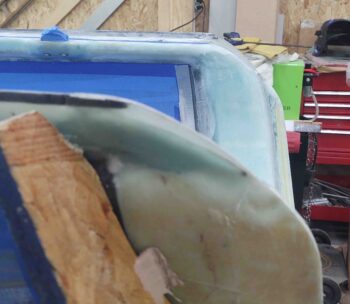
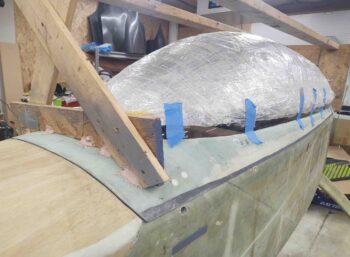
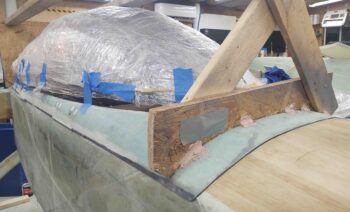
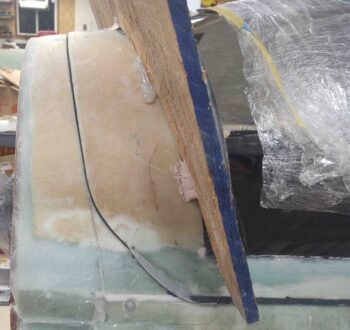
I’ve been remiss in doing this next task, and should have gotten it done a day or two ago since it impacts the interior canopy frame painting. I glassed 2 plies of BID to the aft lower edges of the canopy to allow me to create a nice transition from the added glass to each side frame, up around the aft “corner” of the canopy and the turtle deck.
Tomorrow the first task will be to do some Dremel work on the inside edge of the original canopy frame, add in a flox fillet and then glass 2 plies of BID from the inside onto each of these layups below.
•••
12 October 2020 — I started off today immediately laying up 2 plies of BID on each interior side of the canopy aft lower corner transitions between canopy and the Turtledeck. Besides aesthetics, I’m hoping this will keep the wind noise down and the rain out.
I then peel plied the layups to ensure they would be as ready as possible later in order to get the interior of the canopy painted.
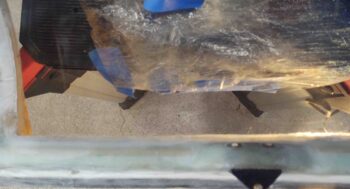
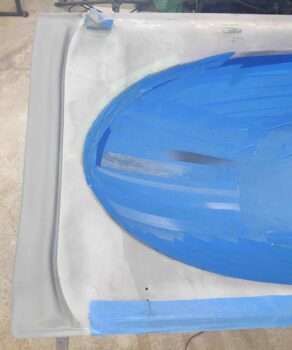
I then spent about an hour re-taping the canopy to protect it from the paint.
I then hit the canopy front lip with another 3 coats of dark gray paint + primer. There are still 2-3 slightly visible minor divots, but I’m calling this good and pressing on.
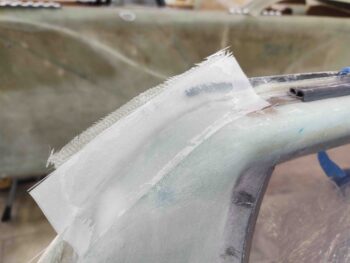
After all the canopy taping and re-painting the canopy front lip, enough time had passed that the canopy aft lower corner transition layups had cured. I pulled the peel ply and then marked them (free hand) for cutting.
I cut the glass with a Fein saw and then cleaned up the edges with a hard sanding block.
Here are shots of the separate sides.
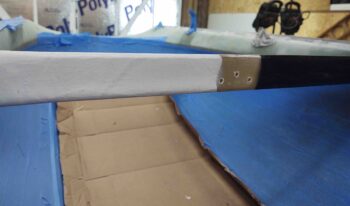
I then finished taping up the canopy specifically for the frame priming and painting. I also added some lettering for my caution placards on the crossbar. There’s actually black lettering on the black painted side of the crossbar.
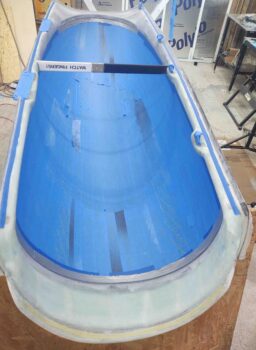
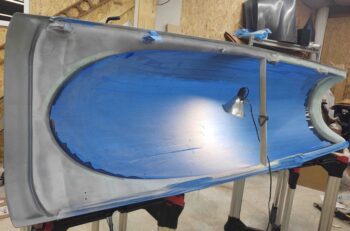
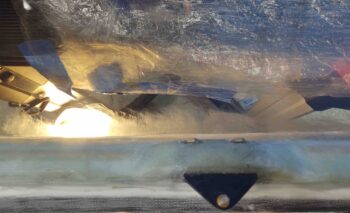
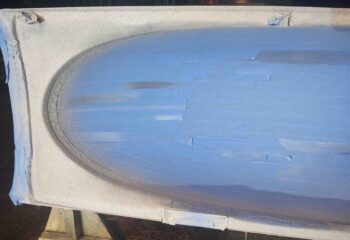
I then took the canopy out in front of the shop and primed it first, then painted it with Rustoleum gray stone granite.
Here’s the front and aft side of the canopy after one coat. It looked good so I didn’t spray another coat.
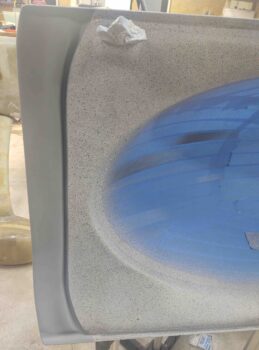
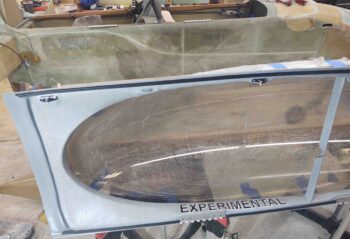
Once back inside, I removed the tape protecting the canopy front lip. I really like the contrast between the dark gray and the granite paint.
I did end up hitting a number of spots with another coat once inside and I inspected it with the bright lights on the canopy frame.
I also removed the caution placard lettering on the crossbar before the paint cured too much to then make them difficult to extricate.
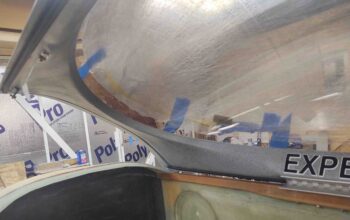
Also, although I don’t have a shot of it, I was going to put the EXPERIMENTAL placard on the canopy where the light gray primer block is just forward of the crossbar. Once I pulled the tape I didn’t like how light it was. At first I planned on repainting it with the dark gray, but then simply decided that the placard would probably adhere fine to the granite paint, so I just hit that spot with a couple coats of the granite paint.
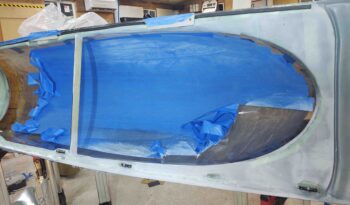
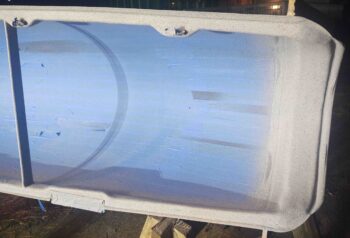
Here’s a wide angle shot of the entire painted interior canopy. It looks great and I’m really happy that I went with this paint, and even more that it’s done!

•••
13 October 2020 — Yep, I’m calling the canopy done.
The latch handle still needs to be dialed in and the SC-1 needs to be permanently mounted (I’ve ID’d bolts in an order I’m compiling with ACS), but besides those the only thing that needs to be done is to finish & paint the outside of the canopy. I’m calling that Chapter 25 since the rest of the exterior will need to be finished as well.
I set out to make my first task of the day to clear coat the interior canopy frame that I painted last night. Well, I lightly sanded the area where the EXPERIMENTAL label was getting attached to… to knock down some of the bumps of this granite paint, and literally went one stroke too far and cut though the top coat of paint and bared a couple bigger spots of the light gray primer beneath.
I was none too happy, but this granite paint takes at least a good 2-3 hours minimum to dry, especially before clear coating. So I touched it up with a very light blast from the can and let it sit. I then worked on the instrument panel for almost 4 hours until it cured.
Late in the afternoon I finally got the canopy out in front of the shop. Thankfully the weather held and there was no rain.
The first coat of clear was a light one, as per the instructions. The 2nd and 3rd coats were medium. I then hit it with a 4th coat in the “high traffic” areas, and let it sit for a couple of hours to cure.
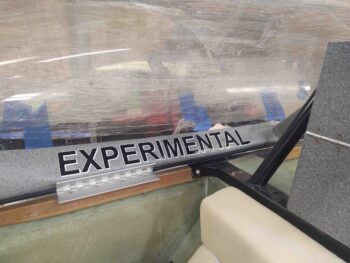
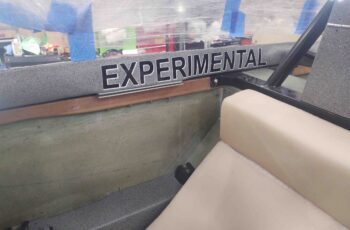
Back in the shop a few hours later I removed the protective tape and cleaned up the canopy edge glass (there was some glue gunk in spots from the tape). I also added the EXPERIMENTAL label on the hinge side of the canopy frame.
Yes, black and white is the color scheme for labels on this canopy…
I then installed the canopy back onto the fuselage. The following is simply a smattering of pics I shot, trying to get a good bunch of angles.
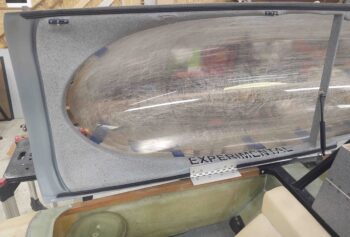
A closer shot . . .

With the interior sides of my canopy near-vertical when closed, it makes the EXPERIMENTAL label near-horizontal when opened. Luckily the plane is often in the grazing position with the canopy open which will make it make it much more visible.
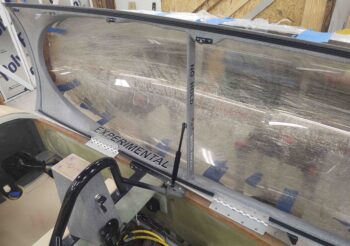
A shot somewhat from the back seat.
 And a shot of the front canopy skirt.
From inside:
From outside (through canopy):
With new B-seals all around on the canopy, I grabbed some shots of the outside –each side– to show the intersection alignment between the canopy edges and both the fuselage (side) and the aft nose/avionics cover (front).
And a shot of the back canopy alignment with the Turtledeck. Note the added glass flange in the lower aft “corner”… I’ll probably tweak that a bit more before final exterior paint.
•••