
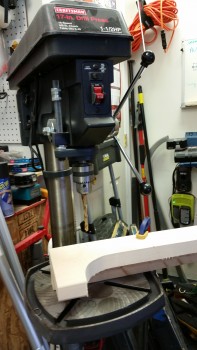
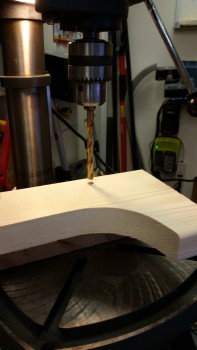
Fuselage Dolly
27 October 2015 — I went over my plans for the dolly that I will be building for the fuselage, ala my buddy Mike Beasley. Since I finally was close to the final design, I knew that I would actually need to build the base to get enough data to finish this sucker.
First off, why am I doing this now? (Instead of planting my butt in front of the canard and sanding away . . . ???). Well, the reasons are: A) To take a break from sanding while still being incredibly productive!, and [more importantly] B) I don’t want to get to a point where I am so frustrated with position, repositioning & flipping the ever-weight-increasing fuselage the I work in a less optimized state until then, and then have to take time out to build this thing. Also, with my buddy’s fuselage incident where it fell off the saw horses & smashed his rear longerons, I figured I would pay the piper up front and get this fuselage dolly knocked out early so I can enjoy its functionality.
Here are the key features and requirements for this thing:
- Had to be mobile (i.e. on wheels)
- Had to be low enough when working IN the fuselage & high enough when working on the external fuselage (adjustable height . . . more to follow!)
- Had be able to be leveled as a surface–not shimming the actual item, but leveling the platform itself. (Leveling screws . . . aka, poor man’s outriggers)
- Secure canopy storage (since I would have the length and width, I might as well make the underneath area useful and store the canopy in a wood box)
- Optimized stabilization of the fuselage (when the fuselage gets its nose, etc. more weight will be added and more awkwardness in controlling it will ensue, thus multiple tie down points are a must)
So, while sitting having lunch 2 blocks from Lowe’s, I realized I had met all my critical design goals and I could begin construction immediately. I bought a couple of sheets of flooring material (OSB) and a few 2x4s to get me started. While checking out the cashier asked me if it started raining yet! So with that info in hand I rushed to get to the house and get some wood cut. It did sprinkle on me quite a bit, but never got into an actual downpour, thank goodness.
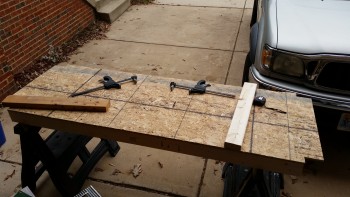
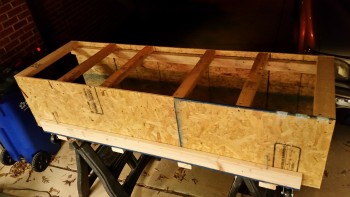
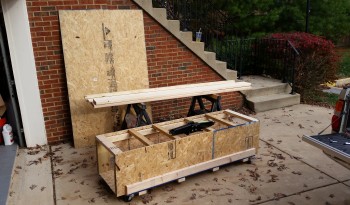
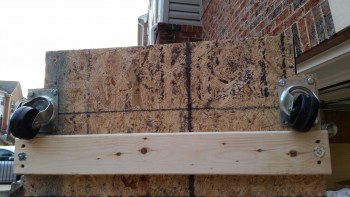
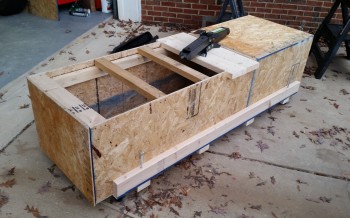
After cutting the wood, I started constructing the base of the fuselage dolly. Here’s the very bottom of the dolly. I’m about to attach 4 each 2×4 cross beams & the wheels to the bottom of this thing.
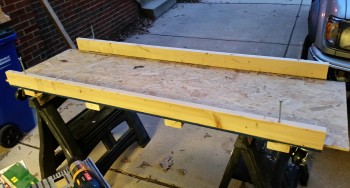
Here’s the base turned upright. If you look closely you can see the wheels near the corners (mobile) and the four threaded leveling screws just inboard of each corner as well.
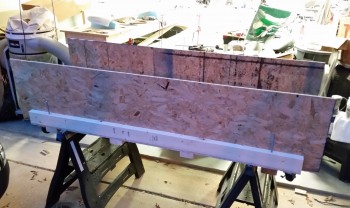
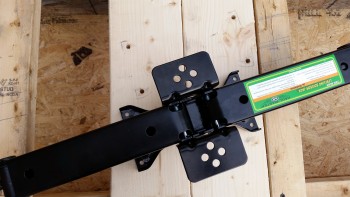
Here are the OSB sides attached.
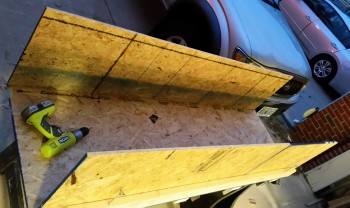
And the future temporary home of the canopy.
I added the top cross joists that sit on a 2×3 stringer that runs the whole length of the dolly on each side.
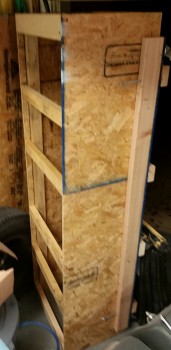
After getting to the point where I needed to cut more wood, and for some parts buy the wood to cut it, and get some more hardware, I cleaned up my work area and stowed my new creation up on end.
I then ran off to Harbor Freight to pick up some “supplies” . . . mission operational security does not allow me to divulge any information until later, after it’s been implemented and tested. ha!
•••
28 October 2015 — I didn’t get much done today on the build, although I did make progress.
I tried to get down to Home Depot during a 1-hour window of time where it was NOT supposed to be raining, but, alas, the weatherman was wrong and I ended loading and unloading the remaining lumber for my fuselage dolly in the rain. This is the main reason I have no pics of the event, since I was scrambling to get it all done as quickly as possible.
I dumped the wood in the garage, quickly wiped it down and then had to go meet a real estate client. After a few hours with my client, I was across town near a buddy’s house & we ended up going out to dinner.
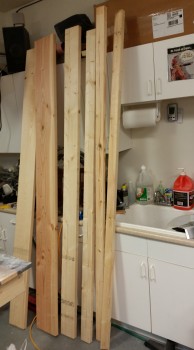
Thus, besides acquiring the required wood to finish the fuselage dolly, the only significant thing I did for the build was take the pic below upon returning home (there’s actually a few more pieces in the back room as well).
•••
29 October 2015 — I pulled out the big dog to make some real noise! This sucker will cut anything!
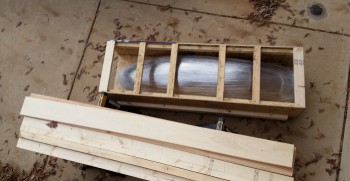
Here’s the stash of goodies that will turn into an operational fuselage dolly.
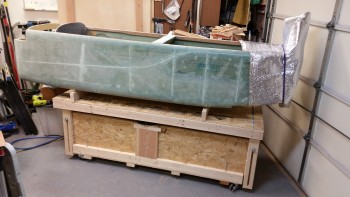
I pulled the canopy out and placed it into the fuselage dolly . . . it fit perfectly!

I then notched the sides to make a mount for the . . . ???
(what could it be?!)
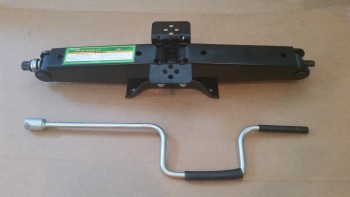
Yes, it’s a scissor jack from Harbor Freight! At last, my secret is out!
As you can see in the pic below, I offset the jack slightly off center, a few inches towards one end of the dolly to allow the extension to meet the side near the front corner. This will allow me to operate the scissor jack being off to one side of the centerline and not have to work with a airplane nose or tail in my face.
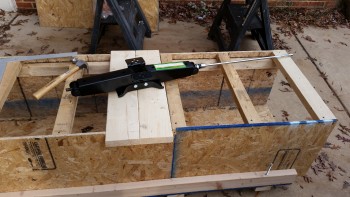
Here’s another shot of the scissor jack.
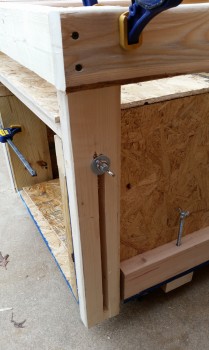
Once I had the location figured out, I drilled the four 5/16″ holes for the carriage bolts.
I then installed the carriage bolts.
After cutting the top two 2×6 pieces for the screw jack mount, I also cut & installed another 2×6 support in the front inside at each corner on one end (I had already installed these at the other end).
With the inside 2×6 supports mounted, I was then able to finish installing the bolts for the wheels at the corner.
I then cut some shed siding that I had sitting around & mounted it in place. I left one top side open to use when I clean out the lower fuselage dolly before placing the canopy inside of the box. It will then be sealed completely (via wood siding) to protect it.
Below is the last shot I took of the fuselage dolly in its latest state before I packed it back up in the garage and quickly changed to get on the road to see my buddy Doug.
BTW, I spent exactly two hours working on the fuselage dolly, from the very start to cleaning up my work and leaving for dinner.
•••
30 October 2015 — I got back to working on the plane at about 4pm, and since the days are getting shorter, and cooler, I figured I would get to working on the fuselage dolly during the daylight, and while it was a bit warmer (vs night), and not raining. I apologize but since I left my camera upstairs and I was in the “I’ll get it in 5 minutes” mode, alas, there are no pics. However, what I did was basically cut the remaining canopy box covers & the framed the main table top and mounted it to the scissor jack. There’s a few more things I need to tweak to optimize its operational use, but I can already tell I’m going to be really happy with the functionality of this fuselage dolly.
I ended up spending about 3 hours on the fuselage dolly. My guesstimate is that I have just about another 2 hours to go to finish it up.
After the 3 hours were up (and it being too dark to see any lines on my tape measure!), I ran to Home Depot to pick up some hardware.
•••
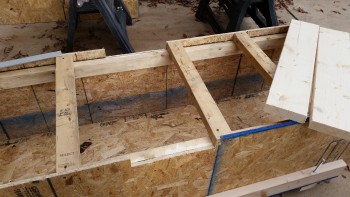
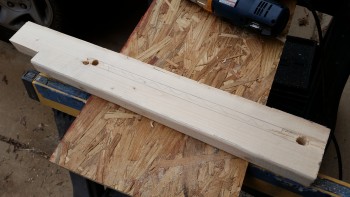
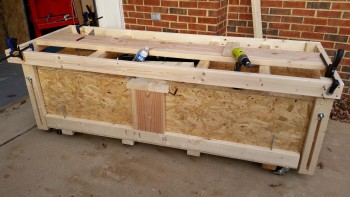
31 October 2015 — My first task of the day on the fuselage dolly was to get all the corner support struts built and attached. These are essentially the corner table legs that keep the top fuselage table mount steady and secure at each elevation.
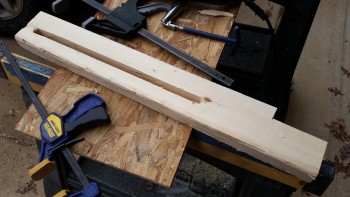
The support struts are simply 2x4s with a 5/8″ slot cut down the center so that a stationary 1/2″ bolt mounted on the lower box slides through the slot. Then, when the table is at it’s desired elevation, I simply tighten the 1/2″ wing nuts and secure the table mount in position. A point of note is that I intentionally made the slots in the support struts a little oversized at 5/8″ compared to the stationary 1/2″ carriage bolt (which protrudes through the strut slot) to ensure there was wiggle room in the sliding action to prevent any unwanted binding.
Here I’ve positioned a corner support strut and am marking the upper point to be drilled out with a 5/8″ auger bit.
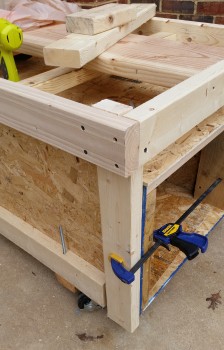
Here’s a corner support strut ready to be permanently screwed to the table platform.
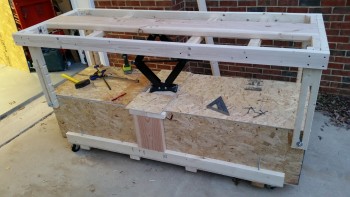
Side view of fuselage dolly with the corner support struts ready to be permanently mounted to the table platform (top work/mounting surface).
I had also done a bit of research on creating ratchet arms as a safety mechanism since I’ll have a fair bit of weight on this table. The scissor jack can easily support & lift 5,000 lbs, but the area that it supports is less than 1 sq. ft., so these corner struts are vitally important to the stability of the load on the top table platform.
So although I haven’t designed or made the exact ratchet pawls, I went ahead and notched each corner support strut every 3″ starting from the bottom of the strut for the ratchet pawl to engage with once I make & mount them.

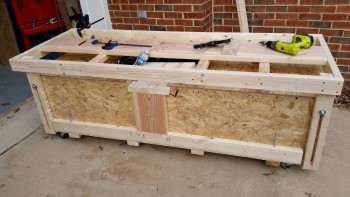
An updated pic with ratchet notches on the support struts:
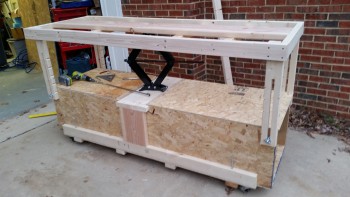
This is a pic I took immediately after testing out the raising and lowering of the table platform. So far my plan is working as designed!
This is pretty much the same view as above, but some minor additions have been made such as cross supports at the end of the table platform and the final install of the lower decking immediately adjacent to the scissor jack on each side.
You may notice in the pics that the scissor jack is not at its full extension height. This means the height of the table platform is being limited by the length of the slot in the support struts, not by the scissor jack. I have already planned out additional steps I can implement to allow the scissor jack, and thus the table platform, to reach its max height… IF I really need it to go that high. We’ll see if I need to go that route during future build tasks.
It is getting dark much faster these days, and that will be even more accelerated here on the east coast as tonight we change our clocks for daylight savings time. Thus, by the time I had the top mounted it was fairly dark, so I lit it as best as I could. After turning on the outdoor lights there seemed to be enough that instead of just taking a simple picture, I figured I would attempt to make a video to show the fuselage dolly in operation.
Now, I didn’t narrate the video because I did this on a whim, and I had music playing fairly loudly in the garage. However, the mike on my phone hardly picked up the actual volume of the music, so the video seems like a silent film to a degree. Yes folks! I’m that lazy that it pains me to now talk during my videos! Ha!
Oh, one other note on the video. In the video I appear to be hunting & pecking around for the hex drive on the scissor jack that is situated towards the center of the table under the table platform (If I haven’t mentioned it before, I angled it towards the corner for easier raising/lowering operations when the fuselage is mounted on the table platform). My point is that it’s actually very easy to see and engage the scissor jack under the platform, it was just more difficult & time consuming to attempt it while trying to film the process with a phone in my hand.
Ok, a very final note on this video: the canopy is inside the lower box with the end caps screwed in place, making this a very secure housing for the canopy until I get to Chap 18.
•••
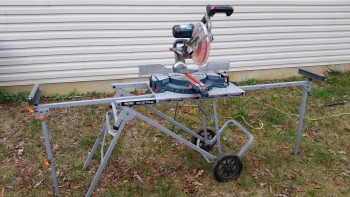
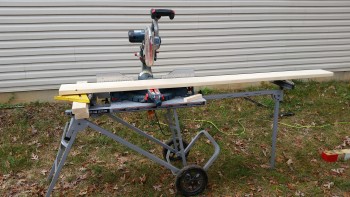
1 November 2015 — Since there was a good chance of rain earlier today I decided to get the wood for the table platform brackets cut. In addition, I wanted to get the saw out of the garage and back into the shed behind the house.
Figuring that there wasn’t going to be a lot of visual storytelling going on today, I snapped this picture to show the wood-cutting process.
•••
17 November 2015 — I checked at Lowe’s, Michael’s and Home Depot in search of springs for my ratchet pawls for the fuselage dolly. No joy. I guess I’ll have to look online for them.
So, now that I’ve got my electrical component curiosity satisfied for the internal nose configuration, I was finally able to focus on getting the fuselage pulled out from under the canard build table and mounted onto the fuselage dolly.
Next, I’ll finalize the mounting of the fuselage on the dolly, reconfigure the shop to allow for room to work on the fuselage, and get moving on the nose build.
•••
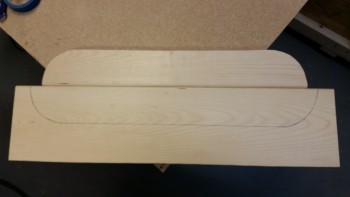
19 November 2015 — I measured out the fuselage “saddles” that will keep the fuselage safely atop the fuselage dolly.
I kept the bottom of each saddle 3-1/2″ high to keep them the same height as a regular 2×4.
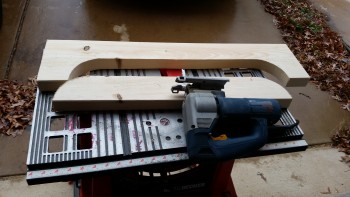
Here’s the first cut “saddle”.
And here are the saddles in place, although not yet mounted.

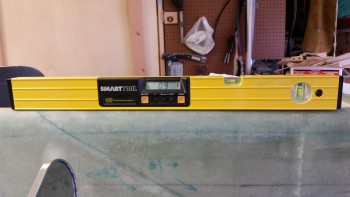
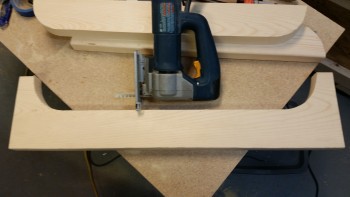
I should note that before I cut the front saddle I measured the angle of the work top of the fuselage dolly.
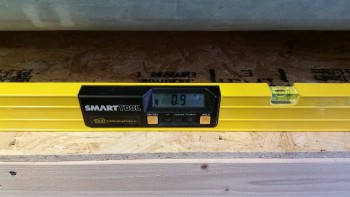
The goal to match the angle of the longerons with that of the work platform on the fuselage dolly. As you can see, they both came out at the same angle.
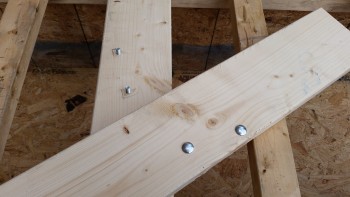
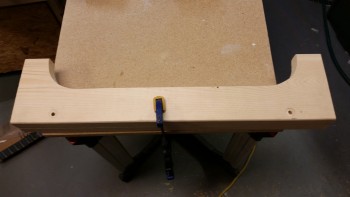
My next task was to drill a 3/8″ hole 4 inches from the side of each saddle into the 2×3 below it. The 2×3’s will be mounted flat and then each saddle bolted to the 2×3.
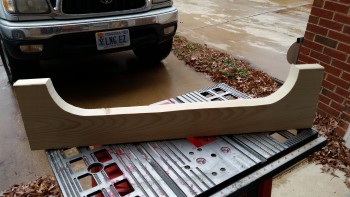
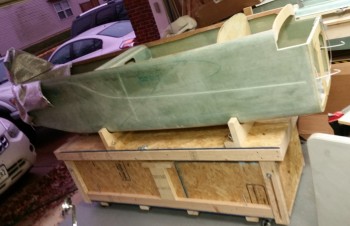
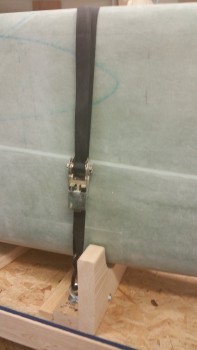
Here’s a shot of the fuselage mounted on the fuselage dolly in the saddles.
I also mounted 3 tie-down points on each side of the fuselage dolly: one next to each saddle, front & aft, and then one in the middle of the work table.
Along with finishing up a lot of tasks on the fuselage dolly, I also reorganized the garage to facilitate the nose build and cleaned up a bunch. After I finished with my non-build tasks, I got back to work on the left elevator rebuild.
•••
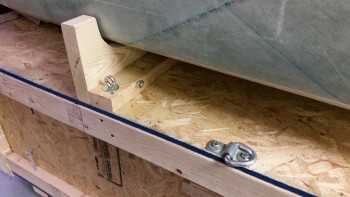
21 November 2015 — I installed the 5/16″ bolts that I bought last night at Home Depot into the forward & aft fuselage cradles.
Here’s a shot of the front fuselage cradle bolted in place.

•••
25 November 2015 — Today I needed to move the fuselage forward on the dolly for clearance of the nose gear well. To move the fuselage forward I needed to cut another fuselage saddle wider than the current forward saddle. I marked up a piece of wood and cut it out.
I then clamped the old saddle over the new undrilled saddle. I drilled through the existing holes to make the new mounting holes.
•••