
The temperature high for today was fine for painting the left wing, but the overnight low was just not acceptable for leaving the wing on its mount overnight. I don’t want a repeat of the right wing dew shenanigans.
So I did some cleanup tasks on the right wing.
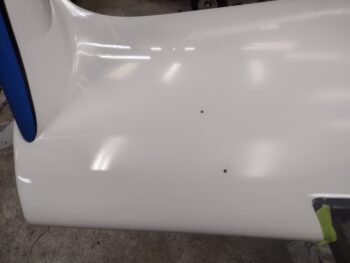
I started by first removing the protective Saran wrap plastic filling the insides of the outboard video camera mounts. I then taped up the holes and gently drilled them out to accept a 10-32 screw.

Here they are after cleaned out and prepped for use (note the tape on the edge of the leading edge light opening… I had a few white paint touchups I had to do from the tape pulling small bits of paint off).
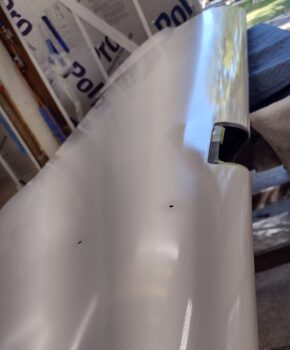
Near the strake junction on the top right wing I did the same thing for the top two baggage pod mounting holes. The inboard hole however had some gunk (epoxy?) in it and I had to employ a 10-32 tap to clean it out.
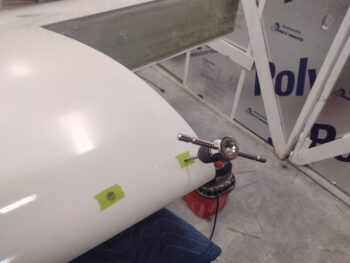
A somewhat blurry pic showing the top baggage pod mounting holes cleaned out and ready for use.
Since I’m not painting until tomorrow, I then did something that some may call controversial. Ever since I discovered this concept I have really wanted the capability to mount a 360 camera on a pole that will take pics/video in flight that looks like the plane has its own linked drone flying just out in front with nothing showing (it removes the pole in the picture/video editing) but air.
I’ve pondered this for a good while, and made chicken scratching sketches on how I’d do it, but I set that aside for the future since I wanted to get this bird in the air ASAP. But with a known day and a half weather delay before painting, I decided what the hell… let’s dive in and get it done.
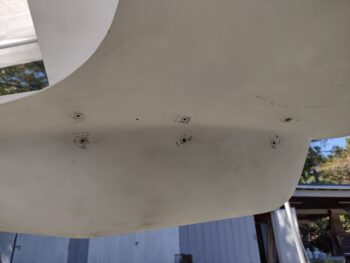
Below is actually from late afternoon yesterday, when I positioned a 1/2″ pole aligned with the aircraft centerline at about 1-2° nose down (since the plane flies 2° nose up). I then drilled the 6 each 3/8″ holes for the aluminum threaded inserts I made on the lathe late last year (yes, specifically for this mod). The bottom 3 are all into the lower winglet. The middle and aft on the underside are actually into the winglet intersection fairing.
The “controversial” part of this mod one could argue is the front underside hard point: it is mounted into the actually wing, along the same line as the hole many builders drill into the wing for a tiedown bolt. Obviously being more outboard, my hole is into the UNI and BID layups that secure the winglet onto the wing… note that I drilled the hole more inboard so that nearly 2″ of layups are attached to the bottom wing before the insert hole.
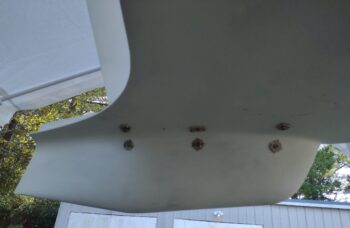
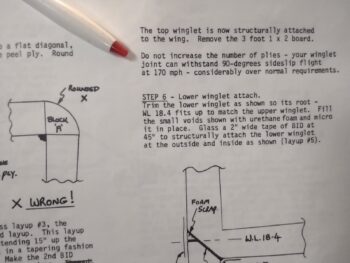
My final decision to do this is based on an entry in the plans where it states that we are not to add more plies to the layups since the “winglet joint can withstand 90-degress sideslip flight at 170 mph – considerably over normal requirements.” Thus, I figured stealing 3/8″ out of the strands, while still leaving a nearly 2″ overlap onto the bottom wing undisturbed —especially since I don’t plan on doing aerobatics in this bird— was wholly acceptable and not causing any safety issues… IMO.
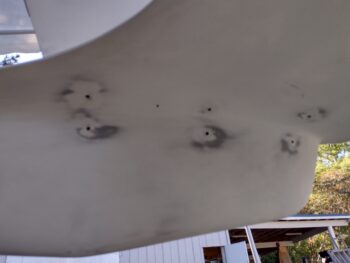
I had removed the screws and popped off the taped wide area washers late last night in hopes it would allow me to scrape off any excess flox if still in the “green” (gummy) stage. It was not.
So today I took the Dremel tool with a cutoff disc and carefully removed all the excess flox. I had a couple of the aluminum inserts protruding out a hair, so I shaved those down as well.
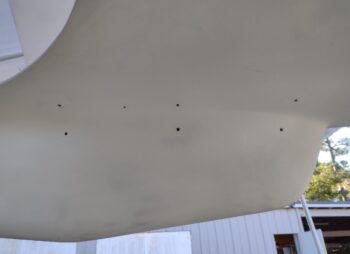
I then slathered up the area around each insert with some Icing filling, and after it cured sanded it all down.
I then hit the area with higher quality rattle can white primer, which I’ll wet sand after cure along with the bottom of the wing. Also, before final paint this area will get a coat of sealer.
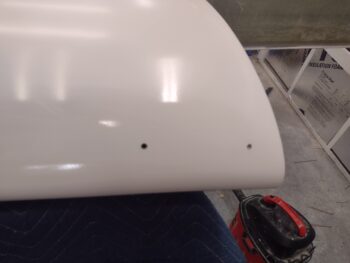
Back on the right wing, I grabbed this shot to again show the dull interior paint on the wing top from dew, as compared to the shiny leading edge.
In the early evening I wet sanded the bottom of the left wing in prep for painting it. Again, if the weather holds tomorrow, I will be painting the left wing white.
Rock ‘n roll!