
This post covers the last few days.
I used black RTV to secure the bottom “belly” video camera and aerodynamic encasing bump (a mold of the old Feather Lite composite nose puck) to the underside of the airplane.
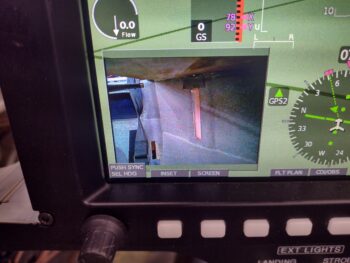
 While mounting the bottom video camera, I was in real time positioning the camera and encasement bump to get the video image framed as straight as possible. I first started off with the landing brake down to align the bottom edge of the video parallel to the bottom edge of the landing brake (pic 1). And for left-right windage I simply used the outside of the main gear wheels to align the video image (pic 2). It did slip just a hair to the right as it cured, but still totally acceptable.


Once the video cameras were no-kidding programmed and operational, I spent a good 45 minutes finalizing the video connections with heat shrink and zip tying it all up with the video multiplexer (MUX) to secure it all. I then mounted the MUX and bundle of wires up under the Tri-paragon’s top shelf.
After extending a couple of wires that were coming from the left sidewall and would not have clearance with the GNS-480 GPS mounting tube in place, I then spent almost an hour slowly positioning and installing the GNS-480 mounting tube into the panel, complete with a deconflicting components and rerouting wires for clearance.
 After the GPS mounting tube was in place, I also spent a few hours extending almost a half dozen wires that were not able to allow installation of GPS indicator lights, GPS radio PTT wire, etc.
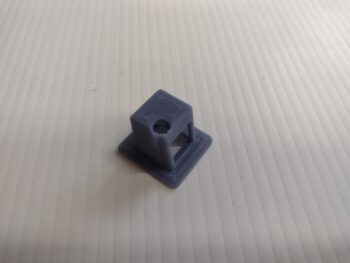
Day 3: I got busy installing the fuel site gage video cameras, which took a good bit of trial and error to get them right. Moreover, I had one 3D printed video mounting bracket on hand from about a year ago (or more), but needed another one for the other/left camera. Apparently I hadn’t saved my latest CAD file because I needed to spend almost an hour updating it to get it “good” like the one I had on hand.
BTW, getting it “good” means the ability to insert the video camera into its mounting bracket without damaging anything. Which I did just that by accidently ripping off 2 of the 3 wire leads to the camera board. These wires are VERY tiny, and it took a lot of diligence and care soldering them back onto the tiny board without screwing them up!
That being said, here is the #2 version of the video camera mounting bracket (the right camera’s bracket is black, and I already had it taped into position inside the strake baggage area).
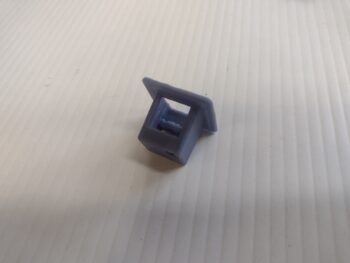
After another hour of assessing angles and video quality, as well as getting the cameras tucked away as best possible as to not get damaged whilst cramming bags and stuff into the strakes, I decided to do another mod and mount the cameras in the very corners of the strake baggage area just inside the opening on each side.
This meant having a mounting flange for the underside of the top strake skin, and the inside wall of the baggage compartment (aka the original aircraft side skin).
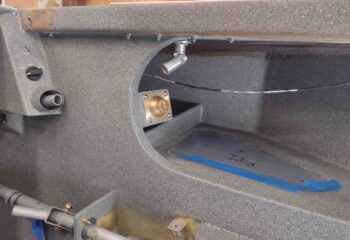
Here the left camera is installed into its mounting bracket, and ready for install.
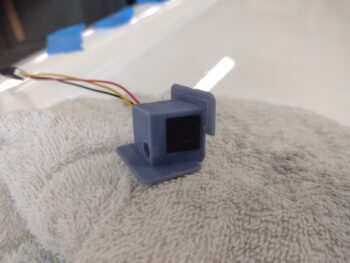
I mounted the left camera first, using E6000 adhesive to secure it. I then kept checking that it wasn’t slipping or falling away from its mounted position, as I assessed the business (wiring end) of the GNS-480 tube. This lasted for just over 30 minutes at which point I then headed off for a break . . .
 My wife, Jess, went out to the beach with a girlfriend to celebrate Mother’s Day and got back earlier than expected. She wanted to go for a scoot on the Harley, and how could I deny her that!! So we took a few hour break, went down by the water and had a snack while watching boats and dolphins do their thing.
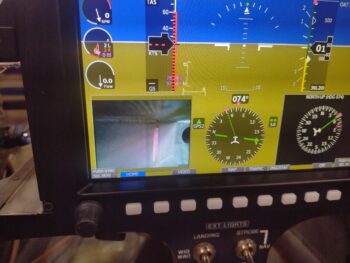
Upon returning home, I then installed the right camera in its original mounting bracket (although I had one printing as we were out on the bike). With the GIB map light mounted where it is, I could not mount the right video camera up against the inside wall in the corner as I did on the left side.
If I was forward of the light than obviously the map light would be in the way…
So the only other option I had was to mount the video camera outboard of the map light, and just slightly forward of it at an angle, which both hides and protects the camera a good bit, but it does affect the image quality slightly mainly due to the amount of light coming in towards the camera. That being said, the video quality is still definitely good enough to see the fuel level… and remember, this is with all the shop lights on AND without the canopy installed.
 I’ll note that when I went to check the install of camera #1 earlier, after flipping on the master switch I heard fans whirring as if I had just turned on a computer. I had not heard that sound before and it was coming from the aft of the plane. I then noticed the green light glowing in the engine electronics bay in the GIB headrest. Ahhh, the cooling fans have a thermostat to start the fans anytime the temp is above 82°. I checked the shop thermometer and it was 84°… a serendipitous component check, showing they work!
 Back to the GNS-480… I terminated all the GPS annunciation Korry lights and then added a dab of RTV on the terminals to keep them secure.
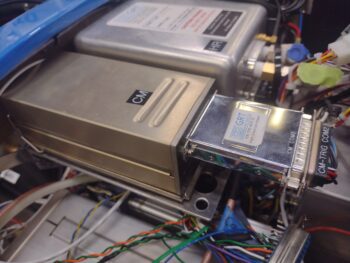
 I also finished installing the COM 2 radio, which entailed getting into the Hell Hole to loosen up an Adel clamp on the antenna cable to allow me to get a few inches of slack for the antenna cable to route underneath the Trio autopilot control head when it gets installed.
 Pressing forward!