
Happy Christmas Eve my peeps!
I started off today sanding the minor half-conical external bumps where the rudder cable conduit exits the sidewalls much further aft than previously… at least 5″ further aft. I sanded the pour foam to make the conical shapes, with the widest, furthest forward part of the “cone” consisting of the 1/16″ G10 “washer” that I embedded halfway into the sidewall, with the cable conduit transiting through the center of it. I also sanded the paint around these conical bumpouts to allow better adhesion with the 2-ply BID layups.
Here we have both the right side (pic 1) and left side (pic 2) prepped for glass.
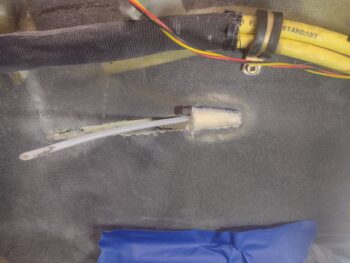
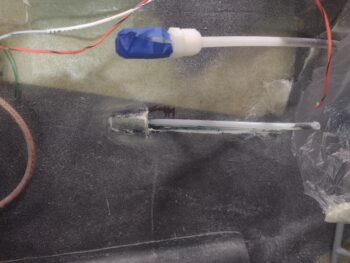
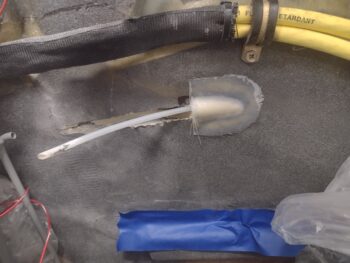
Which I did next, laying up 2 plies of BID on the aft EXTERNAL conical bumpout on each side. I emphasize external since forward of the G10 “washer” I will make an INTERNAL conical shape (i.e. into the sidewall) with the widest part again starting at the washer, but then narrowing as it goes forward. This will provide a scooch more space for the rudder cable spring to reside and better angle the cable for the rudder pedal conduit.
Again, peel plied 2-ply BID layups on both the right (pic 1) and left (pic 2) sides.

The outside temperature was a pleasant 60° F, but for epoxy work I wanted that bumped up a bit more. So I turned on one of my Kerosene heaters and let it blast for a bit.
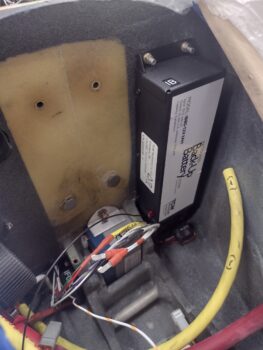
Since the shop was a good temp for layups, it was clearly a good time to do another epoxy-based task in adding a threaded RivNut to the upper right sidewall inside the nose’s battery compartment. This threaded hardpoint will specifically be for securing the rather robust inline fuse that is for the hung starter warning alarm circuit inline fuse (I’m kind of wishing I had used an old-style glass inline fuse for this guy… these inline ATC fuse holders are quite chunky).
Note that I first swapped out the front top corner bolt that secures the starter contactor (anodized gold box) to add an Adel Clamp for the first inline fuse lead. I then drilled a hole, prepped the RivNut and floxed it into the hole (pic 1). Fast forward a few hours later, and here are the taped wide AN970-3 washer and greased-threaded screw removed, showing the RivNut floxed into place (pic 2).


Another hour’s worth of cure later I secured the inline fuse onto the sidewall… much better. Yes, it’s very busy in this nose battery compartment, but let’s try and keep it all as tidy as possible, shall we?!

While all the layups and flox were curing, I took about half an hour to gather up my tools and hardware to install the right rudder into the winglet. You can clearly see it hanging open a little bit, as I need to remove it and sand some internal mating surfaces down at the bottom inside rudder and pocket for it to close all the way and seat in place. Paint, once applied, has a way of making tight surfaces get knocked even further out of spec tolerances and such is the case here.
Also note that I installed the Nav/strobe light mounting plate on the forward wingtip.

Another quick kill task was lopping off the way-too-big diameter stock terminal connectors for the CTEK battery charger leads that are getting permanently connected to the battery with the pairs’ quick disconnect connector. I sized the correct FastOn ring terminals and then crimped them on, replete with the correct color heat shrink applied… of course <wink!>.

My last task of the evening was running the wiring bundle through the transit hole at the bottom of the Napster bulkhead before installing the TCW Technologies IBBS (Integrated Backup Battery System) unit. To be clear, this wiring will need to be pulled out to allow me to widen that wiring transit hole, as it needs to be just a tad bigger in diameter to fit all the wires exiting and entering the nose battery compartment.
And with that, I called it a night. If I get a chance tomorrow, Christmas Day, I’ll shape the forward rudder cable conduit sidewall channels and get those glassed.
Either way… moving forward!