
Starting off, here is a pic of the pitot-static “T” fittings on the GRT AHARS (middle of pic) and the 90° right angle fitting on the TruTrak ADI (bottom center) that I installed yesterday.
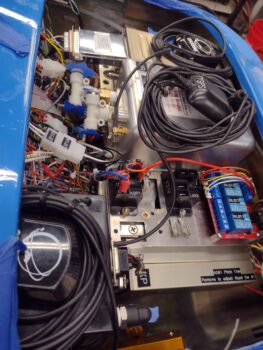 Again, here is the 90° fitting on the TruTrak ADI. My first task today was installing the one straight fitting I have on hand into the pitot port on the MIni-X, immediately followed by a “T” fitting that will connect to the ADI on the forward-facing side, and to the AHRS on the inboard facing side (pic 1). All this after testing out other physical configurations.
Meanwhile, over on the left side I connected a 3-outlet manifold to the Alt-static valve (switch) that sits on the panel (pic 2).

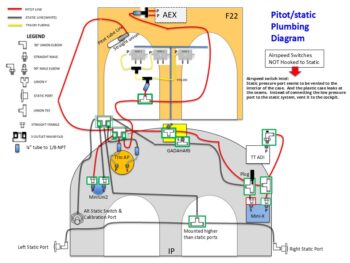
After testing out a few different physical configurations, I finally settled on the double-fitting setup on the Mini-X to connect it from the pitot and static lines coming from the AHRS and then connecting those via the “T” fittings to terminate at the TruTrak ADI (pitot only).
Through my testing shenanigans and pitot-static machinations I literally updated my pitot-static diagram significantly 3 times by mid-day today. Although not a beauty of a diagram, it works for what I need to document my pitot-static plan. Again, I have parts on order to allow me to finish installing the pitot-static system fairly soon.
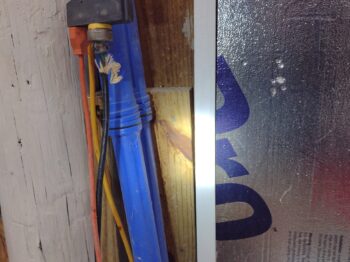
 Back on the electrical system, I re-installed the glass 3-amp fuse into the IBBS power feed for the GRT EIS. I then flipped on the IBBS power switch to see if the EIS was getting power, and as you can see it fired up. Initial test complete.
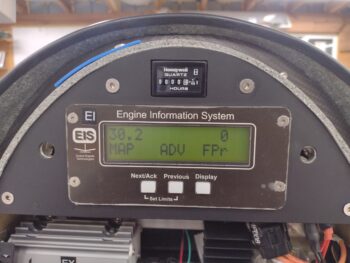 The only other components connected to the X-Bus/IBBS is the GRT HXr and AHRS, and since the HXr is not installed I’m not testing that circuit yet.
So I tested out some components powered by the Master Bus, starting off with the Dynon Intercom… with only the green LED being the only indicator of power at this point, but that is clearly a great starting point.
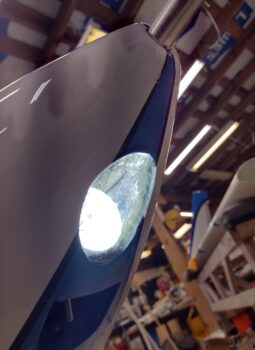
 I also installed a fuse into the Wig-Wag/Landing light position on the Master Bus and tested the 2-position switch with the middle position firing up the wig-wag and the top position powering a solid light beam. Test good (I’ll test the wing wig-wag/landing lights controlled by the same switch when they are installed).
 Here’s what that looks like on the actual bird. Please ignore the dust inside the landing light lens, I’ll get around to cleaning that at some point!
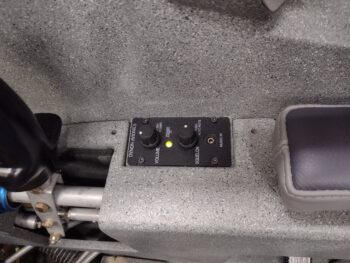
 My last test was on one of my 2 dimmers, this one controls the panel lights. This dimmer also controls dimming the AG6 Warning Annunciators and the Trio autopilot (not yet installed), which will get tested when I’m ready to fire those up. I turned the shop lights off so you can see the max lighting on the TruTrak ADI and the Vertical Card Compass. Another successful test.
 What is not successful are 2 issues with the Mini-X. The first being my OAT value is not showing on the screen, although the probe wires are physically connected to the Mini-X connector and ground. Issue #2 is that when I flip the Master Switch on I almost immediately get a Low Bus Voltage warning message. Thus, when I pull the Mini-X to install the Static fittings, I’ll be doing some circuit testing to check these things out.
I also have a couple of development projects going that are in their initial stages: one for a mounting ring to allow me to install the fuel vapor warning sensor (for the first few months of flight ops to ensure no fuel leaks in the cockpit) and the other for a GPS puck plate that I will test installing on the right side of the avionics bay top opening. As those get further along and are viable I’ll post pics and discuss.
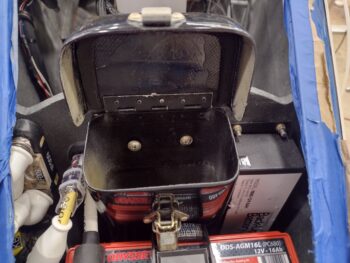
My last official act of the evening was to widen the lower mounting holes on the bottom back side of the nose tool box that allows it to slide down onto the reverse mounted Clickbonds. With the battery strap slightly pressing against the tool box it made it a bit harder to get the bottom holes aligned with those bottom securing nubs, so widening them just a tad did the trick. Toolbox installed! (until the battery gets removed again…)
 Pressing forward!