
This post covers the last few days…
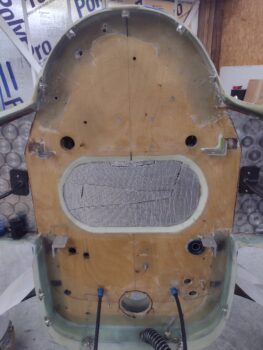
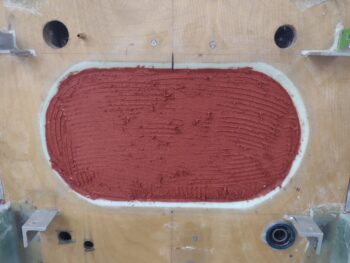
Starting off, I used the largest pieces of leftover Thermo-Tec heat shield to fill in the center depression on the firewall.
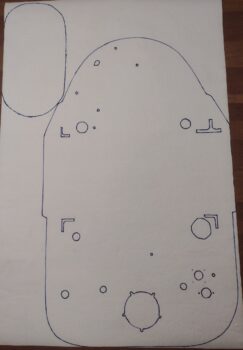
I then traced out the firewall onto my stock of Fiberfrax to create the layer that will cover the entire wood firewall structure, plus an oval to cover the Thermo-Tec in the center depression of the firewall.
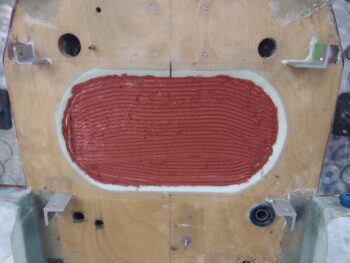
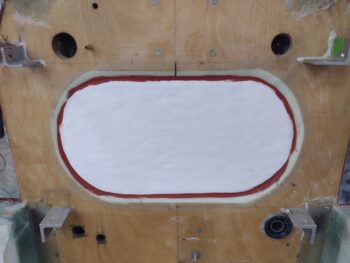
I filled any gaps between the Thermo-Tec pieces with red hi-temp RTV before applying it across the entire face of the Thermo-Tec (pic 1). I then set the Fiberfrax in place and let it cure overnight.
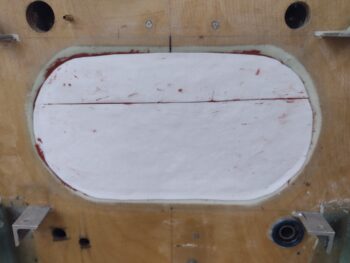
The following day I noted that I still had a significant depression even with the Thermo-Tec and Fiberfrax layers in place, so with a couple remaining large scraps of Fiberfrax, I went ahead and added a final filler layer for this depression… still not completely filling the depression, but good enough to provide an adequate transition.
I had a good bit of errands to run, life administrivia, etc. to knock out, as well as doing some research on other Long-EZ related components like my main battery configuration, brake pedal installation, etc.
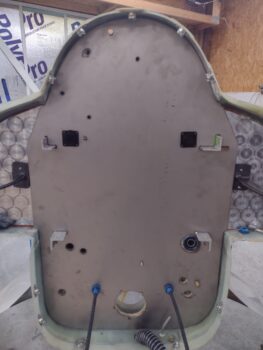
Thus the only thing else I got done on the firewall was later in the evening, after the new Fiberfrax was securely in place, I test fitted the new titanium firewall cover. I’ll admit I missed one hole: the AN3 bolt for the ‘Forrest-of-tabs’ grounding bus inside the hellhole… so I cut that out of the firewall Fiberfrax layer and made a note to buy a 3/16″ cobalt drill bit to make the hole in the firewall the following day….
Which I did. With ALL the holes accounted for (and created), I then quickly slathered up the original wood/glass firewall with red hi-temp RTV, attached the Fiberfrax layer before then adding more red RTV and setting the titanium firewall in place (which took some fairly creative contortions to get into place).
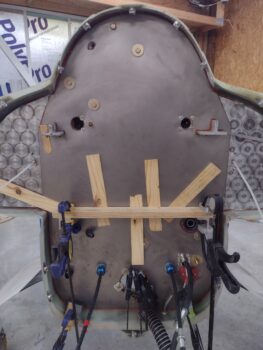
I then spent nearly 2 hours first getting the titanium firewall set as securely in place as possible with bolts, screws, AN passthrough fittings, throttle/mixture cable securing hardware, etc. before then clamping a piece of wood across the lower engine mount extrusions and wedging the firewall into the underlying fiberfrax (I had meant to get a pic of the Fiberfrax in place, but I was scrambling to get everything mounted before the red RTV cured).
Next came almost an hour of simply cleaning up all the red RTV that was … well, everywhere. It made a huge mess all over and took a good bit to clean it up.
And with that, another milestone has been met: the titanium firewall and underlying Fiberfrax layer is installed!