
Another 2-day post here, which is clearly becoming my norm.
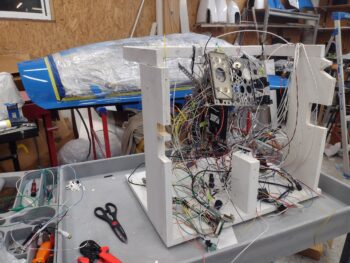
I got the Tri-Paragon back out into the shop, ran off a good bunch of wire labels and applied those with the heat gun.
Not shown is that I realized I needed another few wires soldered into the Video Camera MUX D-Sub connector for the throttle handle castle switch that controls the video camera forward & reverse screen cycling on the HXr EFIS. All totalled, I soldered in 3 wires for that function.
 I’ve been holding off on working on the stripped out #8 setscrew on the right wingtip Nav & Strobe light assembly until warmer weather, and today that happened. I got the setscrew out using the technique of forcibly inserting a hi-torque bit (took 2 sizes) to reverse it out with judicious force.
I then used my 1/4″ ratchet to install a new set screw with a 5/64″ allen bit inside a 1/4″ socket to keep the alignment as straight as possible, and then no kidding it snapped off before the setscrew was all the way into the body of the Nav/strobe light. My saving grace was that it wasn’t nearly as far in as the first setscrew (about 0.05″ peaking out), so in a number of iterations I VERY CAREFULLY Dremeled a slot into the exposed setscrew to then use a flat-tip screwdriver to unscrew it… obviously at this point we’re into the official TOTAL PITA realm, and I clearly didn’t want to go through this sh*tshow a third time.
I test installed the 3rd setscrew with a brand new 5/64″ allen wrench when I noted there was still just a hair bit of wobble on the installed light… so I added two separate plies of thicker Gorilla duct tape on the mounting bracket, and 4 small dollops of RTV to secure it in place when I did the final install. As you can see, that did the trick.

I should note that, as per AeroLEDs, these setscrews are “patch” setscrews in that they have a literal patch of pre-applied thread locker on one side of the threads. I don’t know if that was the issue, and I even ran a 8-32 tap into the hole to ensure the threads were clean after I retrieved the jacked up setscrews. Anyway, lessons learned for the left wing and task complete.
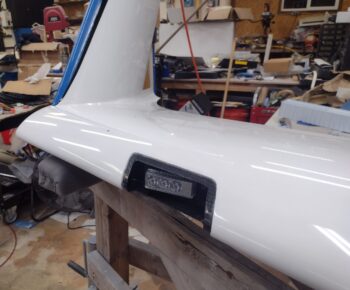
Although this entire initial endeavor was undertaken a few weeks ago, here’s the shot to show the wing leading edge Wig-wag/landing light wired up and installed (still needs aimed correctly before lens goes on).
 I noted that I had misinterpreted the physical layout of the landing brake relay position on the wiring diagram as I was finalizing its connection to the P4 connector (throttle switch cable), so tomorrow I’ll have fix that and redo the connection wiring [40% of work is rework they say??].
I also did a number of other clean up, prerequisite wiring tasks and labeling in preparation before the Tri-Paragon gets installed… shooting for tomorrow if everything goes as planned!