
Another 2-day update here. Wow, time flies when you’re building an airplane!
Lots of research and purchase orders going in to figure out and acquire all components for the pitot/static plumbing. That’s taken up a good few hours each of the last couple of days.
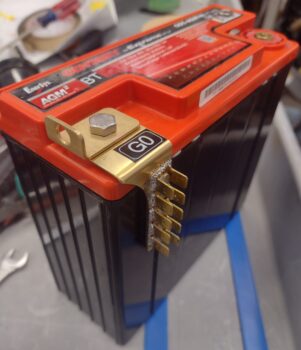
I also got around to knocking out one of two remaining (that I’m aware of) machining jobs I have on the books: the brass G0 Ground Bus that hangs off the battery’s negative post in the nose (job #2 is the right angle bracket for the GNS-480 mounting tube).
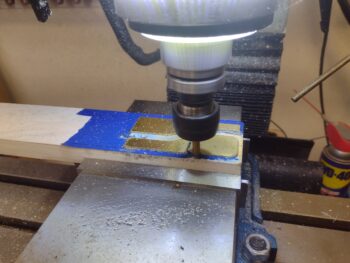
I started by cutting a brass plate to length and prepping it for milling.
 I then proceeded to mill the brass plate (pic 1), which thankfully didn’t take too long… here’s the end result of the G0 Ground Bus tab that will get mounted directly to the battery (yep… cheating!).

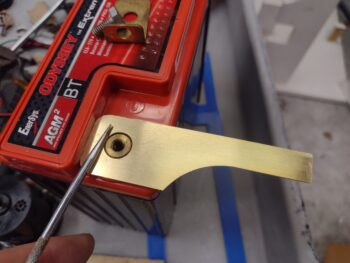
After cleaning it up and deburring the edges, I checked the hole fit around the raised center brass ring on the negative battery post (pic 1). It fit near perfect. I then secured the battery cable attach bracket into place (pic 2). Note how dirty the L-bracket is… destined for a white vinegar bath in the morning.

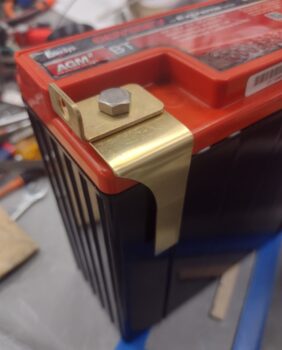
Day 2 morning: I carefully bent the G0 Ground Bus tab over in the vise and then remounted it onto the battery (note the CLEAN L-bracket!).
 I then secured the double-row FastOn connector tabs first with a rivet, and then by soldering around the perimeter and in the center rivet holes. I had used my left over vinegar and 3M Scotchbrite pad to clean the mating surfaces, but for some reason my solder was being finicky about wetting out and flowing between the components. That being said I couldn’t pry the tabs off with my bare hands after soldering, so they’re on there pretty darn good (I had expected some possible shenanigans with the solder, thus the rivet!).
Note the 3D printed mock-up that I tested out a month or so back when I designed this G0 ground tab in CAD.
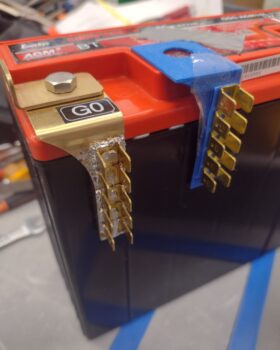 And here we have the final pic before it gets installed into the nose… which is coming up within the next day or two.
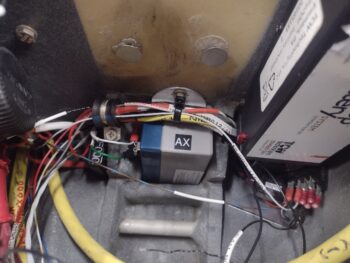
 In prep for the battery going in, I did a good bit of work on the heated pitot tube… primarily assessing how to plumb it up to the sidewall pitot tubing.
I also terminated FastOn connectors to the white (power) and green (ground) wires that connect the small back-up battery to the nose Auto Gear Extension system (pic 1). After installing the angled bracket battery securing tab, I then also wrangled a good bit of the local wires into the right side Adel clamp. After I wire up the Taxi Light actuator relay coming up soon (lower right corner), I’ll install the left side Adel clamp (pic 2).

And with that, I’m calling it a night. Much more to do in the nose tomorrow.