
After mucho preppo and a day’s delay in having to reshoot the black edge stripes, I was finally ready to paint the canopy… at night vs mid-morning to mid-afternoon which I prefer to do.
Since I had a fair bit of boat paint on the canopy frame, I needed to seal it before shooting the blue Nason paint.
When sanding the boat paint to get it smooth and contoured for the spray-on paint, I was cautious not to have any break-throughs in the paint down into raw micro. That being said, there was a significant amount of micro showing through (epoxy wiped vs raw), but I definitely did not strip off as much boat paint as I would have wanted (for weight reduction) in being cautious NOT to have such a break-through.

After shooting the sealer above I had 2 large hairs (not human) on the aft frame near the D-deck intersection. I scooped them out with my finger and tried to shoot another couple of coats to fill in the 2 areas, but the sealer is so thin it has no real build to it, so no leveling out of imperfections. Thus I had to wait a good 45 minutes and carefully sand down the spots with 400 grit paper. This, and one more light coat, did the trick and I was back in business (this is just ONE example of the myriad of on-the-fly repairs, remediations and mitigations that I have to perform on nearly every paint shoot).
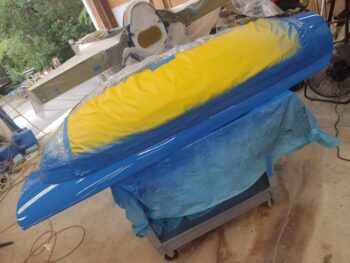
I didn’t like the pic I got of the painted canopy, so I grabbed another one the next morning. The yellow vinyl is to ensure no paint getting through the multiple layers of Saran wrap.
With the canopy finally painted, I carefully pushed it over into the far corner of the shop next to the milling machine. Since the dew was up to its dirty tricks, I had covered the taped, covered and degreased fuselage/strakes/nose and pushed the bird outside.
With the canopy out of the way, I pushed the fuselage into the shop just far enough to be out of the “dew zone.”
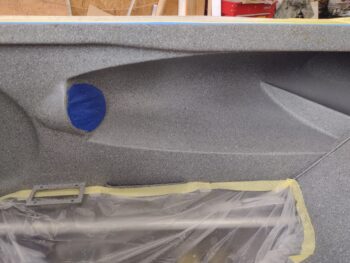
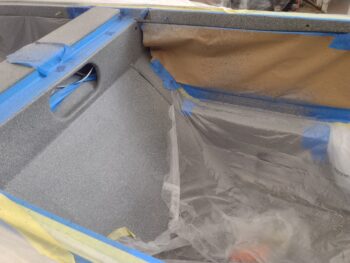
I then uncovered the cockpit areas and shot the aft longerons and the aft corners where the longerons meet the base of the Turtledeck. Also, although hard to tell here, I also shot a 1/2″ strip on the inboard side of the left longeron with the gray rock paint. This is because the white longeron peaks out under the canopy on the inside, so I made a stylistic decision to remedy that… easy enough since I was shooting other internal cabin stuff.

I shot a little on the front right longeron as well as inside the right strake where the burn mark was from my heat lamp mishap. I also did a couple quick bursts on the right edge of pilot’s seatback (bottom right corner of pic) since it was looking dull and not “rocky” enough.
On all the longerons, but especially the left side, the white paint seeped down about 1/4″ inch and literally melted some of the gray rock paint. Thus the reshoot on all the longerons. I also had bare longerons peaking out from my roll bar side attach frames, so I shot those edges as well.
Finally, I shot the top of the pilot seat back since apparently during the strake build/tops install I had ham-fisted this area each side with nasty brown EZ-Poxy on my hands… that all had to go. Oh, and let’s not forget the left armrest storage bin hinge, which was looking pretty gnarly… that got some love in the form of primer + rock paint + clear coat as well.
During my induction period and wait times on the degreaser, etc. I worked for another good hour-plus on my paper firewall cutout, finishing up the bottom half so that’s it now ready to start the iterative process of drawing it up in CAD… coming soon!

Still pushing forward to get this bird in the air ASAP!