
I spent a good majority of yesterday studying to get back into the groove for an Instrument flying lesson I had this morning. Me and my new instructor flew south out of the SFRA, did a couple of holds off of Stafford before flying an approach and practice missed approach at Stafford. If felt good to be back flying, even if it is training. But enough about that . . .
Today I started off by shipping my 8″ prop extension back to Sam at Saber Manufacturing so he can drill the holes & insert the required 3/8″ bushings (in-between the 1/2″ holes I currently have) in order for me to mount the Silver Bullet prop. Of course, originally, I had planned on going with a 3-bladed Catto prop which required 1/2″ prop bolts as per Craig Catto. In addition, Sam will swap out my 1/2″ prop bolts for 3/8″ ones and swap out the crush plate with one that has 3/8″ holes. It’s never-ending on these adjustments, eh?! One change is never without its 2nd, 3rd and 4th order affects!
I then finalized the dimensions of my cardboard Triparagon template and then traced it out onto my 0.090″ thick sheet of 6061T6 Aluminum (the same sheet that I used for my gear heat shields). I didn’t get the Triparagon cut out tonight, but will do so within the next day or two.

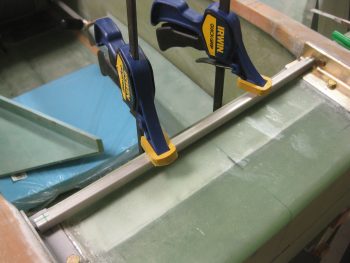
What I did get cut tonight was the 1/2″ x 1/2″ square 6061T6 Aluminum tube that I’m using in lieu of the plan’s GIB upper seatbelt mounts. This tube will allow the upper seatbelt straps –with the webbing merely wrapped around it– to slide inboard and outboard to allow the GIB to have a much better variance in adjusting the upper seatbelt straps to their comfort.
I started the process of drilling the holes for the seatbelt tube by marking the extrusions on each side with lines that extended beyond the sides and edges of the square tube.
I then carried those lines back onto the top of each end of the tube to mark the center point for drilling on each side. I finalized trimming 3/8″ x 3/8″ square 2024T3 inserts, each about 1.25″ long, that slide into place on each end of the tube with the outside face of the inserts close to flush on the each side.
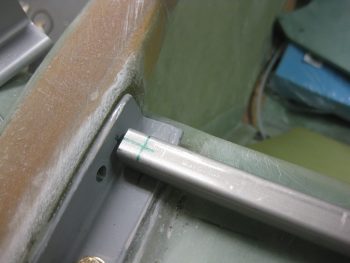
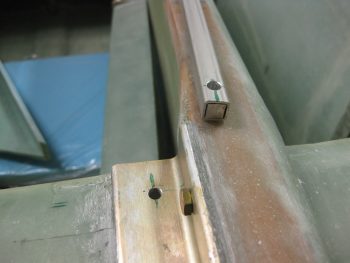
I started with a small drill bit about 1/16″ thick and then stepped my way up until I had a 1/4″ hole drilled down through the seatbelt crosstube ends into the extrusions and then through the Spruce hardpoints embedded in the CS spar, respectively of course.
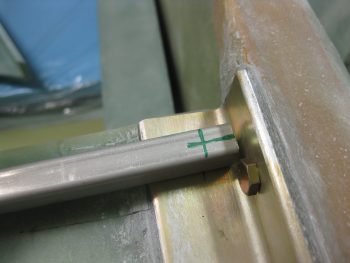
Here’s a closer shot showing the forward bolt hole on the right extrusion very close to the same spot as my original mark. Up on the longeron is the end of the GIB seatbelt cross tube with the 1/4″ bolt hole drilled through it as well. In this pic you can see the 2024 insert in place (very snugly) in the end of the tube. I’ll remove the inserts and Alodine them before re-inserting them before the final mounting of the seatbelt cross tube.
With the GIB seatbelt cross bar mod and the fact that my longerons are wider in the back than stock, it took me a good 20 minutes to figure out the best length of AN4 bolts to use in all but the aft horizontal bolt position on the extrusions (which is the stock plans size bolt obviously).
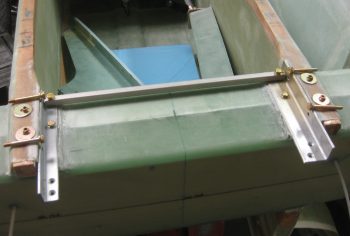
Here’s another shot of the bolts that will get mounted into the upper right engine mount extrusion, right longeron, and CS spar hardpoint.
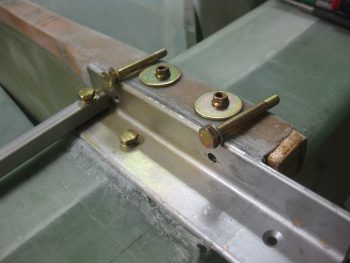
Here’s a shot of the all the upper extrusion mounting hardware. As you can see, I also put the firewall back in place.
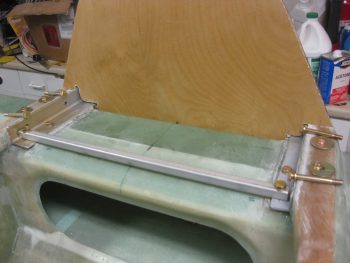
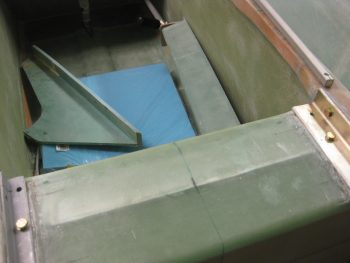
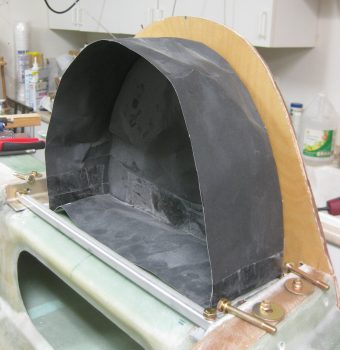
I then did a quick check to see how my GIB headrest / component shroud fit & looked (maybe I’ll start calling it something a bit catchier like, “the vault” or something).
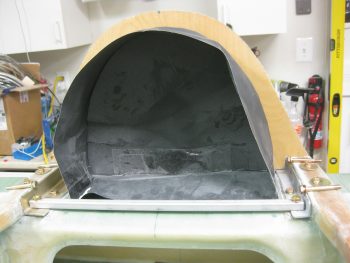
It fit fairly well. Of course some minor tweaking will be in order, but so far I’m happy with the configuration back here with the D-Deck and all.
Tomorrow I’ll continue to work getting the extrusion mounting bolts installed. First, I’ll prep the holes in the wood using epoxy with a little bit of alcohol added to it as per the latest CSA newsletter (Oct 16). I’ll also work on the GIB seatbelt upper strap bar and try to get the Triparagon cut out and maybe work on that a bit. As soon as I get the bolts installed and the seatbelt cross tube finished, I’ll then finally start back on the wheel pants before rolling into the nose and canopy builds.