
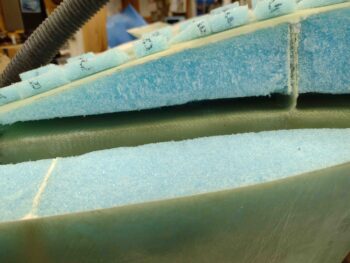
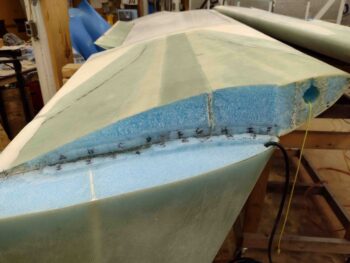
I started out today by ginning up a bunch of blue foam wedges to secure the 8-ply BID Layup #1 in place and keep it pressed up tight and flat against the inside wing glass and inside winglet glass.
My buddy Dave Berenholtz noted on his on blog that a popsicle stir stick is about the same thickness as 8 plies of BID, so sliding them in place with the wedges gives you a good idea of the proper thickness required for the foam wedges.
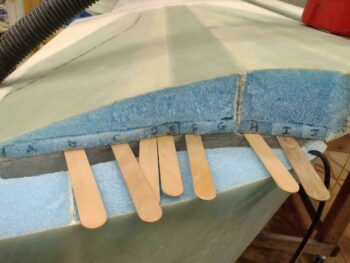
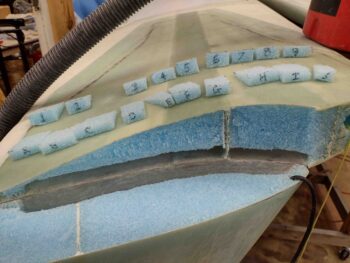
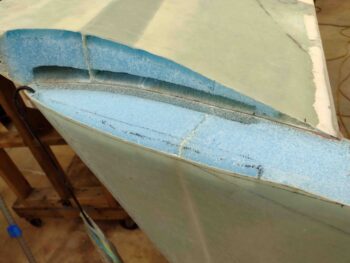
As you can see, I labeled the wing wedges A-J whereas the winglet wedges are labeled 1-9. You can also see that the fiberglass is prepped for Layup #1.
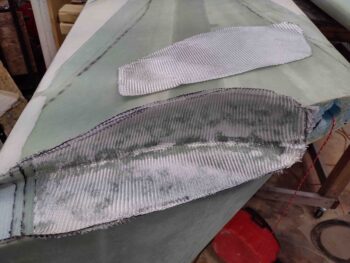
I then cut and prepregged 4 plies of BID for Layup #1 into 2 different prepreg setups. I also cut all the BID at this point for the right wing Layup #1 as well.

I then wet out the prepregged Layup #1 sets of BID.
I then cut the shear web slit on each prepregged 4-ply BID set and then merged the two sets of prepreg together for the 8-ply Layup #1.
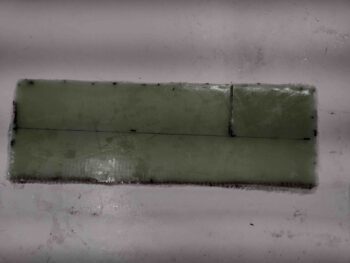
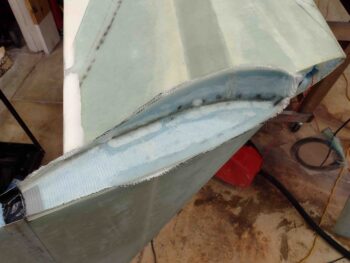
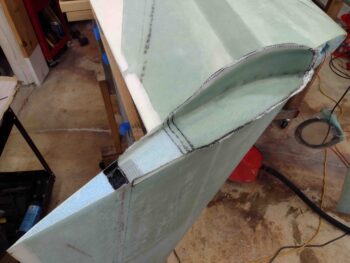
I then laid up the Layup #1 8 plies of BID into the inside corner of the left wing and winglet. As you can see, the slit allows the layup to slide in around the intact shear web.
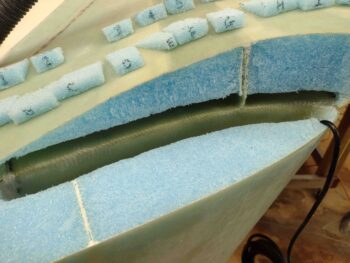
Here are a couple more angles of Layup #1.
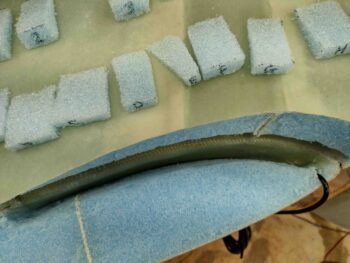
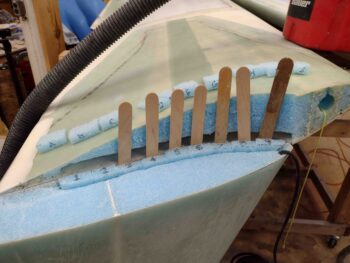
I then slathered up each foam wedge with flox before sliding it into place, starting with the A wedge in the wing, then the 1 wedge in the winglet… alternating up and down, from left to right.
I then left Layup #1 and the floxed wedges to cure for a few hours before I proceeded forward with Layup #2. Not shown is that I cut the flox corner edges, removed the foam and cleaned up the glass along the glass edges. I then whipped up flox and filled up the flox edges. Since I’m using all slow hardener, I want the flox at least slightly cured with as much “body” as possible when I glass Layup #2. I should note that, per plans, we give the first layup a few hours to start getting into its cure cycle to avoid any exotherms with all the epoxy and flox, but still want an epoxy bond connection between Layup #1 and Layup #2 along the edge of where the wing meets the winglet… kind of at the center of a big X (or + if you prefer!).
Also not shown is that I removed the foam towards the aft end of the winglet (forward of the rudder) to create a channel where the internal bell horn pivot arm will be situated.
About 4 hours later, I cleaned up the protruding foam wedges, wet micro’d the remaining exposed blue foam (about half of it was already covered with flox) and then laid up BID ply 1 and 2 of Layup #2. These two plies cover farther aft, up to the break between the rudder and the winglet. They also cover the channel for the internal bellhorn pivot arm.
I also made a small channel in the forward wing end for the antenna cable and ran that through the wing’s foam cable conduit.
Here’s ply 3 of Layup #2 going in while ply 4 is on deck.

For ply 5 and 7 I cut the BID so that the forward portion of the piece had more perpendicular lines (i.e the “wall” or wing edge, etc.) whereas the aft end is a bit angled. On all the other plies I cut the aft end biased parallel to the weave lines. Note ply 8 in pic below right.
Also note that for each successive pair of BID plies I stepped the aft edge forward about 1/4″ to allow for a smoother transition when the layup is peel plied.
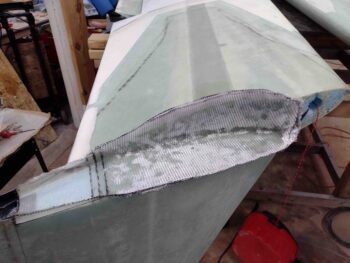
Here is the left wing/winglet Layup #2 complete… just before I peel plied it.
Again, left wing/winglet Layup #2 complete… just before I peel plied it.
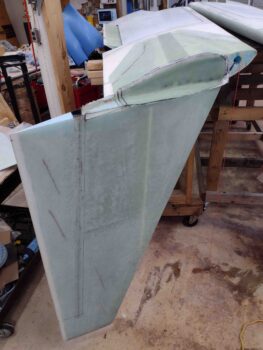
And here we have the left wing/winglet Layup #2 peel plied.
The plans say to wait a few hours to allow the glass to cure a bit before slathering up Layup #2 and the end ‘A’ Block of foam with micro and installing the foam in place. I’m not doing that for two reasons: First, I want to ensure my layup looks good, and secondly, I didn’t make up an ‘A’ Block of foam. I will consider doing that on the right wing… we’ll see.

I then spent a good hour prepping the right wing and winglet for Layup #1 and #2. I still have to clean all the old epoxy and foam off the exposed glass, and hopefully will get these layups knocked out tomorrow.
It was well after midnight, so I packed it up for the night. Tomorrow I plan on having another good build day in getting these winglets attached to the wings.