
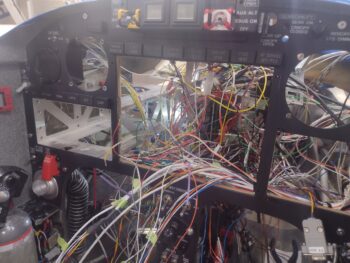
This blog post covers the past few days, where the mundane antics of splicing wires, crimping FastOn, D-Sub and/or CPC connectors onto wires, running wires, labeling wires, and terminating wires —all while verifying and annotating these wires in “the book”— is slowly coming to the final stages,
I’ve added countless ground wires to their respective ground busses, have a good number of Master Buss power wires connected (about half), all but one E-Bus component wire connected, the P5A/B plug (control stick) wires populated, and all but a pair [Video Camera MUX] wires connected on the P4A/B plug (throttle handle).
In the next day or two I should be ready to install the top shelf of the Tri-Paragon, with all its associated components installed (AHARS, transponder, COM2 radio, etc.), to then focus on the left pilot armrest intercom before installing the instrument panel display units and instruments.
With a good amount of the wiring ran, configured, labeled and documented, I temp installed the GNS-480 GPS mounting tube with its aft-side (yes… technically “front” side) bracket mock-up in place to get a bead on where to install the Clickbond for the support brace mounting on the aft side of the F28 bulkhead.
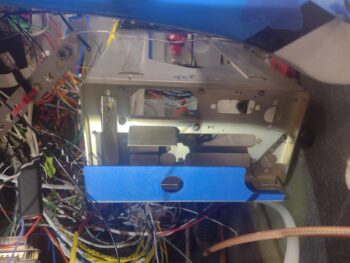 Here we have the GNS-480 GPS unit mounting tube in place (temporarily at this stage) with the back of the MiniUni2 backup EFIS and the wires heading to the Autopilot source [GPS or EFIS] switch in view as well.
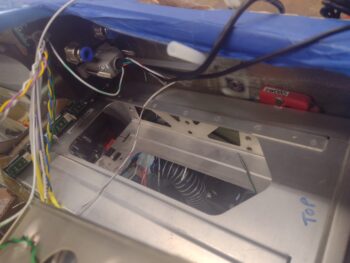 Another shot of the GNS-480 mounting tube set in place, with the remaining wires of this bundle (another small bundle hanging over the right sidewall) left to be ran and terminated… mostly magnetometer (6) wires and video camera and autopilot cables (4).
I’ll also note that I’ve printed off about 4 batches of labels the past few days and heat shrank those to wires (~25 labels).
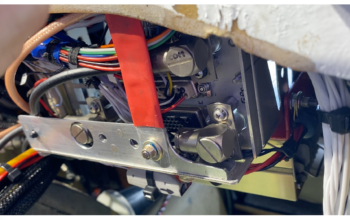
 As a reminder, here is the GNS-480 mounting tube brace in Marco’s bird.
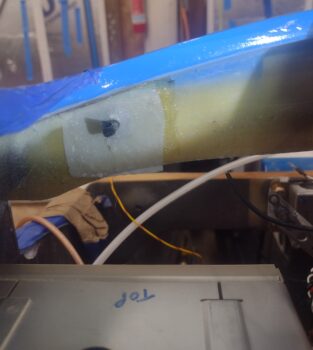
 And here is the Clickbond that I floxed and glassed into place on the aft side of my F28 bulkhead to allow me to also install a brace on my GNS-480 mounting tube.
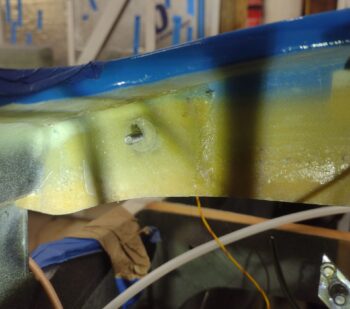
 And at the end of the evening with the Clickbond installed and ready for a brace to secure the forward end of the GNS-480 mounting tube.
 I’m sure I missed covering a myriad of smaller tasks that I’ve knocked out in pushing to get the electrical wiring complete to allow installing the instrument panel components.
Tomorrow I plan on doing some machining for the GNS-480 mounting tube bracket and the G0 brass battery ground buss.
Pressing forward!