I have a list of about 20 layup tasks (each task could be multiple layups) that need to be done on this bird to finish up the composite portion of the build. Currently 20 seems to be the magic number since even when I knock out a few I always seem to find a few more layups that need to be done.
Well, today I decided to knock that list down just a bit more.
I started by re-drilling the 3/16″ hole in the bottom cowling front lip 3-ply CF layup I made to increase the depth of the cowling at this hole to add some meat to hold a CS screw… which is what I also drilled out.
I then test fitted the CS screw and its Tinnerman-style washer, and Voila! Screw position #3 of 4 total on the cowlings thickened for a CS screw. . .
With the #3 screw position completed, I wanted to get #4 knocked out as well. Interestingly, the thickness of the cowl in this position was even less than the other 3 spots, so I added 4 plies of CF vs just 3. After laying up the 4 stepped plies of CF, I then peel plied the layup.
With a layup under my belt, I then spent a good half hour pulling the peel ply off the right intake inboard wall CF tape layup. I then checked all the layups on these inboard walls and sanded down any rough spots or sharp edges that were lying in wait for unsuspecting fingers to draw blood… not on this bird!
I took a short break from the shop to call Sam at Saber Manufacturing to order a 3/8″ crush plate for my “new” white backup Hertzler Silver Bullet prop, since that is the last piece I need to allow me to mount that prop as well (I’ll note that I’ll need to make up a complete new spinner since the white SB prop would be offset —due to the prop extension bolt holes being offset— from my primary silver SB prop).
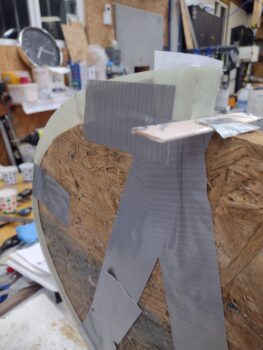
Back in the shop I took the 2 OSB forms that I used to originally create the GIB headrest arch structure and screwed those to the upright/vertical tab on one of my glassing boards. I then taped the GIB headrest & D-deck gap cover onto the forms to provide a working shelf, if you will, to glass on a small tab on the left side of the cover that will essentially create a “dogleg” in the cover to go around the engine electronics cooling fan.
After cutting the tab out of the same scrap glass that I used for the cover, I then sanded both the tab and the cover edge and cleaned them with Acetone in prep for a layup.
Here is the GIB headrest surround cover plate taped to the form and the small tab glassed in place with 2 plies of BID.
And a shot from the other side of the small tab glassed in place with 2 plies of BID to the GIB cover plate. I used a thick micro fillet in the corner to help secure the tab to the cover plate. I then of course peel plied the layup.
I had just a small amount of epoxy left over in the cup from the above layup, so I took a good half hour to fill some indentions I had on the aft top cowl lower interface surface, primarily where the intermediate sections tied into each other. After laying up a narrow filler ply of CF, each strip around 3/8″ wide on average, I peel plied these mini layups.
I then called it a night and went out to dinner with Jess. Tomorrow I plan on focusing on the bottom cowling armpit inlet ramps to get those positioned and glassed into place. I suspect I’ll spend a day or two on those, then once those are in place I’ll start working on the exhaust pipe configurations.


