
I started out today by getting a couple of pairs of layups in to get them curing as I finished up yesterday’s blog post, and did a bit of research and task list prep as well.
The first pair of layups was the plies of BID on the wing root cowl mounting flanges to help elevate (as currently situated: inverted) the cowling side edge to a level equal to the wing surface, on both wings.
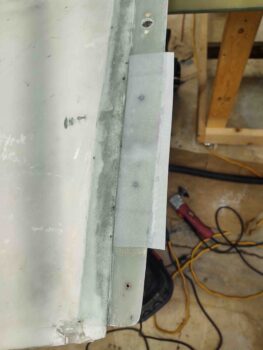
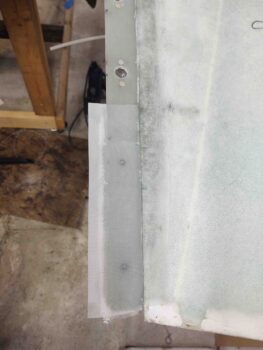
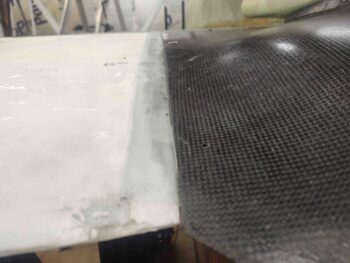
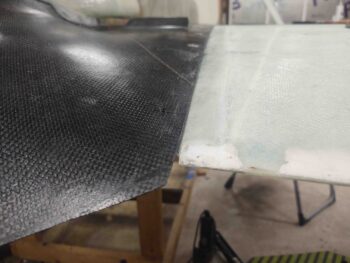
On the right wing (first pic) I essentially “pyramided” 2 plies of BID to fill in the low spot around the #3 and #4 CAMLOC positions. On the left wing, I “stair-stepped” 3 plies of BID at the aft end around the #4 and #5 CAMLOC positions. I then peel plied the layups.
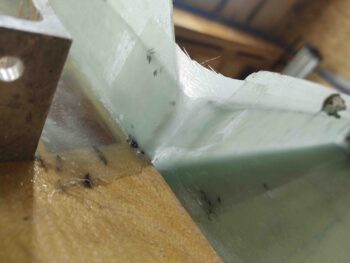
The second pair of layups was the interior side to finish out the corner connection between the strake and fuselage 1.6″ stock plans cowl flanges. I trimmed the edge of the vertical flange and gave each corner area a good sanding before laying up 2 plies of BID, with also a bit of flox to fill in some rough spots. I then peel plied those layups.
A few hours later I marked the cut lines on the bottom cowling to outline where the armpit air intake scoops would get mounted.
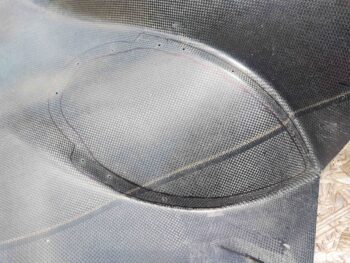
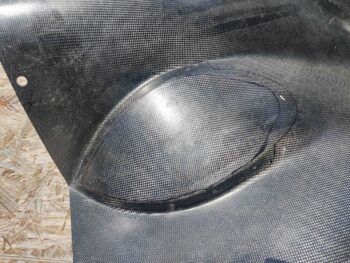
I then used my Fein saw to cut out the air scoop intake holes on each side of the cowling. I then remounted the cowling back into place.
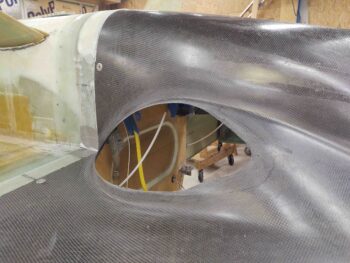
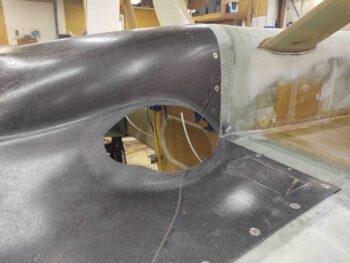
Having already positioned, spaced and fitted the armpit air intake scoops yesterday, securing them in place with clecos, I merely wet out both interfacing edges of the air scoop and bottom cowling flange around the large scoop opening with wet epoxy. I then slathered on some flox and clecoed the air scoops back in place on the bottom cowling.
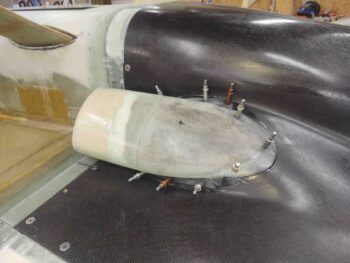
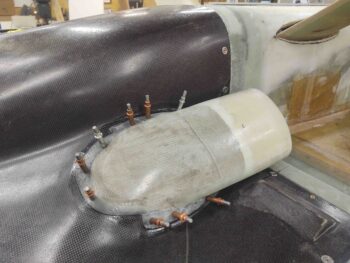
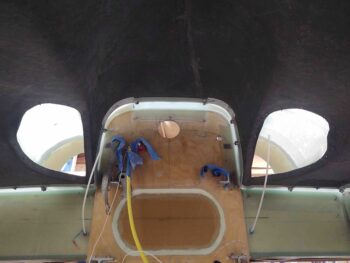
Here’s a shot of the mounted armpit air intake scoops from inside the bottom cowling. If you look closely you’ll see that prior to remounting the bottom cowling I taped the rounded corners of the cowling that interface with the bottom rounded corners of the firewall.
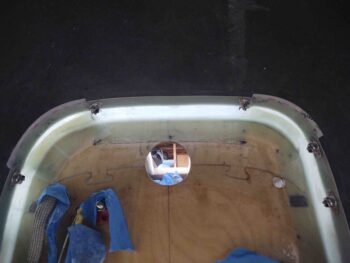
I had also sanded, Dremeled, and prepped the firewall and 1.6″ flange corners for glass. I then prepregged 2 sets of 4 plies of BID and laid them up in each corner, overlapping as much as possible onto the previous horizontal and vertical flanges —the new layup overlaps being restricted only by the installed CAMLOC/Skybolt receptacles.
Thus, except for some cowl air gaps to contend with at the strake/fuselage corners, this completes the mounting flanges install for the bottom cowling.
By the time I got around to floxing/clecoing the armpit air intake scoops to the bottom cowling, and glassing in the corner connecting flanges, the added plies of glass on the wing cowl-mounting flanges were pretty much cured. It may not be readily visible in these pics, but those plies of added BID really did the trick in bringing the cowling edge in line and level with the wings’ inboard edges.
Tomorrow I plan on glassing the external flanges of the armpit air intake scoops to the external surface of the bottom cowling. Again, I’m working to finish up all the bottom cowling install tasks I can complete before moving back onto working the hell hole hatch & cover and the RAM air intake scoop.