
Yes, today was all about getting the milling machine CNC capability online. Which I was actually successful in doing.
Yesterday I spent much of the day messing about with reinstalling the X-axis ball screw and mounts to allow the stepper motor to actuate the table left and right without getting a Drive OK Fault Alarm… which, while I’m glad the Drive OK Fault Alarm is working properly, I certainly don’t want to see one every time I command a +/- movement on the X axis.
With the drive axes finally working in all directions yesterday, today was all about finalizing the CNC install tasks with a couple of bench tests. And then documenting my mill CNC efforts up to this point in a video.
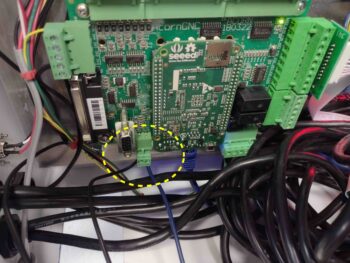
My first task of the day was accomplishing a spindle speed output test on the Acorn CNC control board. This involves hooking up the Fluke multimeter to the 0-10 volt “VFD” output (I mistakenly call this an “input” in the video…) on the Acorn board. Since my meter leads wouldn’t fit in the cabinet, I connected two lead wires up to this output.
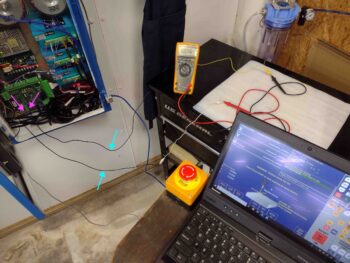
Here are the 2 Acorn board VFD output wires connected to the Fluke multimeter.
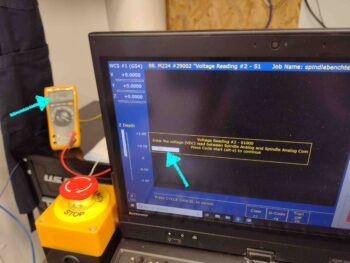
I then loaded up the spindlebenchtest.cnc program into the CNC12 software.
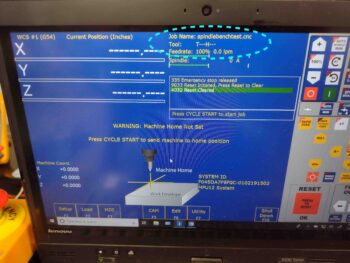
And ran the program. The program has the Acorn board kick out a series of 4 discreet voltage values which you read off the multimeter display and then enter into the program entry box, one at a time. This confirms the voltage values between the Acorn board and the CNC12 program to verify all is correct for the VFD voltage output.
This is a prerequisite task that needs to be completed before wiring up the KBSI-240D spindle speed/direction control board, and I figured I would simply get it knocked out now.
I then unboxed and prepped the KP-3 Kinematic Touch Probe for the bench test that I performed while filming the video. I figured I would do at least one bench test “live” on camera.

I took the probe body out of its plastic case and then carefully installed the actual probe stylus into the front/bottom of the probe housing.
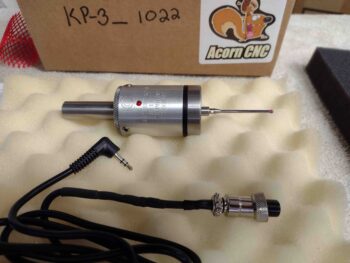
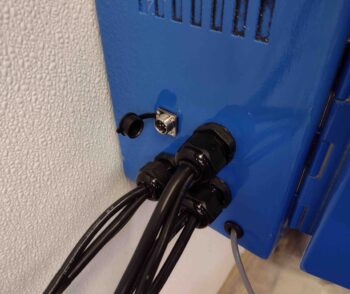
As you can see above, the jack of the probe lead is inserted into the probe body, while the other end is attached to the connector on the outside of the CNC control box, below.
With the KP-3 probe ready to go, I actually filmed the bench test segment first (ah… tricky I am!) before then filming the remaining video footage detailing my mill CNC upgrade machinations.
Here’s the video. It’s a bit long, but I think informative. Enjoy!
After filming the video, I then of course had a late night of video compilation and editing to get this thing loaded up on YouTube.
Soon I will get back to working on the actual plane… promise!