
Today was pretty much a full day on the GIB headrest structure again. However, I think that tomorrow I should honestly have everything wrapped up on the headrest –since I’m running out of tasks to do on it– and I will, no matter what, be getting on to the prep for the nose and canopy builds.
I started out by pulling the peel ply on the top plate reinforcement layups and trimming the glass. I also pulled the upper exhaust cooling fan out of it’s recessed notch in the sidewall. It took a bit of convincing, but I finally got the little fella out of the glassed notch.
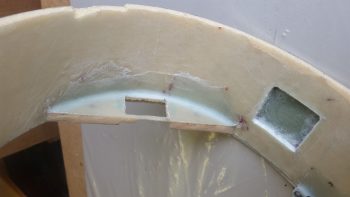
The same was true for the larger intake cooling fan, although it did come out a lot easier than the little fan. I will say that the layups inside both the fan notches look good and will definitely do the job.
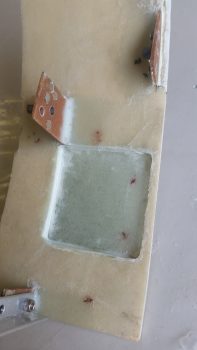
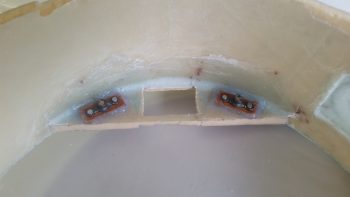
One task I did last night but failed to mention, probably because I didn’t have a pic of it, was creating flox hard points in the depressed foam sides for the Hobbs meter mounting screws. Here you can see that the hard points are cured. You can also see I lost a bit of foam off the front strip, which I will glue back into place.
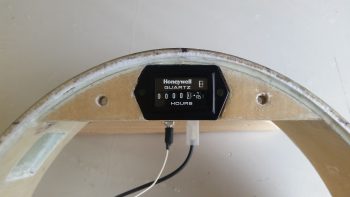
I then test fitted the Hobbs meter, which fit snuggly but just fine.
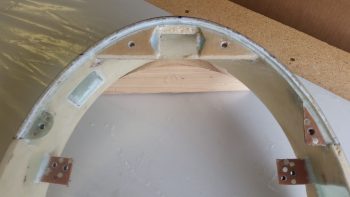
I then made up 2 K1000-3 nutplate assemblies for the top plate upper mounting screws.
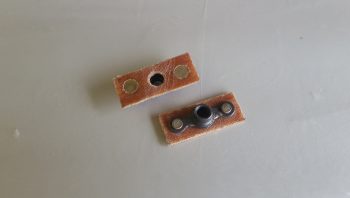
I then floxed the nutates in place and secured them with 2 spare AN3 bolts.
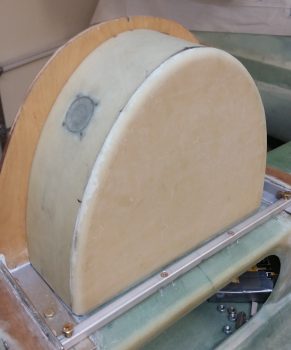
I then marked up the aft side of the foam headrest cover piece to depict what area(s) would get sanded down to create a depression in the foam. The areas not sanded down or depressed are the portions that interface with the front edge of the headrest structure, and/or the parts that press up against the CAMLOC mounting brackets.
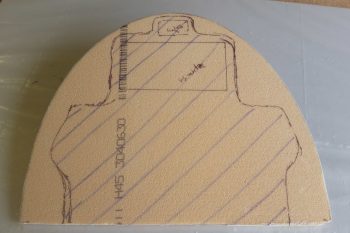
I then took the foam headrest cover piece outside and spent about half an hour sanding down the marked areas into a nice depression about 0.070″ deep. When I brought the cover back inside the shop, I then cut a trough all around the edge of the glass to create a micro corner when it gets glassed. To be clear, I didn’t use flox in the trough since this piece is not a structural component of the aircraft.
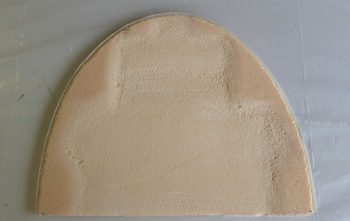
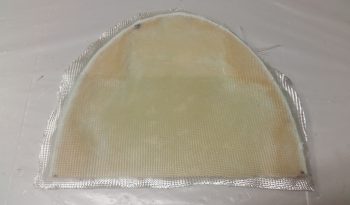
I then laid up 2 plies of glass on the back side of the GIB headrest cover piece. The first ply covered about the bottom 2/3rds of the cover while ply #2 covered the entire aft headrest cover. I didn’t feel that peel ply was required on the aft side of this cover, so in rare form I didn’t use it.
I typically take Friday nights off, which I did tonight to again hang out with my buddy Rob for some beers and dinner.
When I returned I trimmed the cured glass on the aft side headrest cover layup. The layup looked fine and I’m pleased with the results.

I of course then had to check it out to see how it looked. Not bad!
Again, I plan on spending no more than half the day on the GIB headrest (including glassing into the fuselage) and then I have to get on with nose and canopy build. While I am glad to have gotten the GIB headrest and components squared away, I really have to get back on schedule with the main nose and canopy build.