
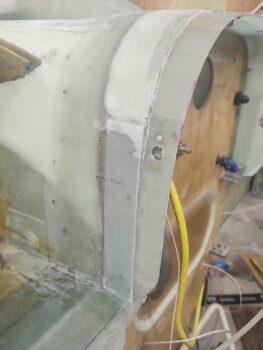
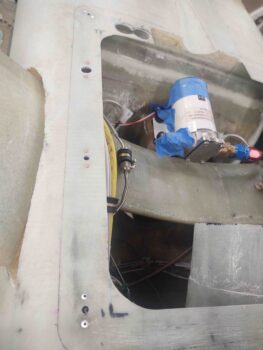
I started off today with an “unscheduled” task of slowly cutting away the aft edge of the hell hole hatch cover center channel to allow the flange of the aft RAM air scoop section to peak through.
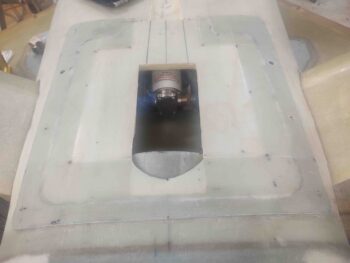
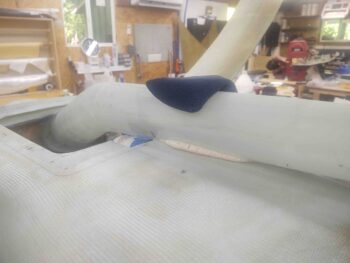
I included this shot simply to show the flange of the aft RAM air scoop piece inside the hell hole.
And one more pic from the aft side, fairly level with the bottom of the fuselage to show how much of the flange of the RAM air scoop piece peaks above (technically below) the surface of the hell hole/fuselage surface.
I then focused on getting the scooped divot on the bottom of the fuselage that provides clearance for the top side of the RAM air scoop as it transition aft into the hell hole.
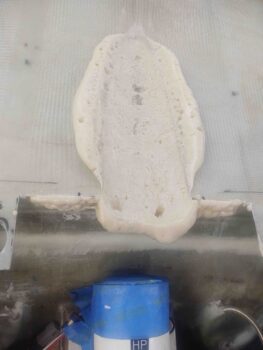
I taped up the top (bottom as situated) of the RAM air scoop where it interfaces with the scooped divot and then applied a small bit of pour foam in the divot. The addition of the pour foam is to back fill some of the foam I took out as I was cutting away the bottom aft fuselage to create the space required for the RAM air scoop to be positioned correctly. Since I was estimating the amount to be removed I went a little too deep, so here I’m filling the surface back in to the surface of the RAM air scoop.
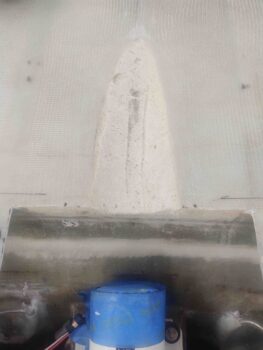
Here’s the fuselage-located scooped divot with the pour foam added, after I removed the taped RAM air scoop.
I then removed the excess foam, carefully sanded the surface and then created small “trenches” around the edges for flox corners.
I then created the flox edges, micro’d the foam and laid up a ply of BID inside the scooped divot. I then peel plied the layup.
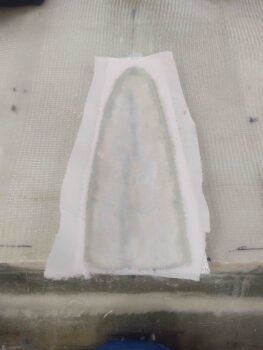
After re-taping the top of the RAM air scoop I then remounted it and added a little weight to ensure it compressed the layup as best possible.
As the scooped divot layup cured, I trimmed, sanded and cleaned up the layups from last night: the aft hell hole flange and the aft RAM air scoop piece attach to the front face of the firewall.
Also while the scooped divot layup cured I knocked out a task that’s been on my to-do list for quite a while now: the partial filling of the sidewall depression at the junction of the aft fuselage/firewall with the bottom cowling. Again, this is a mitigation —not elimination— of the consequence of having a rounded fuselage matching up to a cowling designed for a traditional-shaped fuselage.
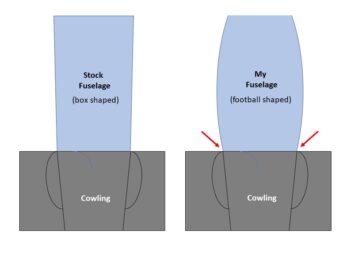
In my quest to mitigate this depression, I glassed a 3-ply stepped layup onto each side of these junctions: the aft fuselage/firewall edges.

And the forward vertical sidewall of the bottom cowling.
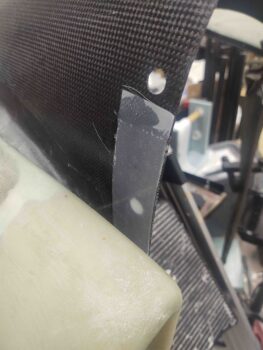
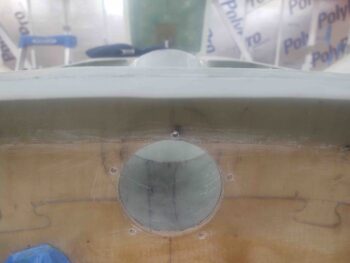
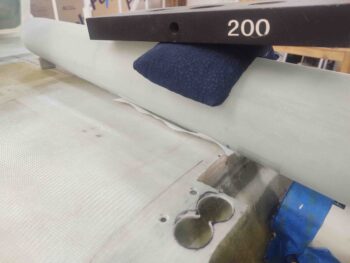
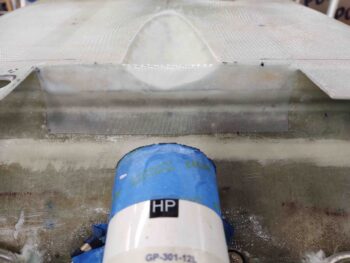
After the scooped divot layup cured, I pulled the peel ply, razor trimmed the glass and sanded the edges (top blue arrow). Also note the initial cut lines I marked on the face of the hell hole hatch cover to remove this area in prep for the integration of the RAM air scoop into the cover.
I then installed a K1000-3 nutplate in each aft corner of the hell hole flange.
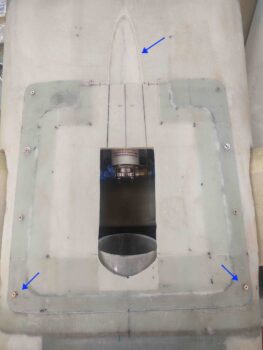
Again, for these corner nutplates I had to use pop rivets to secure them since I couldn’t get the rivet squeezer up into those corners [Note the bare foam just to each aft side of the scooped divot… this will get glassed below].

I then cut and trimmed the glass and foam of the marked center channel on the forward side of the hell hole hatch cover in prep for the integration of the RAM air scoop into this cover. I’ll note that I intentionally left the inside glass intact to keep as much structural rigidity in the cover for as long as possible.
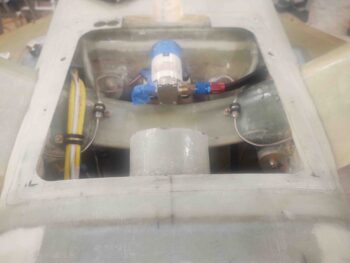
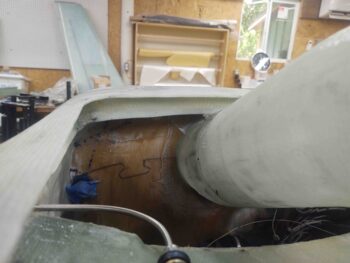
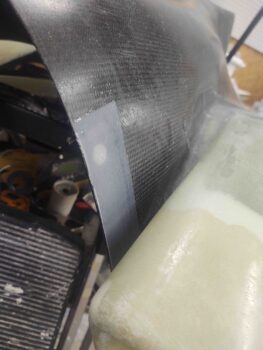
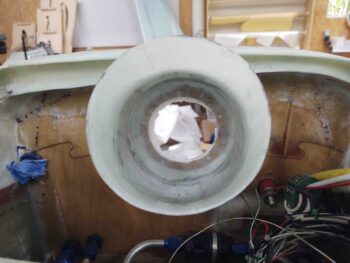
I then prepped the forward hell hole wall to finish glassing the only bare foam remaining in the hell hole. Again on the top edges and around the scooped divot I created small flox corners. I then micro’d the bare foam and laid up a ply of BID and peel plied it (pic #1).
A number of hours later I pulled the peel ply, razor trimmed the glass and sanded the edges (pic #2).
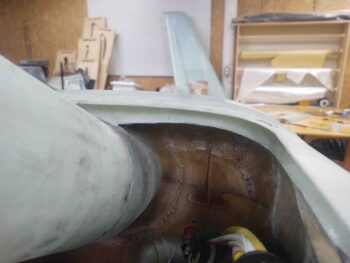
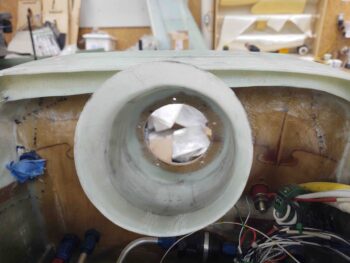
After the layup above —and after spending a good bit of time cleaning up some flox in the corners that had squeezed through from the outside perimeter layup— I added a drier micro fillet and laid up a ply of glass inside the aft RAM air scoop section where the scoop glass structure intersects the front face of the firewall. I then peel plied the layup (pic #1).
Again, many hours later I pulled the peel ply, razor trimmed the glass and sanded the edges.
As you can obviously see, putting slimy BID over drier micro inside the “bottom” of a “coffee can” in an angled hard-to-reach area, resulted in some irregularities in the micro fillet. No worries, in that I will simply go back over (yet another “iterative process”) it with another round of micro to create a much more uniform fillet inside the back wall of this RAM air scoop.
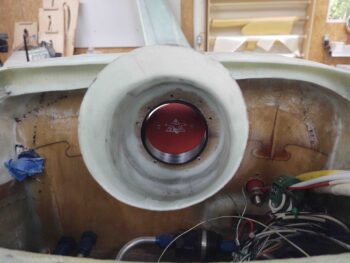
I didn’t want to miss this photo op to place the nose of the RAM air can into the aft face of the firewall and get a shot of it through the open aft RAM air scoop section. Yes, I placed it upside down not only for a better visual of the logo (Rod Bower’s RAM air can) but for better lighting and ability to see the butterfly valve.
I will most likely start out flying with the lip of the RAM air can poking through the firewall as it is here. One reason I wanted the aft hell hole-mounted part of the RAM air scoop to be as short as reasonably possible was to allow me access into it for adding and testing different versions of 3D-printed or machined Bellmouth-style entrance lips around this original RAM air can inlet, which was designed to have a 3″ SCAT/SCEET tubing attached to it.
With all the hell hole proper glass now completed, I will turn my attention to working hard to finalize the install of the RAM air scoop into the hell hole hatch cover.