
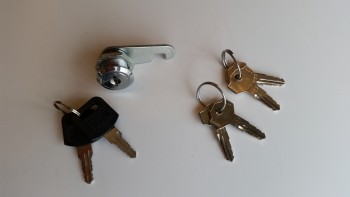
I forgot to mention yesterday that I got some important keys. One set, the cam lock & keys, is a recent requirement and is for the headrest opening, while the other has been on my list to acquire since 2012, which are the keys for the Newton fuel caps that I bought back then.
I’ll be installing the cam lock in the headrest after I finish finishing the roll bar. That will pretty much be the last official task of Chapter 8!
Ok, speaking of Chapter 8. My goal today was to sand blast the entire roll bar in prep for mudding up the nasty weld spots with bondo, and then shoot it with its first coat of primer.
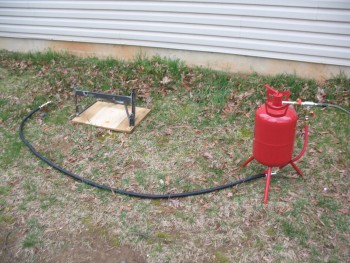
I unpacked the handy dandy cheap-o sand blaster that I bought from Harbor Freight the other day.
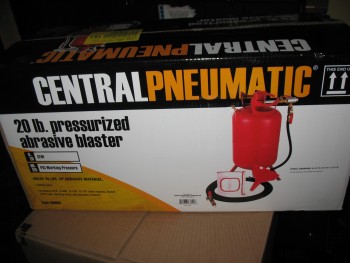
After threading together a million (and one!) connectors, I finally had the darn thing put together.
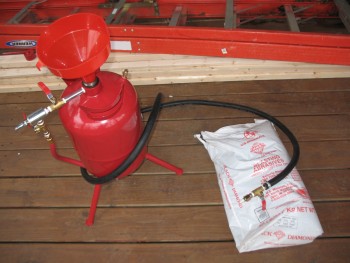
I situated everything outside, ran the hose from the air compressor, got all my protective gear ready, and the bag of blasting media that I also picked up when I got the sand blaster.
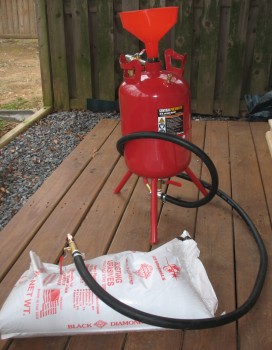
I poured the media into the sand blaster tank until it was about half full, then did one final double check on the lines, tubes, valves, etc. It all looked good so I was ready to make this roll bar look good!
And man did this thing work like a champ! It was a very fine spray but it just peeled all the nasty crap & mil scale right off . . . for about a minute! Then it jammed.
I got it unclogged and got about another 45 seconds out of it, and then it clogged again. I thought maybe I needed to use a bigger tip, since I had loaded the smallest one in the gun since I was using fine blasting media.
The slightly larger tip worked like a champ! For about 45 seconds again. I messed around with this thing for about a half hour & then declared no joy.
I wasn’t sure what exactly was going on, but I was sure that I didn’t want to be in sand blaster troubleshooting mode, I wanted to be in roll bar finishing mode. So I quickly packed up all the sandblasting gear and stowed it away.
Back inside, I was clearly reverting to MANUAL mode. I grabbed a few sanding boards and a bunch of sandpaper–all mostly in the 120-150 grit range–and started sanding away. I concentrated on the welded junctions at first, to allow me to get the bondo out & cover up some less than beautiful welds. Now no one will ever know! HA!
REMEMBER: If ya ain’t cheatin’, ya ain’t tryin’!
I slathered up all the areas with bondo that needed some cosmetic assistance, starting on the left half first, then while all that cured, I worked on the right half. By the time I had finished bondo’ing the right half, the left half was fairly cured and ready for cheese-grating. If you’ve ever worked with bondo, you know that when it’s fully cured it’s a bear to work with & sand. If you knock off the high points while it’s still just a TAD soft and ever so slightly gummy, it makes life a lot easier later on.
After I finished cheese-grating all the bondo’d areas with my 36 grit sanding board, I went to dinner.
After returning from dinner, I grabbed some more sandpaper and spent about an hour finishing up the contour sanding on the bondo’d areas.
Once the bondo’d areas looked good, I grabbed some slightly finer 180 grit sandpaper and knocked off all the mil scale on every area of the roll bar assembly.
With the first major round of sanding & contouring completed, it was time to give this puppy a thorough scrubbing before it got its shot of primer. After hitting it with the air blower and shop vac, I grabbed the acetone & went to town.
Let me tell you, this thing was filthy. The paper towels I used were simply turning a heavy black as I went 3 rounds on the entire roll bar assembly with the acetone.
So . . . when I did a bunch of painting on my motorcycle project, I learned a trick from a few old skool painters: The final prep before shooting any paint or primer is simply, Simple Green. It’s natural and leaves no chemical signature to mess with the paint. It, as its name implies, simply cleans and nothing else. So, I cleaned the roll bar frame one last time with a round of Simple Green, and then got it prepped for Primer.
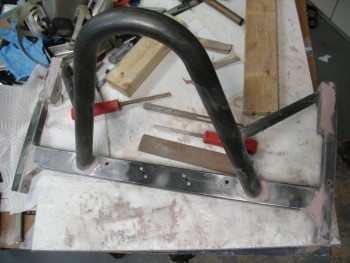
Here’s the last shot of the Roll Bar Assembly in its natural state. Goodbye 4130 color, we’re gonna bring sexy back! HA!
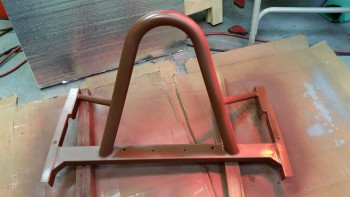
Uh, ok, we’ll bring sexy back later, but for now we’ll settle for this brownish-red primer. Of course this will serve as merely the first primer coat, with much of this getting removed as I sand it down and do some spot touch-ups with bondo for one final clean-up before the final (Gloss Black) primer coat gets shot.
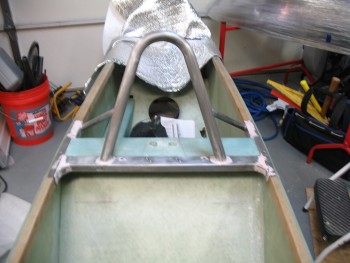
I of course couldn’t resist mocking thus sucker up to see what it looked like installed. Here’s the final pic of the evening.

Tomorrow I plan on trimming the side rails so that they’re slightly radiused on the lower corners front & aft, final sanding the roll bar and shooting the final black primer coat, and getting the nutplate assemblies installed & floxed into place for the 1/4″ roll bar mounting bolts.