
I finished welding the right-side reinforcement piece last night. I started off today by trimming the aft seat rounded piece so that it didn’t protrude forward of the very aft corner of the seat back if you drew an imaginary line straight down. This is required with the new reinforcement plate welded into place at the front of the side rail since the side rail in effect “straddles” the 4″ seat back shelf.
Since the rollbar cross bar will get welded into place onto the reinforcement plate and sit just forward of the seat back shelf, the aft line of the reinforcement plate will essentially be the aft side of the cross bar. Thus, as long as I can install the side rails now with the front reinforcement plates welded into place, it should take only some very minor trimming, if any, to install the side rails with the cross bar welded into place.
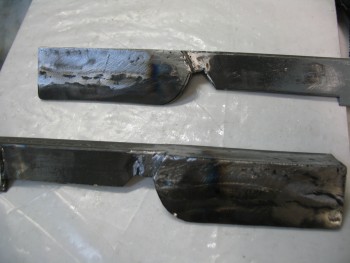
With the final trimming completed on the right side rail, I then installed the reinforcement plate to the front side of the left side rail. As you can see, I drilled 7 total 3/16″ holes into the actual plate being added, and 6 holes situated in different distinct locations on the side rail (so that none of the holes between the 2 pieces align). This allows me to weld the sides of the holes to the metal beneath and then fill the holes in with filler metal so that there are essentially 13 welded hard points “in the field” to attach the plates together. I then of course weld around the perimeter on all 4 sides to create an extremely strong joint between these 2 pieces of metal.
In the pic below you can see where I welded & filled the holes from the inside of the side rail: essentially going “through” the side rail, welding the edge of each hole to the reinforcement plate and then filling in the hole to create a solid surface.
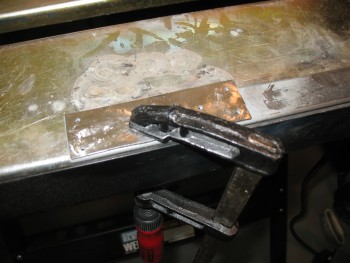
Although not shown here, I ran into an issue when welding the edges of the reinforcement plate to the side rail where I wasn’t getting a good arch between the tungsten tip & the metal, it especially being difficult to get a good weld bead going. Also, a ton of spatter. I thought it was the Tungsten electrode, so after regrinding a couple more electrode tips, I tried it again. A quick note in that I’m using straight Tungsten so far, because I only have about a third of just one 1/16″ 2% Thoriated Tungsten electrode left, and I was saving it for the cross bar to side rail and roll bar to cross bar welds. This means that I already knew that the straight Tungsten didn’t weld as nicely as the Thoriated stuff (yes, I’m cheap!).
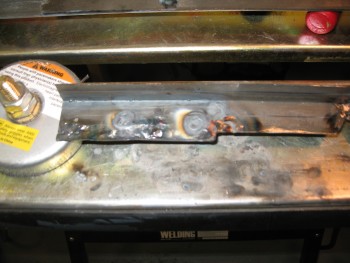
Well, I may be slow but I eventually got it! I finally figured out that I was simply out of Argon! I was kind of surprised since I didn’t figure I would use a whole tank on the roll bar assembly, let alone half of it. Thus, I will be hauling my tank down to the gas supply store today to swap it out it for a full one. I’m fairly confident that tank should last me for the rest of the roll bar build.
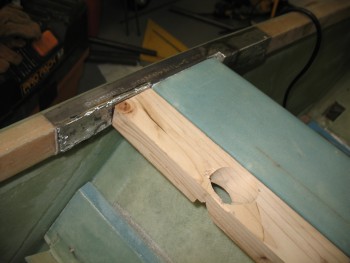
Here are the side rails in place, each trimmed so they can go on & off with the new forward reinforcement plates welded into place.
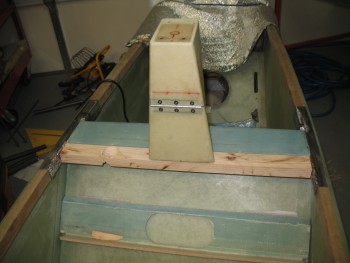
I also trimmed the sides of the mock wood cross bar so that it would fit as well.
With no welding due to a lack of Argon gas, I spent the next couple of hours trimming down the left side, or leg, of the roll bar tubing. With the right side leg longer & embedded into the cross bar–so that it gets welded on both the top & bottom sides of the cross bar–I want the bottom of it to sit on the inside bottom “floor” of the cross bar. Well, currently its about an 1/8″ too high and need to sit lower in its mounting hole.
Trimming the left side roll bar leg does 2 things: it allows the roll bar to sit centered around the headrest while the right leg sits lower into its hole (as per above), and it brings the physical attach point of the left leg closer to the center of the cross bar.
This is important since my original marks for mounting the roll bar onto the cross bar have each leg of the roll bar getting mounted 4.2″ in from the side rail on each side. Currently the right side leg is locked into that 4.2″, but the left leg started at only 3.9″ away. By the time I was done trimming down the left leg, I had closed that distance to right about 4.14″ away, less than a 1/16″ of an inch.
However, since the right roll bar leg is still not as low into its mounting hole as I’d like, and since the roll bar is sitting at 13-1/2″ high vs. the approximate 13″ that I had calculated (I’m not too concerned about this height, as long as it’s a minimum of 13″ tall … also remember the stock rollover is 12.7″ high, but that sits immediately behind the pilot’s head), I’ll be trimming down the left roll bar leg again… I’d guess no more than an 1/8″ most likely.
This should provide me with the magical Troika of 1) right side roll bar leg with the correct depth into its cross bar mounting hole, 2) the roll bar height between 13″ and 13-1/2″, and 3) the left side roll bar leg positioned 4.2″ from the side rail, as is the right side leg.

Another thing that I’m very pleased with is that when I rework a component of this roll bar assembly, whether trimming or welding it, I’ll often weigh it & update a quick weight break out chart I have on a white board in the shop. So far, it looks real promising that this roll bar assembly will have a final weight of no more than 6.25 lbs! That includes the hardware to mount it. Add that to the headrest assembly (with mounting hardware) weight of 1.3 lbs, and the total headrest + roll bar assembly weight will come in well under 8 lbs. Not too shabby IMO… I’ll take it!