
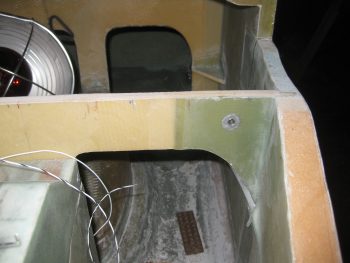
I started out today by double checking my BID spacer pad layups on the front side of the F28 bulkhead. The left-side 12-ply spacer came out fine, but the single ply on the right side seemed to have some issues (i.e. delam around the #10 hole) … no worries since this is mainly for spacing and I can clean it up later.
I redrilled the #10 hole into the canard the doubler on the face of F28 (I also redrilled the #10 hole into the top alignment tabs).
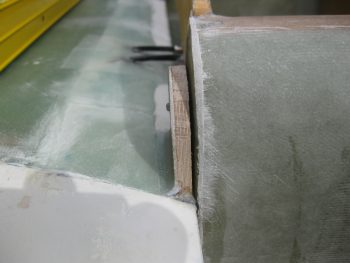
Here’s a closeup of the 12-ply BID spacer laid up on the front side of F28. Just as a point of note, since this a spacer and not structural I used my old batch of MGS 335 on this so as to not waste the good stuff!
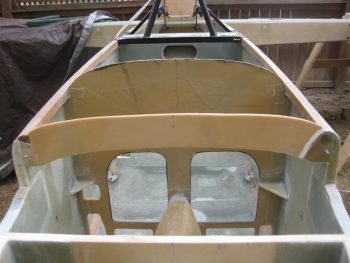
With the new spacers built into the airframe on the face of F28, I gave them a test run when I re-installed the canard.
The left side alignment tab was leaning forward just a hair more than I liked, creating a gap towards the top where it should have been much closer to the F28 12-ply BID spacer.
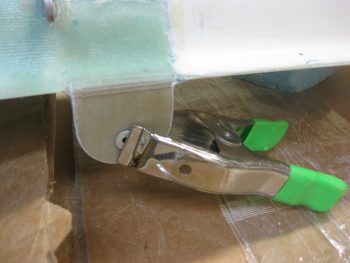
I clamped the left alignment tab tight against the new 12-ply BID spacer on F28 & then very carefully hit it with a heat gun.
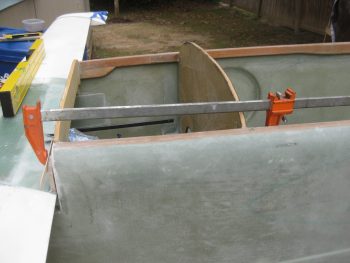
I left the clamp on the alignment tab for probably 45 minutes and when I finally popped off the clamp, the alignment tab looked much better . . . well . . . aligned! ha!
I’ll make a point here that after installing the canard this go around I then measured my left and right sweep from my center measuring block clamped to the top CL of the CS spar, as I had a myriad of times. However, I did it while I still had the left side alignment tab clamped tight… and it showed. I’ve been normally getting 0.06″ delta max between each side on sweep, and this time it was about 1/8″. This of course went back to normal as soon as that clamp came off, although it may have been exaggerated just a hair by the shenanigans of that 1-ply of BID on F28 over on the right!
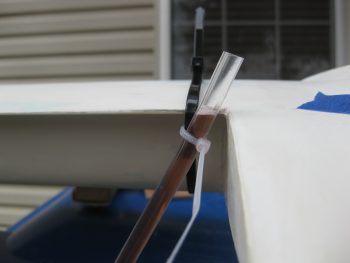
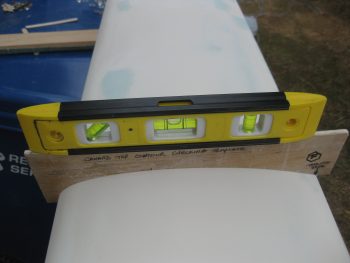
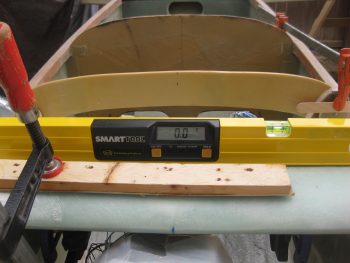
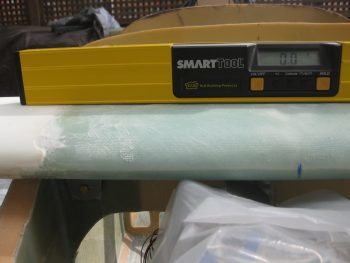
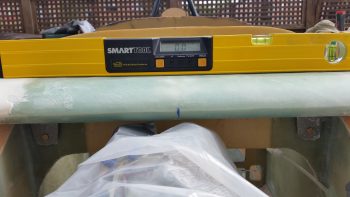
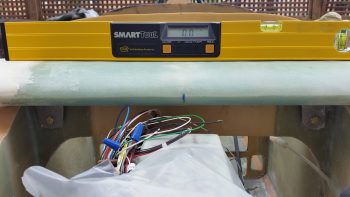
With sweep looking good, and it being the first official trial run of the day on the canard, I fired up my water level and immediately got this! It may be a good day Maynard! I also confirmed this with my digital level at the canard CL.
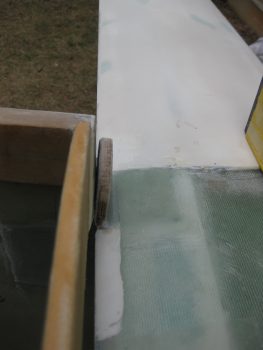
Right side water level:
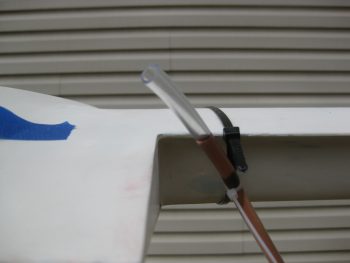
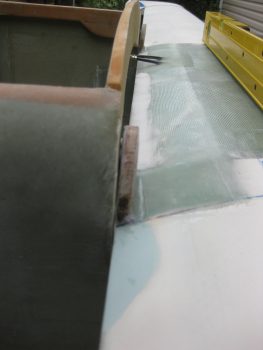
Left side water level:
I then honed in on setting the incidence. I’ve come to the conclusion that somewhat like my fuselage, my canard too has a very slight twist. This may be (in part) due to the fact that I got the cores from Feather Light and they are still using the hotwire method off the original templates. Don’t get me wrong, they make a quality product, but there were some minor idiosyncrasies with the canard cores. Plus, obviously my being a Neanderthal builder clearly doesn’t help! Ha!
I have to tell you that I would probably freak out a bunch more if I didn’t consistently see Burt making allowances for us lesser beings in the plans. Chapter 12 says if one has a twist in one’s canard, then one should mount it with that in mind and average out the twist in one’s canard: “If your canard has a slight twist, set the average incidence equal to the longerons.”
Yes, there are those among us who would willingly cast the first “there is no such thing as a slight twist!” and/or “rebuild! rebuild!” stones, but I am more of the mind & in line with many of our pragmatic generals who say things like: “perfection is the enemy of good enough.” Not that I don’t strive for perfection, I just clearly fall short quite often in this nebulous world that we call a Long-EZ build. Thus, as John Roncz himself (relayed via Marc Zeitlin) once told a pummeled-by-peers Cozy builder: “see how it flies before you change anything” (paraphrased)… I think I too will do the same.
End Rationalization Transmission!
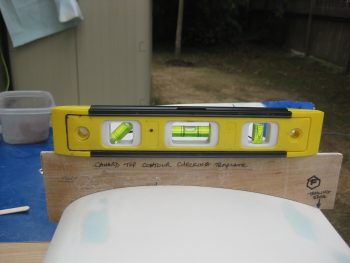
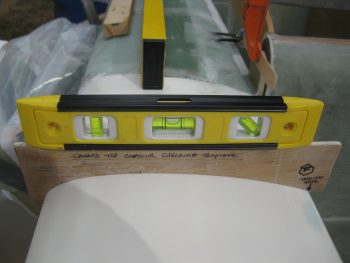
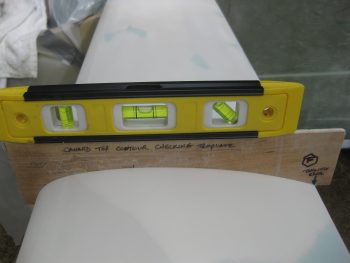
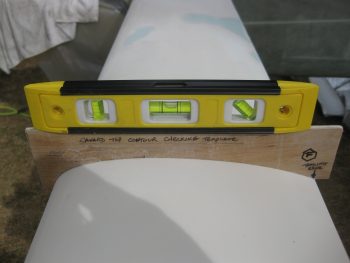
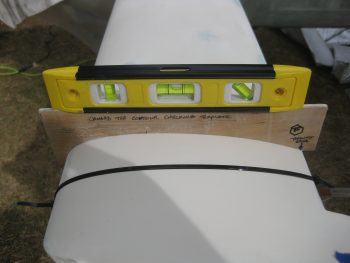
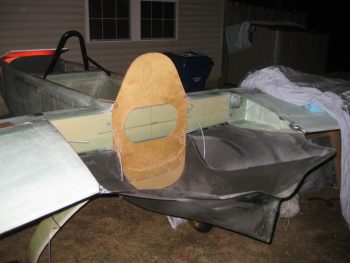
Therefore, without further ado, here are my incidence readings, starting from the canard right outboard side and moving to the left side. You’ll note the right is LE high and then eventually makes it way to LE comparatively lower on the outboard left side. One point of note, after messing with this for hours, my tolerance standard became anything within the inner most hash marks on the level.
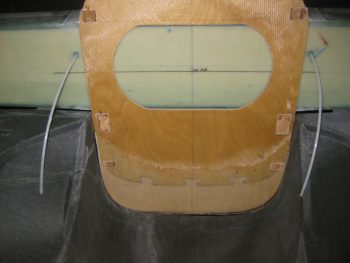
One final point of note. I find it amazing that I can sight down the canard and barely see any twist, with all look nice & laser straight, but this template definitely does do its job by finding that twist in regards to incidence.
Right canard: Outboard to inboard.
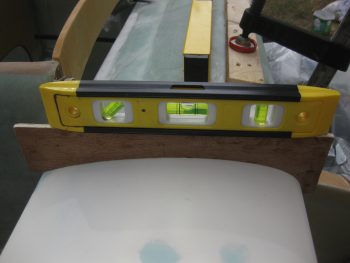
Left canard: Inboard to outboard.
I spent another half hour tweaking the SWEEP, DIHEDRAL and INCIDENCE. To tweak the dihedral & incidence just a hair more, I clamped the right side canard down just a smidge… which totally did the trick.
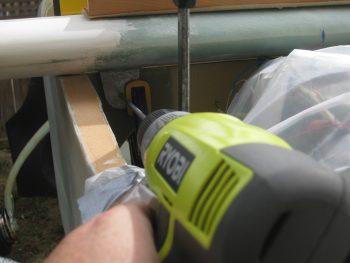
With everything looking good and all my variables locked in place, I pulled the trigger and drilled out the canard main mounting tabs with the long #10 bit. [Note: Although it looks like I’m ‘free-handing’ it here with the drill, I’m not. I have small level with “V” grooves on the bottom that I actually hold on the drill bit shaft and I also set a 2×4 90° from the canard face close to the drill. It may not be a perfect 90°, but it’s pretty darn close.]
I started with the right side bolt and made sure everything stayed aligned by quickly checking my alignment variables again.
With the right bolt in place, everything still looked fine so I drilled the left side mounting tab with the #10 bit. Below is a shot with both AN3 bolts in place on the main canard mounting tabs.
Looking a lot more official on the canard mount with AN3 bolts actually keeping the mounting tabs in place to F22!
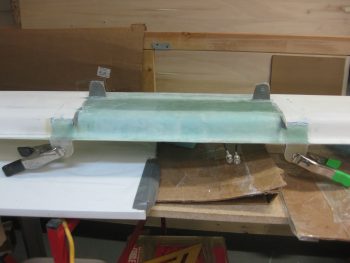
With the lower tab pilot holes drilled and the correct position of the upper alignment tabs confirmed, it was then time to glass the aft & lower side of the alignment tabs with 4 plies of BID.
I started by sanding a radius at the Birch plywood tabs and the canard TE junction as per plans.
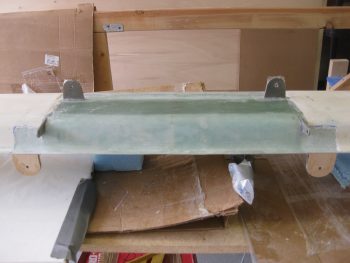
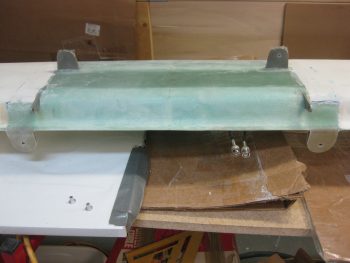
I then laid up 4 plies of BID on each lower side of the canard onto the tabs, and peel plied the layups.
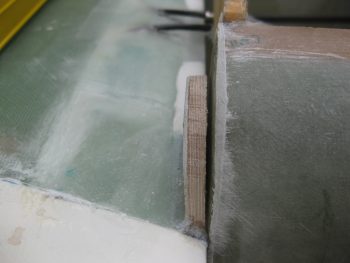
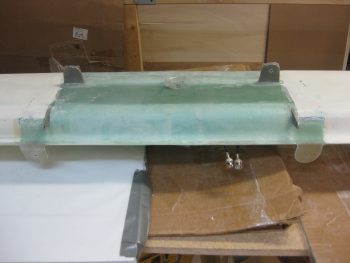
Here are the tabs after I pulled the peel ply, razor cut the overhanging glass & then sanded the edges .
I then re-drilled the #10 hole into the alignment tabs.
I gathered up my CN2s (that I bought from the Cozy Girrrls).
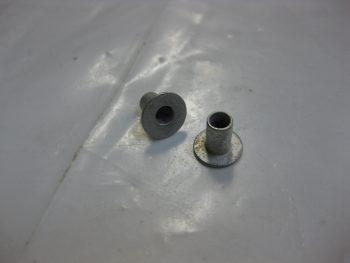
I then drilled the out #10 holes in the alignment tabs to 1/4″, since the outside diameter of each CN2 bushing is 0.243″.
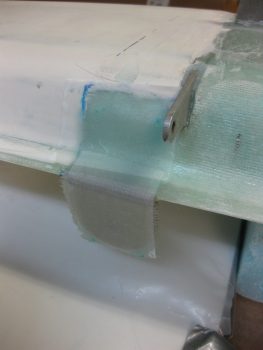
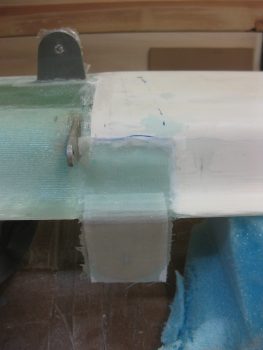
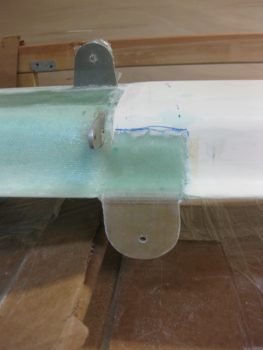
I used wet flox to install the CN2s into the upper alignment tabs.
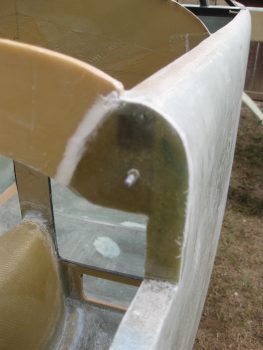
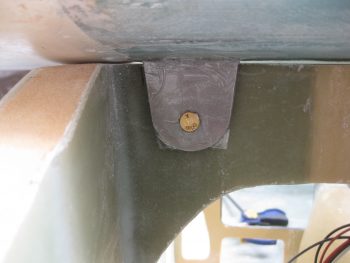
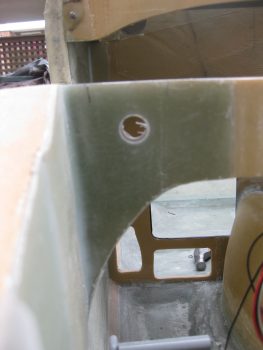
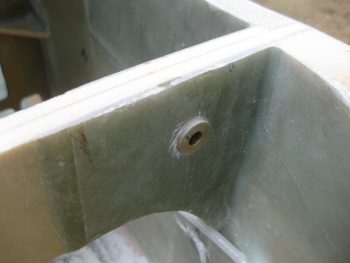
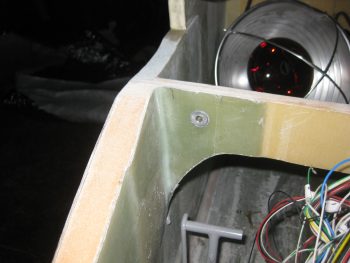
Here’s a close up shot of a CN2 installed into the upper alignment tab.
My garage door spring snapped so I worked that issue (thanks Murphy!) for about 45 minutes before bringing the new & improved canard out to test on the fuselage. The CN2s kicked the tops of the alignment tabs forward just a bit, but everything still lined up just fine.
I don’t have any action shots of drilling out the #10 holes on the canard main mount tabs to 1/4″, but here’s the end result below: AN4 1/4″ bolts in their respective holes!
And at this point, I would definitely say the canard is OFFICIALLY MOUNTED!
Of course there is still much work left to be done! I left the canard in place for a while to give the CN2s a chance to really cure in place, and then after about an hour I moved the canard off its shelf and out of the way in order to drill the 1/4″ holes out to 5/8″ using the spot face tool.

And here are the new & improved 5/8″ canard mounting holes.

And a bit closer shot of each side.

I then inserted the CNL bushings into the freshly drilled 5/8″ mounting holes to mark them for trimming.
I then trimmed both CNLs down on the table saw just as I did with the LWA9s for the wing to CS spar mounting, and then whipped up some wet flox & mounted them into F22.
Here’s a shot of the glow coming from the heat lamp in the nose used for keeping the CNLs warm during curing.

Here’s the same pic, only this time I used a flash.
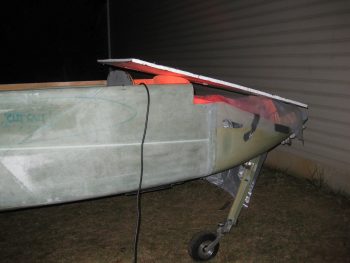
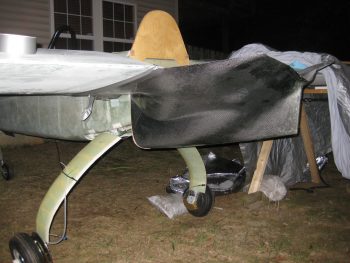
Unrelated to mounting the canard, tonight I finally go that lower cowling mounted so that I could mark up the firewall for trim.
I had to lean way over into the cowling in order to mark the lower line without disturbing the taped-in-place cowling.
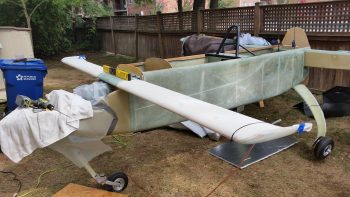
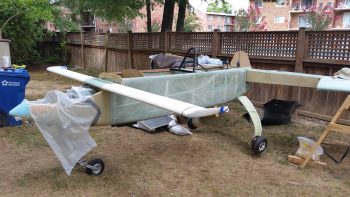
I took this shot just to get an idea of what the bottom profile of the plane will look like.
Another thing that I did that is not shown in these pics is I ran a line from one wing TE corner to the other. This let me measure from the back face of the spar to the string to determine the sweep. I determined that I’m only 0.1″ short at the BL23 mark at the very inboard wing, and 0.4″ short on my wings’ sweep over the entire wing span: BL175.6 vs the plans BL 176. Again, not bad and I’ll take it!
Tomorrow will be my last transmission for a few days. I’ll be heading down south to meet up with Marco and then we’ll both fly to Rough River in his new Long-EZ. I’ll most likely not build or post again (except maybe a quick wrap-up tomorrow) until Monday evening!
If you’re going to Rough River, SEE YOU THERE!