
Today was a bit more even paced than yesterday, but I still got some significant stuff done.
I started off with a good sanding of all the edges and surfaces of the Avionics top deck…
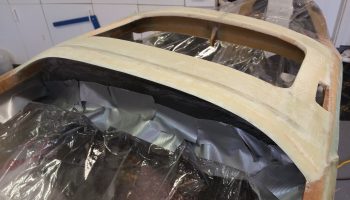
which I guess is now a hatch as well.
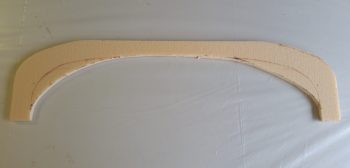
I then got to work estimating the sides/corners and middle open area of the nose intermediate bulkhead. I started to cut the middle open area with the inside edges positioned much farther out before I reiterated to myself that there is a significant transition from the aft squarish-shaped nose cross-section to a much more round cross-section the further forward the nose goes. So I added some mass back in since most likely it is the outer “corners” that will get shaved off during the nose build process.
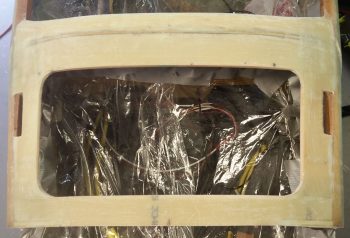
I then mocked up the intermediate bulkhead. Again, this intermediate bulkhead is the demarcation line in that everything forward of it is “standard” nose and everything aft of it lies under the aft nose/avionics top deck cover.

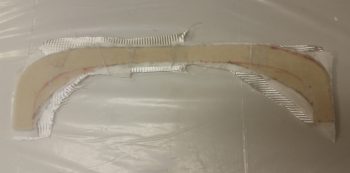
I then glassed the aft side of the intermediate bulkhead with 1 ply of BID and peel plied. If you’re wondering about the front side of the intermediate bulkhead, it stays in raw foam form since it will combine with other raw foam to make up the forward nose walls.
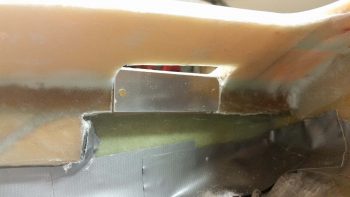
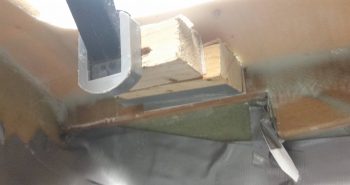
I then got to work on some of the hardware that will be used to secure the cover to the aircraft, as you see here with these hinge assemblies. The 3-ring hinge assemblies will be attached to near-vertical tabs that extend down on the underside of the cover and then extend through the Avionics top deck via the 2 slots that look like hand holds on each side (see both top pics above).
The 4-ring hinge assemblies will be floxed & glassed in horizontally to the underside of the longerons, just aft of the longeron doublers and extensions (directly underneath the slots mentioned above). These obviously are the aircraft side of the hinge lock pin equation.
Also mounted on the fuselage-side are the two strike plates on the left of the pic below. Each of these will be mounted to the inboard “face” of their respective longeron and will be what the upper (cover) hinge lock assembly hits first, at a very slight angle, which then pushes the cover’s hinge lock assembly inboard a bit until it clears the strike plate and then snaps into place –interlocking– in the lower fuselage side hinge lock assembly. The hinge pin will then be pushed forward from the instrument panel side to lock the upper and lower hinge lock assemblies together.
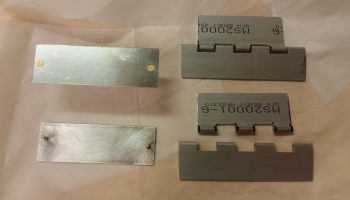
Besides wet flox, the strike plates will be held in place by a countersunk aluminum rivet on each side, used as pins inserted into small diameter holes drilled into the longerons. The strike plates are made up of 0.040″ thick 2024T3 aluminum and measure 1″ x 3″.
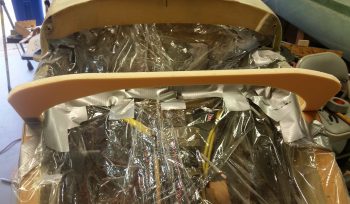
I then floxed the hinge strike plates to their respective inboard longerons and spread clamped them in place.
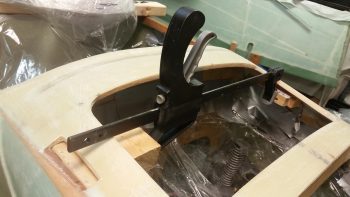
Here’s a closer view of the left strike plate floxed and clamped in place.
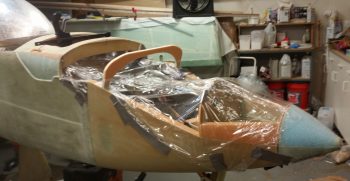
After pulling the peel ply and trimming up the layup on the intermediate bulkhead, I micro’d and glassed it to the nose sides using 2-ply BID tapes on both the front and aft corners.
Here’s another shot of the intermediate bulkhead (sorry for my POS camera!).
And here’s a wider angle shot showing the clamp holding the floxed strike plates to the longerons and the intermediate bulkhead glassed in place.
I had planned on doing a few more layups, but my better judgment actually won out tonight and said to break a littler earlier than I normally would. I’d be working on the avionics top deck area and I wouldn’t want to inadvertently hit the intermediate bulkhead while it’s curing. I have it spiked in place with toothpicks, and the measurement has stayed locked on like a laser sight, so I’m not going to mess around with a good thing. Plus it’s late so I’ll finish up this post and call it a night.
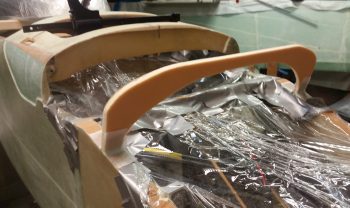
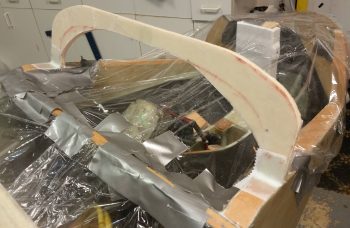
As I mentioned, I have a few more cover prep layups to do on the avionics top deck, and then the rest of tomorrow will be geared towards construction of the GIB headrest/component housing. I’m constructing the GIB headrest at this point because I want to have it mounted prior to the aft canopy frame going in. Plus, once I say I’m finished with the nose and the canopy –as I mention in my update– I want pretty much anything associated with the nose and canopy to be as completed and installed as possible.