
As I was creating the day’s task list this morning, which focused on removing the wings to allow me to take the fuselage outside and sand down the micro on the gear legs, I then started hearing drops of rain on my roof… and once it began it didn’t stop.
Well, flexibility is the key to airpower . . .
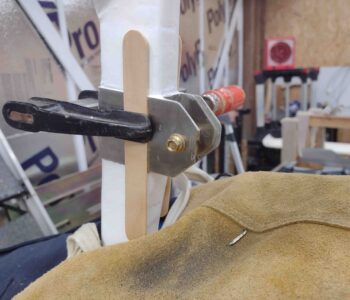
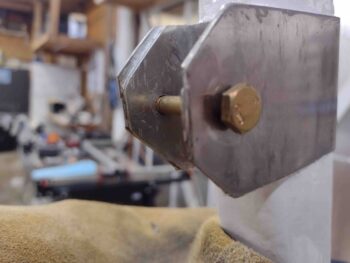
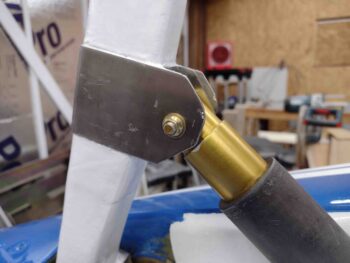
So I pivoted and decided to tackle the issue I identified a couple of days ago when I attempted to reinstall the EZ Nose Lift nose gear actuator. The arm on the actuator was actually catching the NG3 bracket since it extended out beyond the internal NG4 bracket on all sides. It may have been easier to deal with this before I reset these brackets in place with industrial adhesive, but I figured the clearance was tight before and I didn’t see anything changing from the previous setup.
Well, I miscalculated that just a bit since the actuator arm would not mount inside of the NG3/4 bracket to then be secured with the AN4 bolt.
My concern about trimming away the excess NG3 bracket was HEAT. I didn’t want to infuse too much heat into the brackets and thus destroy the industrial adhesive bond that I had just worked in an effort to have a more secure NG3/4 bracket vs using flox in the bond.
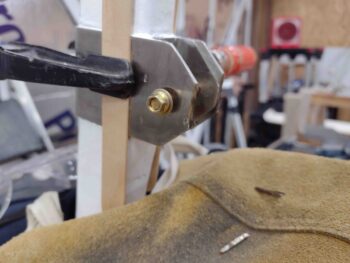
Well, with the somewhat thicker stainless steel acting as a heat sink of sorts, and with the great heat resistant properties of stainless steel, heat didn’t really prove to be near the issue that I thought it might.
Here we have the first vertical edge of the NG3 trimmed away using the Dremel Tool with a cutoff disk.
As I was finishing up yesterday’s blog post, I would simply cut an edge (as above) then would wait 20 minutes or so for all heat to dissipate before cutting the next edge, which here is the other vertical aft edge of the NG3 bracket. As you can see, I was simply trimming the exterior NG3 bracket to match the internal edges of the NG4 bracket.
The main “snagging” culprits in denying the proper clearance to the nose lift gear actuator arm were the aft vertical and top (inverted here) angled edges. So next up was the top angled edge of the NG3 bracket, which I marked here with a Sharpie . . .
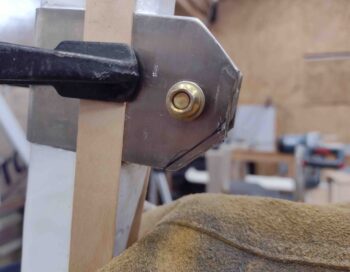
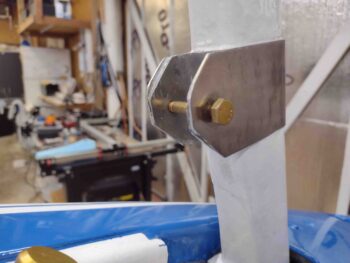
And trimmed away as we see here in this outside shot.
And a shot of the edge alignment between the NG3 and NG4 brackets.
I then repeated trimming the top angled NG3 edge on the other side. I then took just a hair off the “corner” where the vertical edges met the lower angled edges (top here as inverted).
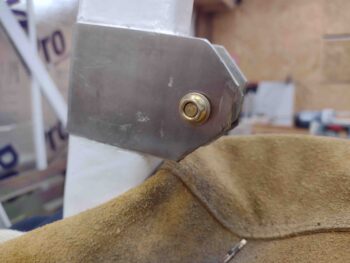
I then took a file to the trimmed edges of the NG3 bracket to clean it all up. Trying to get the Dremel Tool in to make these cuts, with the nose gear channel underneath the leather shop apron had my Dremel hand moving at odd angles over an irregular surface… which unfortunately resulted in a couple small kisses on the edge of the NG3 with the Dremel cutoff disk… no structural damage of course, just a couple unsightly nicks.
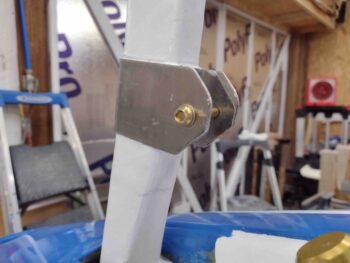
Nonetheless, this task is complete and it allowed for a fairly easy insertion of the EZ Nose Lift gear actuator arm to then be mounted to the NG3/4 brackets.
Here’s a closer shot of the remounted EZ Nose Lift gear actuator arm in the NG3/4 brackets.
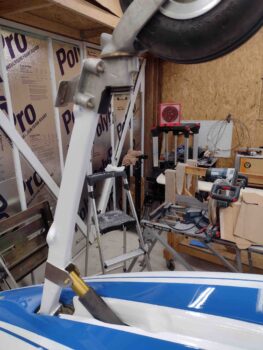
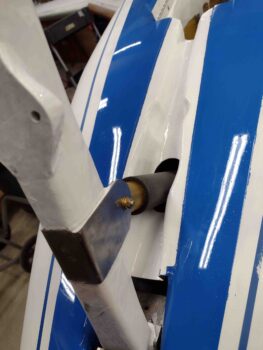
And a shot of the EZ Nose Lift gear actuator arm transiting the white painted nose gear strut channel. I of course remounted the nose gear actuator with the new pivot bolts and pins into the NG30 nose gear brackets. This was a tricky feat going in from below and doing it all inverted, and took a good 45 minutes to accomplish.
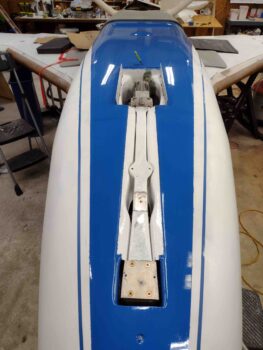
I then hooked up the nose gear actuator to power and tested it out. To be clear, this was the first ops check of not only the geometry of the physically remounted nose gear actuator, but also a test of the molex connector that I inserted into the nose gear wiring circuit to allow easy disconnection and removal of the NG30 cover.
As the rain continued to pour I decided to knock out another pre-flip (back upright) task: the final installation of the GIB thigh support sump tanks fuel drain valves.
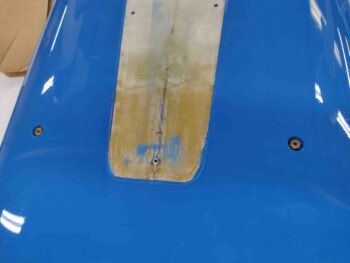
I first removed the red plastic NPT plugs that I had installed to protect the threaded ports during the fuselage painting process. There was a slight ridge of paint around the edge of the ports so I used a 1/2″ drill bit to remove these respective paint ridges.
I spent a good hour researching the sealant I should use to keep these fuel drain valves from leaking. I visited our building buddies over in the VANs aircraft forum (VAF) as well as consulting my notes. Asking what the best fuel sealant is to airplane builders is about like asking people who the best sports team is… the responses are all over the map.
One sealant that kept seeming to get rave reviews is the same sealant Matco calls out for use on all their brake fittings: Loctite 567. And if you read its label it looks like just about all the other sealants folks are using: Permatex #2 or #3, Tightseal, and Rectorseal, etc. PTFE seeming to be the main underlying ingredient in all of them.
So, with Loctite 567 in hand, I pressed forward.
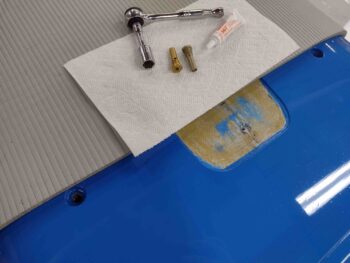
I will say the one area of agreement with most plane builders is to avoid thread tape like the plague, with a few old hands saying that once it’s used it will contaminate the threads and allow introduction of it into the fuel system. Well, I did use it as a temp seal to check for leaks in my fuel system with water… thus, I very thoroughly cleaned all the threads on the fuel drain valves as well as the female NPT threads of the sump drain ports on the belly of the bird.
I then applied the Loctite 567 to the threads as per the instructions and installed the sump fuel drain valves into the fuselage…. hopefully for the only and last time!
Tomorrow I plan to get back to my shenanigans of sanding down the micro on the gear legs and back to painting the fuselage and strakes.