
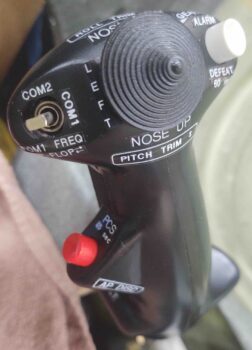
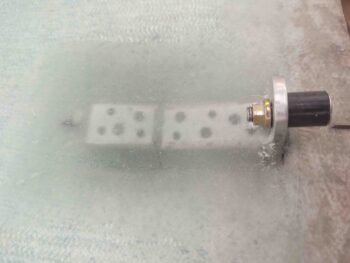
I had printed out some new labels for the control stick yesterday, so first thing today I got them off the work bench and on the control stick so they wouldn’t get lost… here it is. Not much difference, but a few smaller labels (e.g. “COM1”).
I then got to work making up a new nose hatch door striker bracket. Actually I tried filling in the hole with a weld on the old test one… but clearly my aluminum welding is not up to snuff because even though I followed the amps-required reference card, I didn’t even get to 2 seconds before the tab was obliterated… I digress.
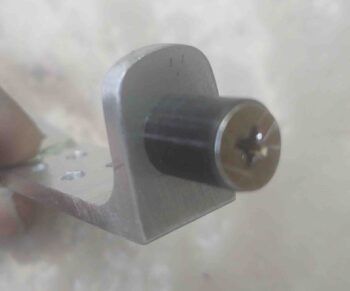
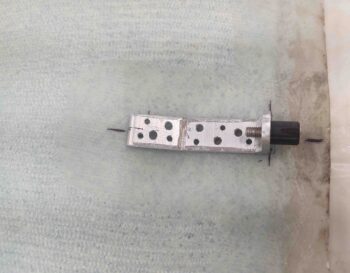
Here’s the new bracket with a new straight striker. I realized not only was the hole off-center on the previous one, but the first striker tube was slightly canted to one side. Noting that, I cleaned the ends of this one up on the lathe.
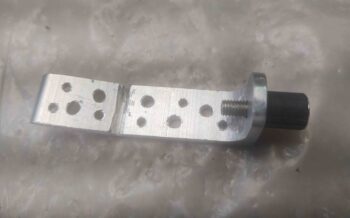
And then spent a good 15 minutes testing it out. All looked good, and centerline seemed the place to be.
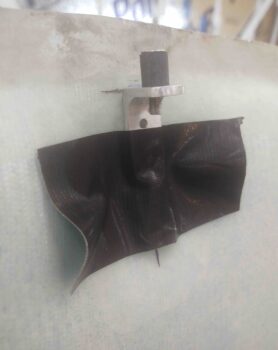
I then did final preps for glass, floxed it in place and laid up 5 plies of glass over it to secure it to the inside nose hatch door.
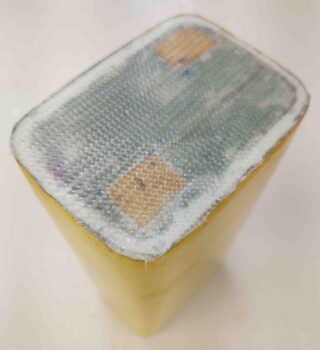
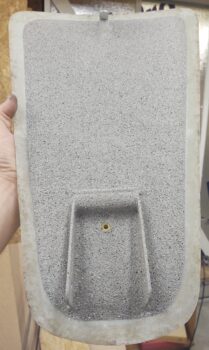
I needed a bit more epoxy, and went to make some more up in the original cup I had been using. Well, my tip on the jug was all wrong and I ended with 3x more than I was looking for. I didn’t want to pour it back in the jug since there was some previously mixed epoxy in the cup (a trace amount, but still some). So after a quick think I decided I would knock out glassing the bottom of the oil box that will get mounted in the nose area… a nose to-do task needing completing.
I cut up some 1/4″ birch plywood squares and embedded them in the foam for some bolt hard points, and also created a flox corner all the way around the perimeter (although I used flocro to limit weight). I then laid up 2 plies of BID on the bottom of the oil box.
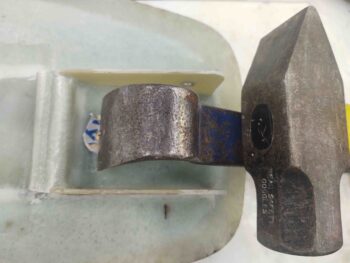
I was getting ready to head over to spend a couple hours with my little buddy, and still had just a bit of epoxy left. I needed to also install a RivNut on the nose hatch door in the vicinity of the hinges to attach the aircraft hinge pins to so they wouldn’t be loose when not securing the hinges to the nose hatch door.
I floxed the RivNut in place in the hole I drilled, and then weighed it down with my 5-pound sledge hammer. I then took off to go hang out with my friends for a bit.
Upon returning back to the shop, I cleaned up the flox around the RivNut… which turned out nice.
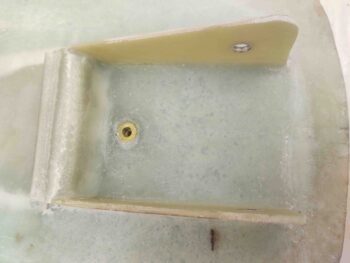
I also pulled the peel ply and cleaned up the nose hatch door striker bracket layup.
I’ll explain it more in a video where I can show the geometry, but the short story is that I ended up putting the previous (yes, canted) striker back in place to obtain a better alignment. Yes, I did test the new straight one out around a dozen times, but the previous striker just aligns better when the nose hatch locks into place…. these builds can have some strange twists to them. So in this case, crooked is straight!
I then taped off the edge of the interior nose hatch door, the striker tab and the outboard hinge tabs and primed, then painted the door.
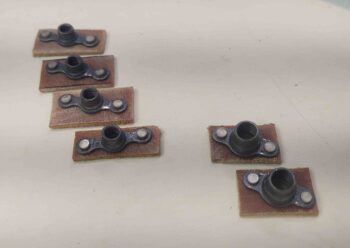
In between the coats of primer and paint, I made up a couple 1/4″ (AN4) and four 3/16″ (AN3) nutplate assemblies for mounting the aluminum panel to the existing composite panel structure. Tomorrow I’ll make up another batch as well.
Tomorrow I also plan on routing the nose hatch door latch pull cable and ensuring the front nose hatch door latch is fully operational. Then I plan on focusing solely on getting the aft nose and avionics cover mounted.