
Let’s talk paint starting off. In reviewing some past posts to see where I was before I jumped back in on this blog, I noted that I had communicated how not happy I was with the current 2-part polyurethane boat paint. Again, it looks great from 6-10 feet away, but upon closer inspection it shows the inherent dust of this shop, and some irregularities in the application. As I’ve recently mentioned, I’m calling it good for the bottom of the plane and rear fuselage sides, but no more than that. I’m willing to live with those areas not having the greatest paint, but definitely not the topside (aka “most visible”) of the plane.
One day while down at my local NAPA auto parts store, picking up some painting supplies, I overheard the paint tech talking on speaker phone to an older gentleman who was restoring a vintage pickup truck. The customer couldn’t find a color code anywhere and was perplexed on how to get the right color, given that he had a couple of parts with the original color. Somewhat serendipitously, I overheard the NAPA paint guy tell the man on the phone that this particular NAPA store apparently had a phenomenal color matching system for auto paint.
A month or so later, after I had expended all efforts in salvaging my boat paint system in trying to make it work, I recalled that conversation and went back to NAPA —with my blue painted nose hatch cover in hand—to learn what options I had. I had never hear of “nason” paint before, but I was shown where it had won the contract as the paint for the Marine One Presidential V-22 Ospreys. We also got a very knowledgeable company rep on the phone and I discussed with him at length my requirements. Out of that discussion I was convinced that this system would meet my needs and I pulled the trigger.
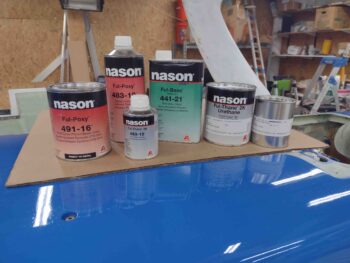
Yes, I will clearly need to do some blending of the paint systems (not the actual paint, but on the bird) and masking off of the pre-existing paint, but I think this will get me a lot closer to what I want as far as paint quality, durability and color scheme. It better, because I have zero plans on switching systems (again!).
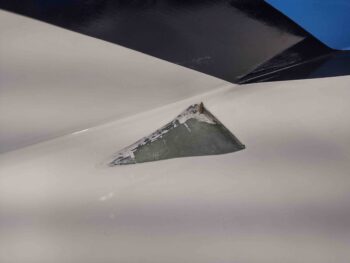
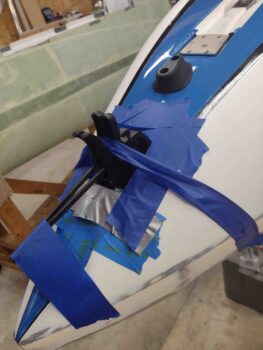
I started off today by taping off the perimeter of the GIB air vent NACA scoop to protect the surrounding paint, then used a razor blade and sand paper to clean up the interior of the NACA scoop… located on the bottom of the right strake, near the fuselage sidewall and just forward of the GIB strake window.
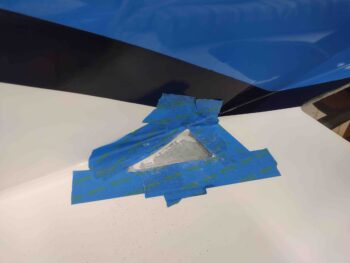
I left the interior of this NACA scoop in raw fiberglass because I need to overlap more glass onto it when I build the remainder of the scoop structure on the inside of the baggage compartment. To mark the aft line of the scoop, I drilled a small hole in each corner, then took a broken drill bit and placed it inside the inboard hole to mark my starting point on the NACA scoop once the bird gets flipped upright.
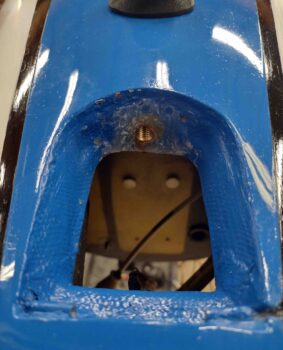
Part of my blue touch up paint machinations included painting the remaining internal horseshoe-shaped edge of the taxi light opening.

I’ve had discussions with various builders (specifically Dave Berenholtz) on the topic of having a good sized diameter bolt or pin to allow for securing the nose of the plane with heavier weights when its needed to have the nose raised all the way up. I talked with Marco about how he uses the nose gear actuator, but since my nose gear fairing is a bit wider than his and free-floating I felt more comfortable just putting in a simple hardpoint on the aft side of the taxi light well.
I actually used the wing bolt hole 5/8″ spot face tool to make the final hole for my brass 3/8″ bolt insert.
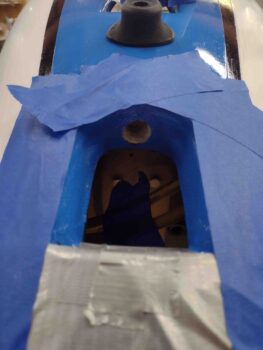
I taped off the interior open face of the threaded 3/8″ brass hard point, and then prepped the hole. I used grease on a 3/8″ bolt that I placed through a taped-off (mold release) thin aluminum washer that I found in my scrap pile, in turn the bolt was threaded into the 3/8″ insert.
Since my spot face was a bit dull, the resulting hole was a bit oversized. So I cheated and stuffed in a couple of plies of wetted out glass before slathering flox into the hole, then inserting the 3/8″ threaded insert slathered with flox as well. As you can see below, I then wedged some small clamps into place on each side of the protruding bolt, pressed up directly against the oversized aluminum washer.
I used MGS 335 here with fast hardener, and here’s the results a few hours later.

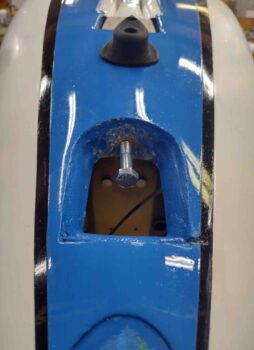
I removed the bolt and washer and spent a good 20 minutes cleaning up the excess flox and glass around the perimeter of the 3/8″ brass insert. I’ll sand the area after it cures fully and touch up the blue paint.
Here’s another shot of a final test fit with the 3/8″ bolt. This particular bolt is 2-1/2″ long… clearly I could use one another inch longer, or even an eye bolt, to secure/tie off a weight to.
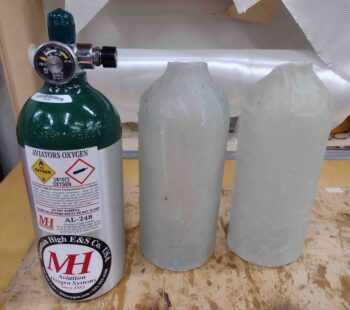
My final task of the evening was extracting the nearly fully cured Oxygen bottle mounting cradle sleeve, side 2, off the bottle. This is always a fun-filled endeavor and took a bit of effort to accomplish. Once off however, with the O2 bottle all cleaned up, it looks like it will work just fine. I’ll note that I’m working the O2 bottle mounting now since once the bird is flipped back upright this will be a prerequisite task before closing out the strakes.
With that, I called it a night.