
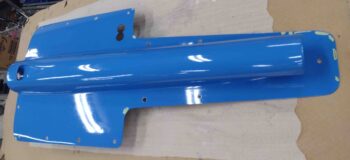
Over the last few days I’ve very carefully sanded down the edges of the RAM air scoop/hell hole hatch cover to allow for it to fit nicely in the outline on the bottom of the fuselage. Here’s a shot just prior to the first of three sanding sessions.
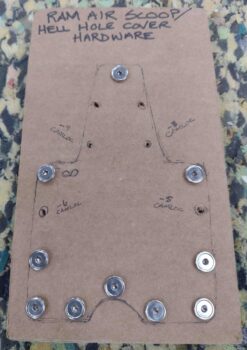
Removing all the screws and CAMLOCs each round to sand the RAS/H3 cover I decided to take 15 minutes to make me up a hardware holder card out of cardboard. These make life infinitely easier for any component that has a lot of screws and/or CAMLOCs, as I also did the same for my wheel pants.
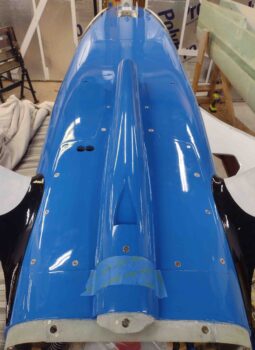
With some other stuff going on, it took me a couple of days of finalizing the perimeter edges as well as the countersink holes on the RAS/H3 cover, but here it is in its final mounted state. I’m very pleased with how the hardware is sitting near-flush with the skin surfaces.
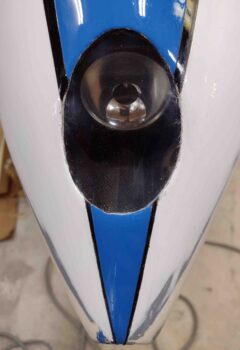
I also spent some time very carefully removing the tape from the nose landing light lens and then carefully trimmed the perimeter of the lens to clear out any stuck tape and invasive micro bits. I’ll clean up the edge a bit and carefully re-apply paint to spiffy it up… In doing so, to make gravity my friend, I’ll do the front (lower) edge while the fuselage is inverted, and the aft edge once the bird is back upright to avoid having the paint attempting to run down onto the lens.
I’ll note that a lot of these tasks I’m doing right now are finicky, nitnoy finishing tasks that take a good bit of time in the iterations to get it right to call it as close to final completion on these components as possible.
Moving forward!