
Yes, Gang, I’m calling it! Chapter 13 is done! Wow . . . although there were a lot of other related tasks, but not specific to the nose build, the nose & nose gear took close to 3 months to complete.
Today I started off with removing the Rivnuts that I used to secure the Click Bonds into place. I would have used my thin standard nuts but I can’t find the bag of those, just like I still haven’t found the stainless steel hardware for the gear fairing. I must have a thieving shop gnome who comes out at night & steals my hardware. Either that or I’m going senile… nah, I have a gnome!
I then trimmed & sanded the nose gear doors and installed them on the fuselage. This one sentence makes it sound like a 5-10 minute process, when in fact it took a good couple of hours to get both gear doors set correctly to lay down properly on the fuselage surface, and then to play nice together. I did a lot more trimming, filing & Dremeling on the ends of the hinges to get them to set in the channel correctly. In addition, I had to slot all the hinge holes a little to be able to adjust the hinges up & down. I did this with a round file that is one of the toughest tools I have… it will grind down stainless steel like it’s butter!
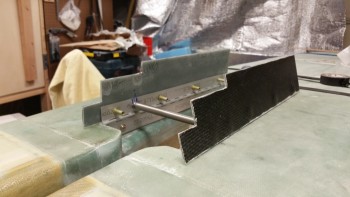
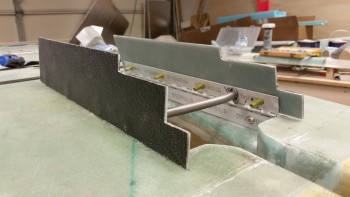
As you can see I mounted the spring but that is proving to be frustration personified! I finally gave up because I got the spring installed, and then trimmed down a notch, and then reinstalled (repeat, repeat, repeat) so that the spring wouldn’t overcenter and thus not allow the doors to fully open when the gear goes down. But by the time I got finished trimming the spring down so that the doors would pop open fully upon the exiting of the gear strut, the spring was too short to keep the doors perpendicular to the fuselage. In short, my doors lean inwards when they are in the “fully” open position.
I spent about 45 minutes checking the forums, blogs, etc. to see if I could find anything, but I really didn’t. I already knew that I was going to have to go the wire insert route (in addition to the spring, yes, which is also wire). I emailed my buddies Marco (call sign “Capt Meatballs”) and Mike (call sign “BizMan”), but Marco was too busy laying up his CS Spar glass to help (ha!) and Mike is probably developing a complete A-Z engineered solution for me as I write this (ha!).
Regardless, I’ll work this as the information & advice rolls in. It does work in the state it is right now, but not with any clean or elegant movements.
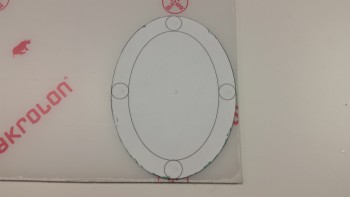
After spending a number of hours on the gear doors, I decided to set my sites on something relatively simple that I could kill with relative ease, and then feel both manly & productive! I took my cardboard template (brown) of the nose wheel viewing window in the center strut of the instrument panel and made another template (white) with a little extra border in order to mount to the center panel strut.
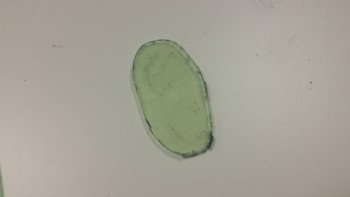
I then grabbed the sheet of Plexiglass [that I ordered from ACS as a backup to the Lexan just in case things got really bad trying to form the landing light lens cover] and marked it up with the larger template.
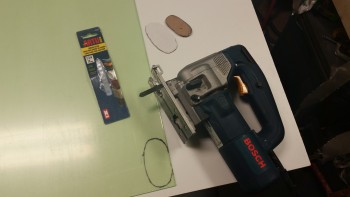
Then using my jig saw I cut out the Plexiglass nose wheel viewing window.
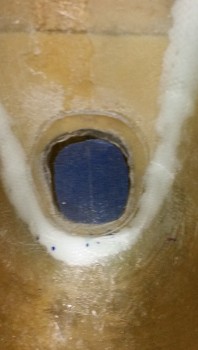
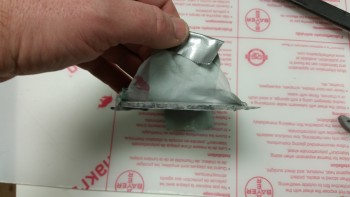
I then took some blue tape and marked an oval shape just slightly smaller than the actual viewing window frame outline. In the pic below the Plexiglass viewing window piece only has the protective plastic on the back since the front side is ready to be mounted to the center strut frame.
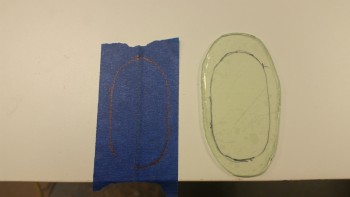
I applied the blue protective tape in place and then used 100 grit sandpaper to scuff up the border of the Plexiglass viewing window.
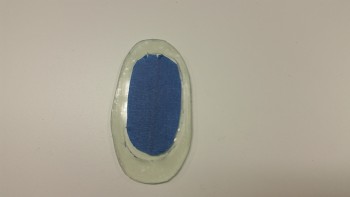
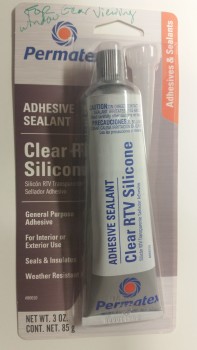
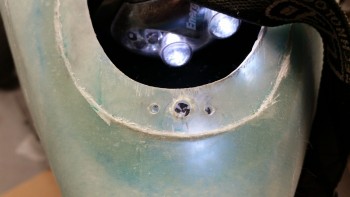
I then used some clear RTV silicone adhesive to mount the nose wheel viewing window to the center strut of the panel, which is of course located on the inside of the nose wheel well cover (NB).
Fast forwarding ahead a couple hours, here’s the mounted nose wheel viewing window.
I then stowed the Plexiglass sheet and pulled out the sheet of Lexan I picked up specifically for the landing light lens cover. Unfortunately, I didn’t use enough forethought and bought 1/8″ thick Lexan instead of the 0.06″ thick that I determined was required as I was constructing the landing light mounting flange.
Regardless, I traced the outline of the landing light lens cover template onto the surface of the Lexan & then cut it out.
Since you can cold bend Lexan, I took my Lexan piece and tried my hand at it. I clamped the Lexan lens around a PVC pipe, continuing to add clamps as I bent it more & more. Since Lexan has a pretty good spring back towards its original shape, I was trying to get it as closed to wrapped around the PVC pipe as possible.
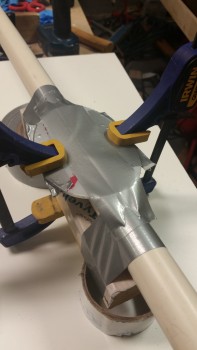
Well, of course the clamps could only do so much and eventually started slipping off. I tried for a good while to keep the lens cover clamped but it became a little difficult. I pulled the Lexan piece off the PVC pipe to check its curvature, which amazingly was NONE!
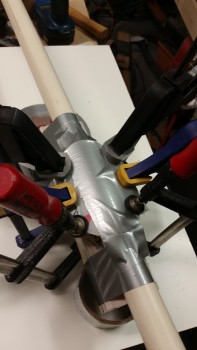
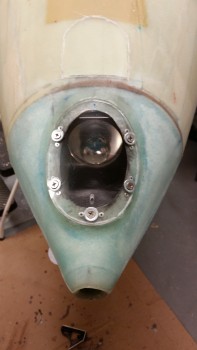
I then put the Lexan lens cover in a clamp and started hitting it with the heat gun (not shown). I did this for about 15 minutes and was really blasting it with the heat gun. I let the clamped lens cover cool for a while and then checked it. It actually held a bit of a curve, so I clamped it again and put it under a heat lamp while I started installing nutplates into the landing light lens cover mounting flange (see pic below). About every 10 minutes I would clamp the lens down even more.
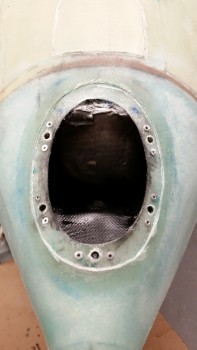
As far as the lens cover mounting flange, I started by installing the bottom center nutplate (in relation to the nose as it sits currently), and then added two more on each side. I didn’t add a nutplate on the upper center part of the flange since I can’t get access to the back side of the flange due to the landing light.
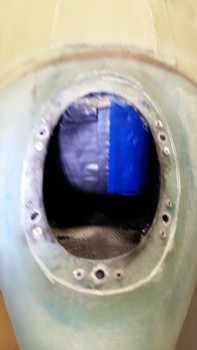
Before I took the tape off the face of the Landing Light, I took the opportunity to touch up some spots inside the light bay with the flat black paint.

A little bit later, after the paint dried, I started pulling the tape off the face of the landing light.
I then mounted the Lexan lens cover to the landing light mounting flange. Now, the Lexan was slightly curved from my myriad of bending actions, but it was only curved maybe about 35-50% of what it needed to be to fit “naturally” onto the mounting flange. So, since Lexan is some tough stuff, I simply (and literally…) bent it to my will! I drilled & installed the bottom center screw first, then the upper left screw as shown in the pics below, then the upper right, the lower right, and then finally the lower left screw. So, one screw at a time I mounted this sucker!
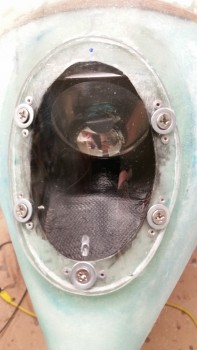
Here’s a side shot of the mounted lens cover.
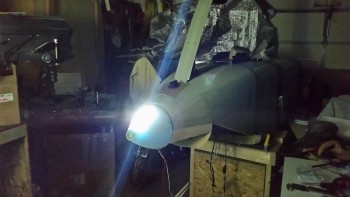
I then fired up the landing light to check out how it’s looking through the lens cover.
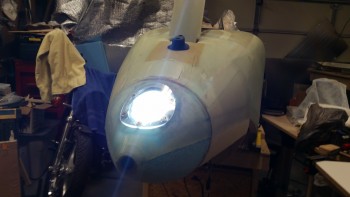
I then turned out the shop lights t see how the light illuminates in pitch dark conditions. Looking good!
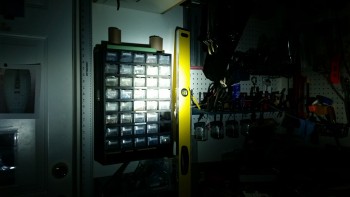
I shot a laser dot out from the pitot tube which hit level with he black handhold that you can see at the bottom of the yellow level in the pic, which tells me that there’s a good difference in angle as there’s supposed to be.
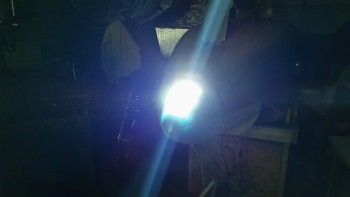
Here’s a closer in shot of the landing light, still with the shop lights off.
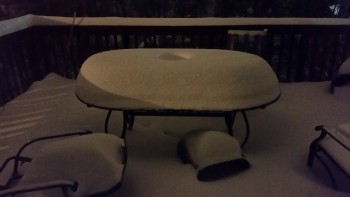
As I came upstairs after calling it an evening, I snapped a couple quick shots to show you all the winter storm we’re having here in Northenr Virginia tonight.
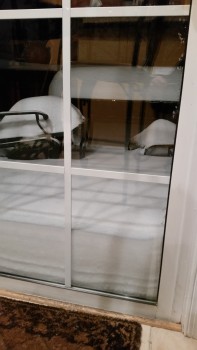
Quite a bit of snow, eh?! So far we’ve gotten between 16-18″!
Tomorrow I plan on working on the gear doors if I get some info from my fellow builders. I’ll also work on the Taxi Light interspersed with prepping to start work on the aft side of the fuselage (main gear, etc.).