
Today was all about progressing on the nose hatch hinges.
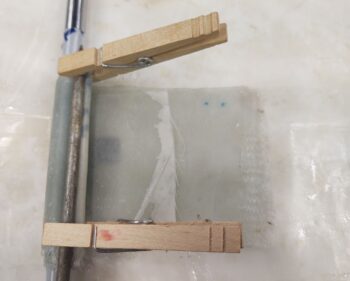
I started by spending a good hour setting up and adding 3 plies of BID to the nose hatch door attach clip. I cut a drinking straw lengthways and curled it up tighter, taped it and then used that as a lip on the front, top edge of the “C” to have a radiused entry for the hinge assemblies front tube to press against when this clip is being snapped into place. The straw contraption is being held by the clothespins with a big nail to push the glass down behind the straw to make it tight, and give the lip more of a protrusion. You can see the peel ply on all the external surfaces.
I then got busy on the actual nose hatch door. I first spent a good half hour cleaning the old sticky duct tape off the exterior surface of the nose hatch door, and the nose just above the hatch.
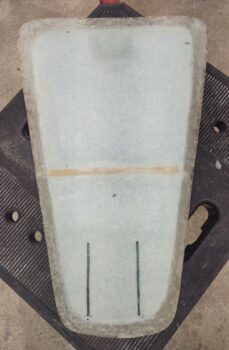
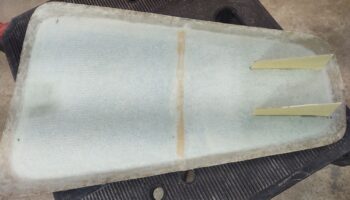
Then, peeking up through the taxi light opening, I set the door in place and then used a few previous dots to slowly dial in the inside lines of each hinge. I didn’t have a way to reach up in there to simply mark the lines, nor did I have a good angle to do so really with an extended pen contraption (I was leaning this way), so I simply took my time (~30 min) and slowly dialed in and marked the lines along the inboard edge of each hinge (left pic, below).
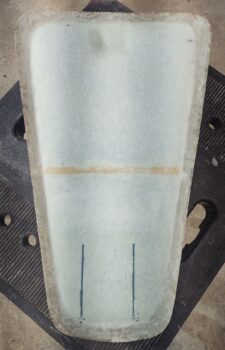
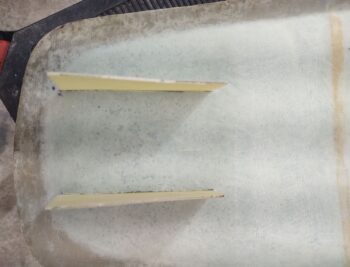
I then used the Fein saw to cut the slots into the interior side of the nose hatch door (right pic, below).
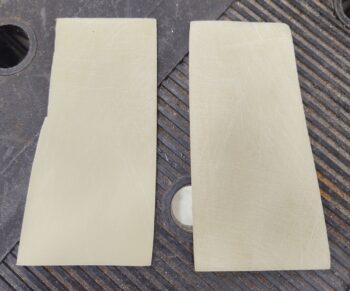
With the slots ready to go, I then cut the first hinge attach tab out of 1/16″ thick G10. I made these tabs a bit taller/deeper than they will most likely end up being, simply to make it as easy as possible when attaching the hinges to these nose hatch door hinge tabs. Of course I’ll trim them to final depth & shape when the hinges are attached.
I then sanded both sides of the G10 nose hatch door hinge tab.
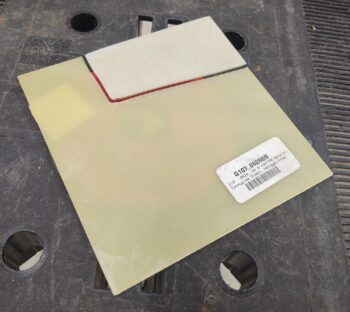
I then cut the second nose hatch door hinge tab and sanded it as well.
Here we have the pair of nose hatch door hinge tabs test fitted into the nose hatch door. They fit great, so time to mount them.
I mixed up some flox and slathered a bunch of it into each slot. I then slid the nose hatch door hinge tabs into place until they bottomed out. I clamped the taped hinge assembly to the hinge tabs to ensure that they were vertical and matched the hinge they would be attached to.
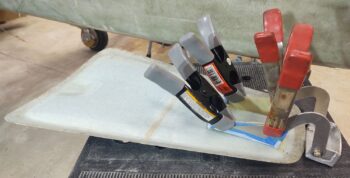
I was heading out to grab a quick bite to eat, so I placed my 5# sledge hammer on top of the hinge tabs to ensure they stayed seated fully in each slot.
I then left these nose hatch door components to cure overnight.